
Reviews
Easy to put on and remove, gimbal works, good box included
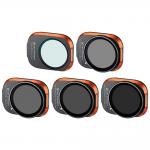
My Mini3Pro works perfectly with these filters, the gimbal has no problems with them, the box for the filters is sturdy and there is no harm in having spare propellers. They can be changed easily. I don't notice any discoloration from the ND filters in the recording.
That says it all, this set is clearly recommended for the Mini3 Pro. But now the question: For whom are these filters recommended and what for?
Put simply, for anyone who doesn't want a video look but wants a film look on their recordings. What's the difference? In the so-called motion blur.
If you film with the drone on a sunny winter day with snow at noon, the camera adjusts itself to an extremely short exposure time due to the brightness. Each picture is only exposed for one thousandth of a second. If you then pause the video and look at the frames, every single frame is a razor-sharp photo, no matter how fast you're flying. It is this complete sharpness of the individual images that creates the video look that is often perceived as cheap.
Film look has motion blur, ie fast-moving elements in the recording, eg in the foreground when it is very close, are somewhat blurred in the individual images. This makes the rapid movement of objects in the running film smoother for the eye. In the single image, however, you can see the blurring of the fast-moving objects. This type of recording also corresponds more closely to how our eyes see. The picture becomes more natural.
To achieve this effect, you need ND filters. In order to achieve a film look, the rule of thumb is that you should double the number of frames per second and thus get the desired exposure time. So if you're shooting a video at 30 fps, the target exposure time is 1/60th of a second per frame. At 60 fps corresponding to 1/120th etc. This is a guide, you can experiment and get interesting results.
On our clear winter afternoon over snow, far too much light falls into the camera in a 60th of a second and the image is completely overblown. If you now put a high ND filter, for example 64 or even 1000 on the camera, the filter darkens the lens. This allows you to set the camera to a 60th exposure time, less light falls through the filter and the picture looks good... but with the motion blur caused by the 60th second exposure time. When which ND filter is right has to do with experience. In general, a higher number indicates a greater darkening of the lens.
So ND filters are needed if you want to make more natural looking videos that contain fast motion. A good example is when you fly over a rapeseed field with the beautiful yellow flowers at a height of only a few centimeters.
You have to decide for yourself whether you prefer a film look or a video look. Both can have their own appeal. But if you want a film look... I can recommend this filter set.
19/04/2023
Related products


Recommended products


 Lens Filter Waterproof Scratch Resistant with 18 Layers of Nano-coating Nano-Klear")
Related articles


Recommended articles


