Dual lens
360° coverage
Optical zoom
2K resolution
Solar-powered
4G LTE
Night vision
Motion detection
Waterproof design
Two-way talk
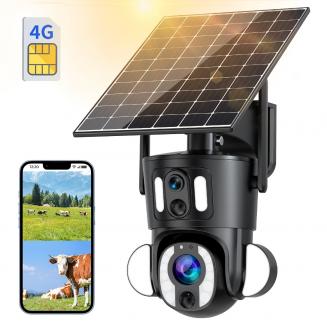
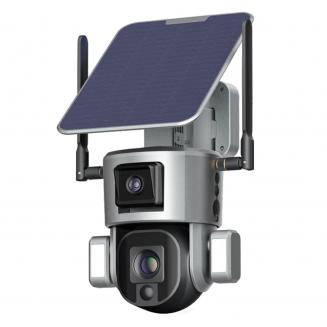
-<b>【Dual Lens & Nearly 360° Coverage】 </b>Get the big picture and the finer details with Kentfaith 4G Solar Security Camera! The wide-angle lens delivers a full panoramic view, while the PTZ lens rotates 355°, tilts 100°, and zooms 10X for close-up views from any direction. Through the app, you can control the direction and zoom in/out to monitor every detail of your property, whether it’s your ranch, cabin, countryside home, or construction site.
-<b>【10X Optical Zoom with 2K Resolution】</b>See everything, near or far, with the 10x optical zoom and 2K high resolution. Whether it's a wide-angle scene or a focused close-up, our 4G security camera ensures crisp, blur-free images that capture every detail.
-<b>【Off-Grid Power & 4G Network Connection】</b>No WiFi? No outlets? No problem! The solar-powered design and 4G LTE connectivity make the solar-powered security camera perfect for remote locations like country homes, campsites, ranches, farms, garages, construction sites, etc. (Note: Includes a SIM card.)
-<b>【Smart Motion Detection & Instant Alerts】</b>With PIR sensing, the no-wifi outdoor security camera automatically records when motion is detected, triggering a spotlight and siren to deter intruders. You'll also receive real-time push notifications or calls for instant awareness. Advanced AI humanoid detection easily recognizes pets and vehicles, reducing false alerts by 99%.
-<b>【Full Color Night Vision & 2-Way Talk】 </b>With 2K full-color night vision, nothing escapes your view, even in the dark. Plus, equipped with built-in speakers and microphones, our off grid security camera allows you to communicate with visitors, like intruders and couriers, in real-time—enhancing both safety and convenience.
Original Price
A$474.99
Discounted Price
A$319.99
Total Save
A$155.00
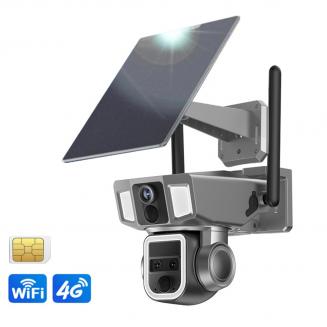
-<b>【4G & WiFi Dual Mode – Install Anywhere】</b>Stay connected wherever you are! Kentfaith wireless security camera supports both WiFi and 4G LTE networks, coming with a SIM card included. Use WiFi mode where available (no monthly fees), like your backyard, shop entrance, or garage. Switch seamlessly to 4G mode for real-time monitoring in rural farms, ranches, orchards, construction sites, or off-grid cabins.
-<b>【Dual Views, Easy Control】</b>Kentfaith outdoor security cameras are designed with dual lenses: Bullet camera + dome camera. The fixed 120° wide-angle bullet camera delivers a sweeping panoramic view for constant monitoring of important areas, while the dome camera offers 355° pan, 90° tilt, and 10X zoom, which can be easily controlled through the app “NIVIEW”. You can view both live feeds simultaneously on your app.
-<b>【10X Optical Zoom & 4MP HD – Clear Day & Night Footage】</b>Kentfaith solar security camera captures stunning 4MP HD video with true 10X optical zoom—no pixelation, even close up. Built-in spotlights provide bright, colorful night vision up to 40m (131ft), so you never miss a detail after dark.
-<b>【Solar Powered for Year-Round Operation】</b>No wiring, no power bills! Powered by a 9W high-efficiency solar panel and a large 12,000mAh battery, Kentfaith 4G security camera runs 24/7 without interruption. With IP66 waterproofing, it stands strong against rain, snow, and heat—perfect for any outdoor setting.
-<b>【PIR Motion Detection, Auto Tracking & 2-Way Audio】</b>Equipped with smart PIR sensors, this home surveillance camera for outdoor accurately detects people and animals with up to 99% precision—minimizing false alerts like moving curtains or swaying branches. Smart auto-tracking of this wireless security camera keeps suspicious movement in frame, while built-in two-way audio lets you hear and speak through the camera anytime, anywhere.
Original Price
A$574.99
Discounted Price
A$399.99
Total Save
A$175.00
4G Connectivity
Solar Powered
PIR Detection
Two-Way Audio
IP66 Waterproof
2K Resolution
Color Night Vision
355° Pan
Cloud Storage
Built-in Battery
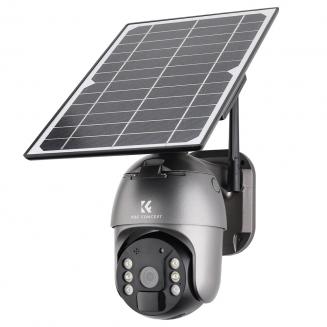
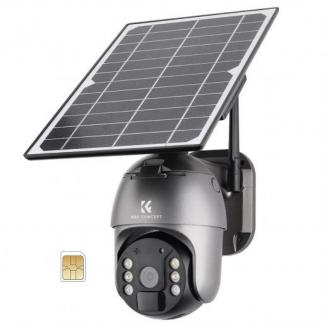
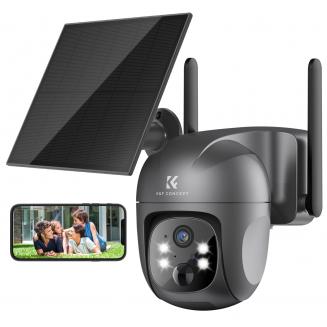
-【SIM Camera and Waterproof】K&F Concept Wireless solar surveillance camera only works with mobile cellular 4G network, TD-LTE, TD-LTE/LTE FDD TD-LTE/LTE-FDD standard and Nano SIM card slot. Waterproof grade IP66. It is a solution suitable for outdoor monitoring. No WiFi required and no WiFi connection supported
-【Uninterrupted work and wider coverage】 The solar security camera is equipped with a solar panel, and the built-in 10400mAh battery provides uninterrupted power, no need to remove the camera from the roof to charge. It achieves 355° viewing through 355° horizontal and 120° vertical rotation, 4X digital zoom, and 360° without blind spots. Application: Ubox APP
-【2K Full HD and Spotlight Color Night Vision】Solar wireless security camera outdoor equipped with 3.6mm lens, provides 2K HD decent images and videos. The built-in spotlight flashes bright light to switch to night vision mode, helping to see true-color night vision in real-time and see-through darkness up to 98 feet even in very low light conditions.
-【PIR Human Detection and Instant Alerts】PIR sensors and AI humanoid detection alarms are used to detect human bodies more accurately and reduce false alarms caused by light or insects. Supports instant alerts and logging. You can instantly see what's going on from your phone.
-【Optional Storage and Data Encryption Protection】The LTE solar battery powered outdoor security camera can be used for cloud storage or MicroSD card (up to 128G) to provide you with flexible ways to save data. You can freely stream videos anytime, anywhere via the cloud (additional subscription fee applies). Mobile apps can be downloaded from the Apple App Store/Google Play
Original Price
A$458.99
Discounted Price
A$255.99
Total Save
A$203.00
Solar-powered
Wireless setup
360° rotation
1080P clarity
Night vision
Motion detection
Two-way audio
Waterproof design
Long battery
Multi-user sharing
-【Infrared Motion Detection & Real-Time Alert】Improved passive infrared sensor and adjustable sensitivity enable home security cameras to be smarter and more accurate to capture the content you really care about. When it is triggered, the wifi camera will send an instant alert on your phone and automatically save the video to the SD card/cloud according to your choice. You can easily and accurately see what is happening at home.
-【Pan/Tilt 360°View & 2K FHD】The outdoor security camera can rotate the head at 355° horizontally and 120° vertically, allowing you to monitor your property 360° on the App without blind spots. Our wireless outdoor security camera adopts 1080P FHD resolution (1920*1080), which can provide you with clear and clear video, so that you can remotely watch it in real time through APP.
-【Solar 9000mAh Battery Power Supply & Wireless】This solar security camera is equipped with a long-lasting 9000mAh rechargeable battery and a high-efficiency solar panel, which can run on uninterrupted power. Eliminates the trouble of power cord and wiring, and it only takes a few minutes to complete the setup. (The wireless camera only supports 2.4GHz WIFI)
-【2-channel audio & Multi-User Sharing】through the home surveillance camera, see who is there, interact clearly with your children, pets or anyone you care about, so you don't miss a package or make guests wait. Share indoor/outdoor wireless surveillance cameras with your family, you can view live broadcast and recorded clips at the same time.
-【IP66 Waterproof Infrared Night Vision】This outdoor wireless camera has a waterproof housing to ensure that it can work normally in any weather, such as sunny, rainy, and stormy, and shows good working performance. The night vision camera is equipped with 4 infrared LEDs, which can ensure you get a clear image up to 55 feet even in a dark environment.
Original Price
A$211.99
Discounted Price
A$147.99
Total Save
A$64.00
Dual camera
4K resolution
Night vision
Two-way audio
Solar-powered
AI tracking
Wide coverage
Waterproof design
Encrypted storage
Device sharing
-【One camera for two uses, the most advanced camera】 1 motion 1 static two solar cameras in one, while on the APP (Niview) to present two can be separately controlled screen, save the trouble of installing two separate solar cameras, 10 times optical zoom, 355 ° 90 ° rotation function, provide ultra-wide and ultra-long field of view monitoring function, the farthest can see 200 meters distance, very suitable for garden , villas, parking lots, shopping centers, warehouses and other places that need to upgrade monitoring.
-【Automatic tracking + PIR trigger alarm】 comes with a powerful AI function, when detecting the presence of people, the solar camera can automatically track the human body movement shooting, and timely send alert information to your phone, so you do not miss any suspicious unwanted visitors, you can talk to the visitors in front of the solar camera through the APP (Niview) in both directions, you can also set the sound and light alarm to drive away Intruder.
-【4K resolution + full color night vision】4K high resolution, can present a super clear picture texture, the included white light can also present a high quality color picture at night, 12 infrared lights in a whole row, the farthest you can see up to 40 meters of night vision picture.
-【365 days non-stop power + IP66 waterproof】6W solar panel continuously powers the built-in 20000mAh large capacity rechargeable battery during the day to ensure 365 days non-stop power, IP66 grade waterproof function, can be used in -10℃ ~ +50℃ temperature range, all-weather operation with quality assurance. Solar camera has passed the FCC, CE, Rosh certification, no need to worry about security issues.
-【SD card / cloud storage + device sharing】Built-in SD card slot, support 8G-128G, record full automatically overwrite the old video, no need to delete, more convenient, you can also choose the security encrypted cloud storage service, free 7 days storage function. You can also share the camera to 8 family members to guard the security together, just install the same APP (Niview).
Original Price
A$749.99
Discounted Price
A$499.99
Total Save
A$250.00
Solar-powered
Wire-free
Long standby
Pan-tilt
PIR detection
Color night vision
Two-way audio
Multiple users
Privacy secured
Waterproof
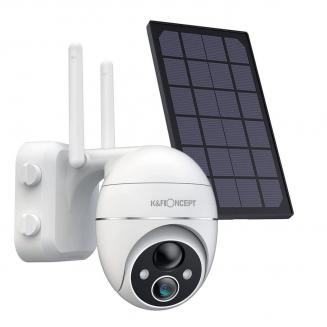
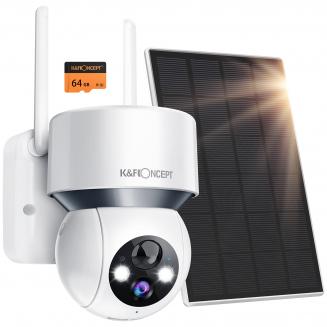
-【360° Wide Angle & Two-Way Audio】K&F Concept Solar Surveillance Camera's smart design enables it to rotate without obstacles, horizontally rotated 355°, vertical 120°, can achieve a wide panoramic field of vision, monitoring without blind spots, no dead angle panoramic shooting. Offer full protection for your sweet home.
-【Smart PIR Motion Detection & Audio-Light Alert】The smart home security camera is equipped with a smart PIR motion detection chip. No false alarm. With a stronger AI algorithm, the home security camera has higher sensitivity PIR motion sensor, an optional setting of 5-10 meters to capture all human movements, significantly reducing false alarms caused by rain and insects, etc. Enhanced protection of your property and sends timely and accurate alerts.
-【Infrared Full-color Night Vision & IP66 Waterproof】The camera can automatically recognize day and night for mode switching. It adopts advanced night vision technology. Under very dark light conditions, it can present clear images through the dark. The security outdoor camera is equipped with an ip66 rated weatherproof outer casing, designed to operate the CCTV camera even in extreme weather conditions.
-【Data Storage & After-sales Service】Use a Micro SD card (128G Max) to save local recordings, you can use APP to view historical recordings without paying any additional fees (64G SD Card included). If you need longer data storage, you can also subscribe to a securely encrypted cloud Storage service, and can enjoy 7 days free storage discount. Please feel free to contact us if you encounter any problems.
-【14400mAh Rechargeable Battery & 100% Wire Free】This solar-powered wireless security camera built-in 9600mAh batteries. Besides, The solar panel can provide non-stop solar power for the outdoor security camera day or night, sunny or rainy., the security camera features an extremely long standby time of up to 6 months. The surveillance camera runs on 2.4 GHz WiFi and stays fully charged with Solar Panel which realizes 100% wire-free security. 100% wire-free. Low battery notification and indicator on the solar security camera.
Original Price
A$244.99
Discounted Price
A$165.99
Total Save
A$79.00
Two-way audio
Night vision
Wide usage
Remote viewing
Long-distance signal
Built-in microphone
Compact design
Lightweight
Multiple languages
Easy installation
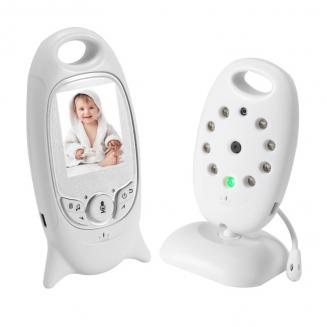
-Two-way audio: Whenever you are in the bedroom, garden, yard or kitchen, you can always see your baby and speak in time to soothe the baby when the baby is crying, which will help you live a better life.
-Automatic infrared night vision device: Don't worry, you will see your baby during the day and night. The infrared night vision device will automatically detect the dim light and provide clear video even in a dark room, so you will always know what your baby is doing.
-Wide range of uses: It can be used in baby monitors, and it is also suitable for nursing care of the elderly and offices, security companies, schools, homes, hospitals and small places.
-With security and long-distance signal, it can be viewed remotely anytime and anywhere
Original Price
A$109.19
Discounted Price
A$109.19
Total Save
A$0.00
Two-way audio
Infrared night vision
Wide applications
Remote viewing
Long-distance signal
Lightweight design
Compact size
Built-in microphone
Lithium polymer battery
Multilingual support
-Two-way audio: Whenever you are in the bedroom, garden, yard or kitchen, you can always see your baby and speak in time to soothe the baby when the baby is crying, which will help you live a better life.
-Automatic infrared night vision device: Don't worry, you will see your baby during the day and night. The infrared night vision device will automatically detect the dim light and provide clear video even in a dark room, so you will always know what your baby is doing.
-Wide range of uses: It can be used in baby monitors, and it is also suitable for nursing care of the elderly and offices, security companies, schools, homes, hospitals and small places.
-With security and long-distance signal, it can be viewed remotely anytime and anywhere
-Automatic infrared night vision device: Don't worry, you will see your baby during the day and night. The infrared night vision device will automatically detect the dim light and provide clear video even in a dark room, so you will always know what your baby is doing.
-Wide range of uses: It can be used in baby monitors, and it is also suitable for nursing care of the elderly and offices, security companies, schools, homes, hospitals and small places.
-With security and long-distance signal, it can be viewed remotely anytime and anywhere
Original Price
A$64.99
Discounted Price
A$64.99
Total Save
A$0.00
Two-way audio
Night vision
Wide usage
Remote viewing
Security signal
Compact size
Lightweight design
Easy installation
Built-in microphone
Multilingual options
-Two-way audio: Whenever you are in the bedroom, garden, yard or kitchen, you can always see your baby and speak in time to soothe the baby when the baby is crying, which will help you live a better life.
-Automatic infrared night vision device: Don't worry, you will see your baby during the day and night. The infrared night vision device will automatically detect the dim light and provide clear video even in a dark room, so you will always know what your baby is doing.
-Wide range of uses: It can be used in baby monitors, and it is also suitable for nursing care of the elderly and offices, security companies, schools, homes, hospitals and small places.
-With security and long-distance signal, it can be viewed remotely anytime and anywhere
-Automatic infrared night vision device: Don't worry, you will see your baby during the day and night. The infrared night vision device will automatically detect the dim light and provide clear video even in a dark room, so you will always know what your baby is doing.
-Wide range of uses: It can be used in baby monitors, and it is also suitable for nursing care of the elderly and offices, security companies, schools, homes, hospitals and small places.
-With security and long-distance signal, it can be viewed remotely anytime and anywhere
Original Price
A$109.19
Discounted Price
A$109.19
Total Save
A$0.00
4G Connectivity
Solar Powered
PIR Detection
2-Way Audio
Built-in Battery
2K Resolution
Night Vision
360° Coverage
Cloud Storage
Data Encryption
-【PIR Human Detection and Instant Alerts】PIR sensors and AI humanoid detection alarms are used to detect human bodies more accurately and reduce false alarms caused by light or insects. Supports instant alerts and logging. You can instantly see what's going on from your phone.
-【Uninterrupted Power Supply and 360° Full Coverage】The 4G solar security camera is equipped with a solar panel, and the built-in 10400mAh battery provides uninterrupted power, no need to remove the camera from the roof to charge. It achieves 355° viewing through 355° horizontal and 100° vertical rotation, 4X digital zoom, and 360° without blind spots. Application: Ubox APP
-【2K Full HD and Spotlight Color Night Vision】K&F Concept 4G Solar wireless security camera outdoor equipped with 3.6mm lens, provides 2K HD decent images and videos. The built-in spotlight flashes bright light to switch to night vision mode, helping to see true-color night vision in real-time and see-through darkness up to 98 feet even in very low light conditions.
-【PIR Human Detection and Instant Alerts】PIR sensors and AI humanoid detection alarms are used to detect human bodies more accurately and reduce false alarms caused by light or insects. Supports instant alerts and logging. You can instantly see what's going on from your phone.
-【Optional Storage and Data Encryption Protection】The K&F Concept 4G LTE solar battery-powered outdoor security camera can be used for cloud storage or MicroSD card (up to 128G, not included) to provide you with flexible ways to save data. You can freely stream videos anytime, anywhere via the cloud (with an additional subscription fee). Mobile apps can be downloaded from the Apple App Store/Google Play
Original Price
A$262.71
Discounted Price
A$262.71
Total Save
A$0.00
New Arrival
Related Accessories
A$45.99 A$45.99
About Us
ABOUT KENTFAITH
-Enjoy Your Selected Digital Life
KentFaith as an end-consumer service provider, kentFaith is committed to improving consumer experience and providing consumers with the most suitable products. We have 150 patents and have won international product awards. We are popular in 200 countries and regions. We have been listening to the real needs of users and are committed to creating an ideal choice that meets your inner expectations and providing you with a convenient and practical exclusive shopping page.
20K + Products
56+
Countries and Regions
20Million+
Customers
150+
Patents
260+
Commercial Partners
1200+
Online and offine Retailers
20000+
Products
More Related Pages
A$28.99 - A$471.49
A$27.99 - A$299.99
A$64.99 - A$499.99
A$18.99 - A$285.99
A$109.19 - A$499.99
A$22.99 - A$489.99
A$28.99 - A$499.99
A$28.99 - A$471.49
A$64.99 - A$471.49
A$177.70 - A$471.49
A$54.99 - A$489.99
A$40.99 - A$239.98
Related searches
Mi Home Security Camera 3
Ring Security Camera Wall Mount
Mi Home Security Camera Basic 1080p
Ip Camera Xiaomi Mi Home Security
Mi Home Security Camera Cloud Storage
Mi Home Security Camera Multiple View
Mi Home Camera Memory Card
Latest Mi Security Camera
Tripod Bracket Wall Mount
Iphone 5s Action Camera Case
Recommended searches
Security Cameras Powered By Ethernet
Lens Hood Sony 35mm 1.8
Osmo Action 4 Memory Card
Best Night Vision Goggles For Stargazing
Hdmi Usb Digital Microscope Camera
Pro Video Tripod Fluid Pan Head
Canon Pro Shot 70 Digital Camera
Outdoor Night Vision Farm Trail Camera
Best Type Of Metal Detector
Best Usb Microphone For Voice Recording

