How To Use A Ring Light For Video?
Mastering the Use of a Ring Light for Video: A Complete Guide
In the age of digital videography and content creation, achieving professional lighting has become a cornerstone of success for video productions, whether they be polished marketing content, vlogs, or online lessons. And when it comes to effective, versatile, and user-friendly lighting tools, few options shine as brightly—both literally and metaphorically—as the ring light. Known for its ability to create an evenly distributed, flattering glow, the ring light has become a staple in the toolkit of videographers, influencers, and enthusiasts alike.
But how do you effectively use a ring light to enhance your video production? While it might seem straightforward—turn it on and aim it at your subject, right?—there are nuances that can make the difference between a polished, professional look and an underwhelming outcome. This article will provide a comprehensive guide on using a ring light to elevate your videos, covering essential techniques, key adjustments, and the common pitfalls to avoid.
Why Use a Ring Light for Video?
Before diving into the how-to details, it’s worth understanding why a ring light is often the lighting tool of choice for video content creators.
1. Flattering Illumination:
The circular design of a ring light ensures soft and even illumination. Its shape eliminates harsh shadows by distributing light across the subject’s face, creating a professional visual aesthetic. This is particularly beneficial for beauty tutorials, interviews, and any scenario requiring a subject-focused shot.
2. Catchlight Effect:
A ring light creates an eye-catching "halo effect" in the subject’s pupils, giving videos a captivating and polished appeal. This is a subtle yet striking visual enhancement that sets ring light shots apart.
3. Ease of Use:
With minimal setup and intuitive operation, ring lights are beginner-friendly. They're lightweight, portable, and often adjustable, making them perfect for creators on the go.
4. Multipurpose:
From creating evenly lit product shots to enhancing live-streaming sessions, a ring light is versatile and adapts to various content creation needs.
Step-by-Step Guide to Using a Ring Light
Now that you know its benefits, let’s discuss how to utilize a ring light effectively for your video creations.
---
1. Choose the Right Ring Light for Your Needs
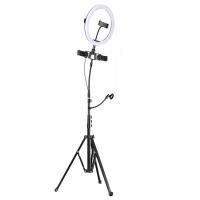
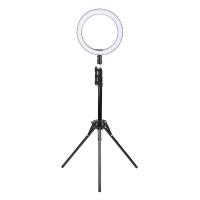
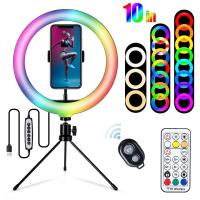
Ring lights come in many sizes, ranging from compact 8-inch lights to considerably larger 20-inch models. Understanding your video needs will help you pick the right one:
- Smaller Ring Lights: Ideal for close-up recordings such as makeup tutorials or desk vlogs.
- Larger Ring Lights: Better suited for interviews, full-body recordings, or larger studio setups.
- Dimmable Options: Many modern ring lights come with adjustable brightness and color temperature, allowing you to fine-tune the lighting to suit your environment or mood.
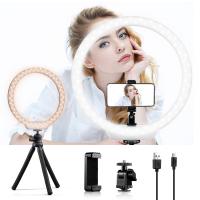
Additionally, some models come with built-in phone or camera mounts, which can save space and streamline your setup.
---
2. Set Up Your Ring Light
Proper setup determines how well your ring light enhances your video. Follow these steps for an optimal arrangement:
1. Position the Ring Light:
Place the ring light directly in front of your subject to minimize shadows. For close-up scenes, the camera or phone can be positioned in the ring’s center for the most precise angle of illumination. If your setup doesn’t allow for central placement, adjust the light slightly above or below the subject.
2. Distance Matters:
Place the ring light at an appropriate distance—usually 2 to 3 feet from your subject. If the light is too close, it can cause harsh reflections or discomfort. Being too far, however, may reduce the intensity of the glow.
3. Secure Your Equipment:
Ensure the ring light’s stand is sturdy and balanced, particularly in long recording sessions or outdoor shoots where it might face environmental disruptions like wind.
---
3. Adjust Brightness and Color Temperature
Modern ring lights often feature dimmable brightness and adjustable color temperatures. Use these features to tailor the light to your specific needs:
- Brightness: Start with a moderate level of brightness and gradually increase it until the subject is evenly lit but not overexposed. Avoid turning it up too high, as this may wash out details.
- Color Temperature: Most lights offer a spectrum from cool white to warm yellow. For professional-looking videos, opt for neutral daylight tones (around 5500K).
Proper adjustment will depend on your ambient light conditions. For instance, if you’re recording during the day in a bright room, you may need less artificial light and a cooler tone to complement natural light. Conversely, in a darker environment, a warmer tone can create a cozier look.
---
4. Position Your Subject
The interaction between your subject and lighting dramatically affects the outcome. Here are a few tips to position your subject for the best result:
- If you’re shooting a head-and-shoulders video, ensure your subject’s face is centered within the light circle to maximize the evenness of the glow.
- If you’re using a larger ring light for full-body shots, place the subject at a distance where the light still evenly distributes across their form.
Pay particular attention to the subject’s eyes. The signature "halo" effect in the pupils relies on both the subject’s orientation toward the ring light and its proper placement around the camera.
---
5. Experiment with Angles
While the standard placement of a ring light is directly in front of the subject, experimenting with different angles can yield creative effects.
- Upward Angle: Positioning the ring light slightly below the subject can help accentuate facial features for dramatic or stylized shoots.
- Side Angle: Angling the ring light to the side will introduce shadows while maintaining soft lighting, which can create depth.
- Overhead Angle: Setting the ring light above the subject’s head provides a natural "sunlit" appearance, suitable for portraits.
Pay attention to how these angles modify lighting intensity and shadow distribution, as they may require adjustments to brightness or positioning.
---
6. Minimize Reflections
Ring lights have a reflective signature, particularly on shiny surfaces like eyeglasses or jewelry. To reduce glare:
- Position the ring light slightly to the side or above the subject’s line of sight.
- Ask subjects wearing glasses to subtly tilt their chin downward or experiment with anti-glare coatings on their lenses.
Being mindful of reflections ensures your videos remain distraction-free and professional in appearance.
---
7. Coordinate with Your Camera Settings
Your camera settings play a crucial role in complementing the ring light. Keep these adjustments in mind:
- White Balance: Match your camera’s white balance to the light temperature to avoid unnatural hues in the video.
- ISO Settings: A properly illuminated scene allows for lower ISO settings, resulting in less grain and higher-quality footage.
- Exposure: Adjust the exposure to prevent overly bright images while maintaining detail in highlight areas.
Balancing the light intensity with camera settings ensures your final footage is both clear and visually appealing.
---
Common Mistakes to Avoid
Even with proper setup, certain errors can undermine the ring light’s effectiveness:
1. Overuse of Brightness: Over-illuminating your subject can result in unnatural skin tones or loss of detail.
2. Ignoring the Background: While ring lights focus primarily on the subject, leaving the background too dark or cluttered can detract from the overall quality.
3. Poor Staging: Misaligned camera placement or sloppy framing can waste the benefits of ring lighting.
---
Final Thoughts on Ring Light Mastery
A ring light is an accessible yet powerful tool that can transform the quality of your video production. Its ability to provide even illumination, flattering tones, and artistic enhancement makes it essential for videographers of all skill levels. Whether creating dynamic tutorials, streaming live events, or recording interviews, a well-used ring light ensures your videos consistently look professional and engaging.
The roadmap provided above will help you unlock the full potential of your ring light, making it a go-to lighting solution in your creative workflow. With a bit of practice and attention to detail, you can elevate the quality of your video content and captivate your audience with each production.













There are no comments for this blog.