How To Stop Shake Camera On Monopod?
Using a monopod can greatly enhance your ability to capture steady shots, particularly when handheld setups may result in shaky footage. However, a monopod is not a catch-all solution, and inexperienced handling or certain environmental factors can still lead to camera shake. Whether you're shooting video or still images, eliminating camera movement is essential for achieving professional-quality results. In this article, I’ll explore practical strategies to minimize or completely eliminate camera shake when using a monopod. By the end, you'll have a clear understanding of how to stabilize your shot for optimal performance.
---
The Purpose and Limitations of a Monopod
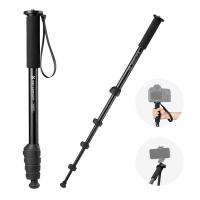
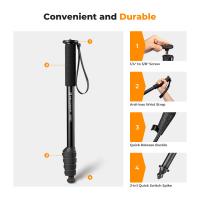
A monopod is designed to provide stability for your camera equipment while maintaining lightweight portability and easy maneuverability. However, unlike a tripod, a monopod has only one point of contact with the ground, which inherently limits its stability. The user must compensate for this by controlling the balance and movement of the setup. Camera shake on a monopod, therefore, is not unusual but avoidable with the right techniques, equipment, and habits.
Reasons for Camera Shake on a Monopod
Before jumping into solutions, it's essential to understand the primary causes of camera shake when using a monopod:
1. Improper Handling: Incorrect grip or positioning can reduce the stability of the monopod, leading to unintended movements.
2. Unstable Surface: Uneven ground, slippery surfaces, or vibrations (e.g., from nearby traffic) can transfer movement to your monopod.
3. Heavy Camera Gear: A monopod struggling to support a heavy lens or camera body may lead to wobbling.
4. Environmental Conditions: Strong winds or sudden gusts can destabilize the monopod.
5. Operator Movement: Movements like shifting your weight, adjusting the monopod’s height during operation, or breathing heavily can introduce shake.
Once these root causes are understood, you can adopt targeted solutions to mitigate them.
---
Techniques to Stop Camera Shake on a Monopod
1. The Proper Setup Makes All the Difference
Getting your monopod ready with the correct setup can eliminate many potential sources of shake before they begin.
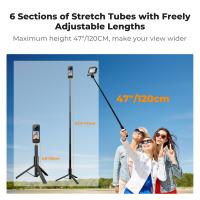
- Select the Right Height: Adjust the monopod to eye level whenever possible to avoid unnecessary bending or tilting, which can affect stability. If you're shooting from a lower vantage point, kneel down with control rather than increasing stress on your wrist by angling it downward.
- Use a Solid Base: Make sure the rubber foot or spike at the end of the monopod is planted firmly on the ground. Different monopod feet are available, and if you’re on uneven terrain, consider upgrading to one with a tripod base or wider stands for stabilizing support.
- Lock Sections Securely: If your monopod has multiple leg segments, lock them tightly to avoid any unexpected slipping or wobbling during use.
---
2. Improve Your Hands-on Technique
While the monopod provides a single point of contact with the ground, it’s up to you to secure and stabilize the system.
- Use the “Three Points of Contact” Method: Keep both hands on the monopod—one gripping near the top or holding onto the camera body, and the other stabilizing the shaft just above the base. Additionally, use your body as the third contact point by leaning the monopod into your waist or against your foot for additional stability.
- Control Your Breathing and Movements: When pressing the shutter or starting a video recording, take a deep breath and minimize body movements. Exhale slowly as you engage the shutter button to reduce chances of micro-shakes caused by your own physical input.
---
3. Utilize Stabilization Accessories
The right accessories can dramatically improve your results when using a monopod.
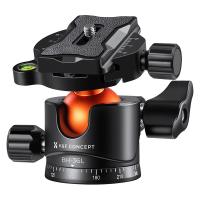
- Monopod Heads: Consider attaching a tiltable or fluid monopod head to enable smooth panning and tilting motions without transferring jerky movements to your camera. These heads provide more precise motion control.
- Counterweights: If your monopod feels top-heavy due to the weight of your camera and lens, a counterweight at the bottom of the monopod can help balance the setup and prevent tipping.
- Camera Straps: Use the camera’s neck strap for additional anchoring. Wrap it firmly around your wrist or shoulder to reduce sway during operation.
---
4. Leverage Image Stabilization Technology
Modern cameras and lenses are often equipped with image stabilization (IS) or vibration reduction (VR) technology. These features are especially useful when using a monopod, as they help counteract minor movements in real-time.
- For still photography, make sure that the stabilization function of your lens or camera body is turned on, but keep in mind that some systems work better in specific scenarios (e.g., horizontal or vertical stabilization modes may need to be toggled depending on your shooting situation).
- For videography, newer hybrid stabilization systems combine optical and electronic stabilization, providing seamless functionality. If the monopod is in a controlled environment, consider using post-processing stabilization to iron out any remaining jitter.
---
5. Adopt the Correct Foot Placement
Your own body position plays a key role in ensuring the monopod doesn’t shake due to your movements.
- Anchor Your Stance: Stand with your feet shoulder-width apart for balance. If possible, align the monopod at a slight forward angle to brace it against your leading leg’s foot. This triangular support configuration can absorb vibrations and stabilize the setup during operation.
- Kneeling Option: If you need to shoot at a lower height, place the monopod on the ground near one knee while resting that knee on the ground for extra support.
---
6. Protect Against Environmental Factors
Environmentally driven camera shake, such as wind or vibrations, requires situational awareness and adaptations.
- Shield Against Wind: If you’re outdoors and it’s breezy, use your body as a barrier to shield the monopod from the wind. Alternatively, hold the monopod tightly with both hands or use physical supports like trees or building corners to block gusts.
- Avoid Vibration-Prone Surfaces: Shooting near a busy roadway or train tracks? Move to a quieter surface where vibrations won’t travel up through the monopod’s base. Platforms made of solid materials (e.g., concrete) typically provide less vibration than wooden decks.
---
Advanced Strategies for Professionals
If you're a seasoned photographer or videographer looking for advanced techniques, consider the following:
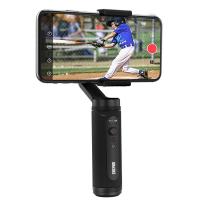
- Add a Gimbal System: For ultra-smooth shots, especially video, mount your camera on a mini motorized gimbal placed atop the monopod. While expensive, gimbals can eliminate nearly all traces of shake.
- Upgrade to a Hybrid System: Some monopods are designed with built-in feet that allow limited tripod-like functionality. This is especially helpful for long exposure photography or wildlife videography.
---
Conclusion: Perfecting Stability with a Monopod
Stopping camera shake on a monopod involves careful preparation, proper handling, and an effective combination of tools and techniques. By ensuring a solid setup, mastering your grip and posture, and using stabilization aids, you can turn this simple accessory into a highly reliable stabilization tool. Whether you’re shooting on rugged outdoor terrain or in controlled studio environments, the strategies discussed above can help you capture sharp, seamless images and videos.
Investing in skill and the right equipment pays off in remarkable results. Whether you’re a beginner or an experienced professional, you’ll find that these techniques dramatically improve both the quality and consistency of your work. Don’t forget: practice makes perfect, and it’s often the smallest adjustments that bring the biggest improvements. Begin experimenting today with the strategies I’ve outlined, and eliminate camera shake from your workflow once and for all.


