How To Connect Rgb Lights?
RGB lights have revolutionized the way we approach lighting and decor, offering a versatile technology that can enhance any space with customizable colors and brightness. Whether you’re setting up RGB LED light strips for ambient lighting in your gaming setup, installing them under cabinets in the kitchen, or designing an eye-catching accent wall, the process of connecting these lights can seem a little tricky to beginners. A properly connected RGB light system allows you to unleash its full potential, ensuring smooth functionality, vibrant hues, and optimal control. This guide will cover everything you need to know to connect RGB lights, offering practical advice to solve common issues and ensure a stress-free setup.
1. Understanding RGB Lights and Components

Before diving into the connection process, it’s important to familiarize yourself with the parts of an RGB lighting system.
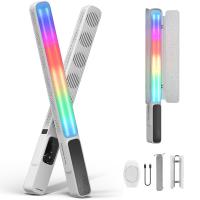
- RGB Strips/Bulbs: These components contain red, green, and blue LEDs. By mixing the intensity levels of these colors, they can emit millions of hues.
- Power Supply: RGB lights typically require a power adapter to convert AC (from a wall outlet) into DC power that the lights can use. A mismatch in voltage can damage the lights, so it's important to use the correct power supply.
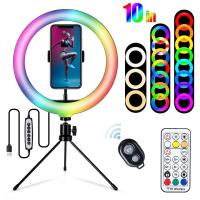
- Controller: This serves as the interface that allows users to select colors, adjust brightness, and sometimes synchronize lights to music. Controllers come in various forms: handheld remotes, smartphone apps via Bluetooth/Wi-Fi, or integrated smart home hubs.
- Connectors: If you’re working with multiple RGB strips or need to navigate turns, connectors help link various segments together seamlessly.
Understanding how these components work together lays the groundwork for a successful installation.
---
2. Steps to Connect RGB Lights

Step 1: Plan the Layout
Start by mapping out where you want to install your RGB lights. Consider the length of the strips and the location of power outlets. Decide whether you’ll need additional connectors or extensions for the setup. Also, ensure that the adhesive backing of the light strips can adhere properly to the intended surface.
Step 2: Check the Power Requirements
Check the voltage and wattage of your RGB lights to ensure they match the power supply you’re using. A mismatch here can result in poor functionality or even short-circuiting. For example, most RGB light strips operate on 12V or 24V DC power. If your lights require a higher wattage than what your adapter supplies, you may experience dim lighting or uneven brightness.
Step 3: Connect the Controller
The controller connects your RGB lights to the power supply while acting as the control hub. Most light strips come with a 4-pin or 5-pin configuration. When plugging the RGB strip into the controller, ensure that the pins match (usually marked as R, G, B, and +). Improper alignment can prevent one or more colors from functioning.
Smart controllers often require pairing with your smartphone or smart home system. This usually involves downloading a companion app, pairing via Bluetooth or Wi-Fi, and following the setup instructions. For remote-based controllers, ensure the line of sight between the remote and the controller is unobstructed.
Step 4: Adhere and Position the RGB Lights
Before installing the strips permanently, confirm their functionality. Temporarily connect the power supply and turn the lights on to ensure all LEDs illuminate correctly and colors transition smoothly. Once tested:
- Peel off the adhesive backing, press the strip firmly into place, and follow the contours of your surface.
- Avoid adhering strips onto hot or dusty surfaces, as this can compromise adhesion.
- Use additional mounting clips or brackets in high-moisture or high-temperature environments for added support.
Step 5: Power the System
After positioning the lights, plug in the power adapter to the wall outlet. Test the lights again by adjusting the settings using your controller. If the lights don’t turn on:
- Double-check that all connectors are secured properly.
- Ensure the power adapter is working and the voltage matches the system’s requirements.
Step 6: Expand the System (Optional)
If your project involves connecting multiple strips, use RGB connectors and amplifiers to maintain brightness and signal quality across the chain. Connectors allow you to bridge gaps between areas that need lighting, while amplifiers boost the current so the colors and brightness remain consistent across longer distances.
---
3. Advanced Tips and Troubleshooting

When dealing with RGB lights, you may run across issues such as uneven colors, flickering, or connectivity problems. Here’s how to address them:
Problem: Uneven Brightness
- Cause: Voltage drop over long distances.
- Solution: Use a power injection method or RGB amplifiers to ensure consistent current supply across the strip.
Problem: RGB Lights Display Only One Color
- Cause: Incorrect pin connection or a damaged controller.
- Solution: Double-check that the pins of the RGB strip are correctly lined up with the controller’s connectors. Reposition or replace the controller if needed.
Problem: Lights Won’t Turn On
- Cause: Insufficient power or a faulty connection.
- Solution: Verify that your power adapter meets the lights’ electrical requirements. Inspect all connections for any loose connectors, and ensure no part of the strip is damaged.
Problem: App or Remote Not Working
- Cause: Pairing failure or signal obstruction.
- Solution: For app-based controllers, ensure your phone’s Bluetooth or Wi-Fi is enabled and paired correctly. If the remote isn’t working, try replacing the batteries or adjusting the distance.
Problem: Poor Adhesion
- Cause: Surface incompatibility.
- Solution: Use additional adhesive or mounting clips to reinforce the strips, especially in high-moisture areas like bathrooms.
Pro Tip: Syncing RGB Lights with Music or a Smart Home System
Many modern RGB lights can now sync to your music or work with smart assistants like Alexa, Google Assistant, or Apple HomeKit. Check the compatibility of your RGB controller and follow its instructions to enable these features. This can transform your space into an interactive and immersive environment, perfect for entertainment or relaxation.
---
4. Creative Ideas for RGB Light Installations

RGB lights allow for unparalleled creativity. Here are some popular use cases and ideas:
- Gaming Setups: Align strips along the back of your monitor or desk for dynamic, color-changing effects that match your gameplay.
- Under-Cabinet Lighting: Use RGB lights in your kitchen to create a modern ambiance while adding functional illumination for cooking tasks.
- Accent Walls: Install LED strips along the ceiling or floor edges to create a floating, futuristic aesthetic.
- Party Lighting: Sync RGB lights with your music player to create a lively, color-coordinated disco feel.
- Holiday Decorations: Program customized color modes for holidays like Halloween (orange and purple) or Christmas (red and green).
---
5. Conclusion
Successfully connecting and setting up RGB lights allows you to transform your space with vibrant and customizable lighting effects. While the process may seem overwhelming at first, breaking it down into manageable steps and paying attention to detail ensures a seamless installation. By following proper procedures and troubleshooting any issues that arise, you not only guarantee the longevity of your lights but also unlock their full functionality for creative and functional applications.
As technology continues to advance, RGB lighting solutions are becoming smarter, more energy-efficient, and easier to control. By investing a little time into understanding the components and setup, you can design lighting systems that enhance your environment and fit your unique needs. From mood lighting to smart home integration, the possibilities of RGB lights are limited only by your imagination. So go ahead, let your creativity shine!


