What Is An Nd Filter Shutter Speed?
Shutter speed and ND filters often go hand in hand when it comes to creative photography. While each aspect has its own standalone importance, combining the two can unlock endless artistic possibilities. In this article, we’ll delve into what ND (Neutral Density) filters and shutter speed are, how they interact, and how to effectively use them in different scenarios to elevate your photography.
---
Understanding Shutter Speed
Shutter speed simply refers to the length of time your camera’s sensor or film is exposed to light while taking a photo. Measured in fractions of a second or whole seconds (e.g., 1/250, 1", 10"), shutter speed is a fundamental element of photography as it directly affects exposure, motion blur, and sharpness in the final image.
- Fast shutter speeds (e.g., 1/1000, 1/2000): Freeze motion and are ideal for capturing fast-moving subjects like sports, wildlife, or splashes of water.
- Slow shutter speeds (e.g., 1", 2", 30"): Extend light exposure and are great for creative effects like light trails, silky waterfalls, and low-light photography.
The challenge arises when you wish to use a slow shutter speed to achieve creative results during bright daylight conditions. This is where ND filters become a valuable tool.
---
What is a Neutral Density Filter?
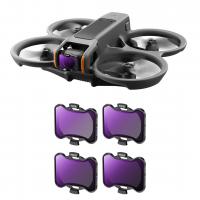
A Neutral Density (ND) filter is a piece of glass or optical material that is mounted in front of your camera lens to reduce the amount of light entering the lens. Essentially, it acts like a "pair of sunglasses" for your camera. ND filters differ from other light-reducing tools like polarizers in that they don't affect the colors or tones in your image—they simply reduce light intensity.
ND filters are available in varying "strengths," commonly referred to as stops (e.g., ND2, ND4, ND8), with each stop cutting light in half. For example:
- An ND2 filter reduces light by 1 stop.
- An ND8 filter reduces light by 3 stops, allowing for longer exposures in bright conditions.
- A 10-stop ND filter, often called an "ND1000" filter, is ideal for extreme long-exposure effects.
---
The Interaction Between ND Filters and Shutter Speed
By restricting light, ND filters allow photographers to manipulate shutter speed without overexposing the scene. For example:
1. If you're shooting a waterfall in daylight, your camera's exposure settings may only allow for a fast shutter speed (e.g., 1/500). This would freeze the motion of the water.
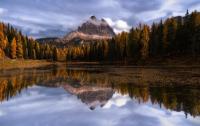
2. By attaching an ND8 filter, you can reduce the light entering your lens by 3 stops. This allows you to slow your shutter speed to a range (e.g., 1/60 or 1") where the water will appear silky and smooth, while the scene remains properly exposed.
The combination of ND filters and slower shutter speeds is particularly helpful for creative shots that demand fine control over motion and light. Beyond waterfalls, this is beneficial for shooting:
- Clouds gently streaking across the sky.
- Busy street scenes where moving people blur into abstract trails.
- Light trails from vehicles or stars.
---
Practical Applications and Scenarios with ND Filters and Shutter Speed
1. Daytime Long Exposure
Often, daylight conditions are too bright for long exposures. Even at your lens's smallest aperture (e.g., f/22) and the lowest ISO (e.g., ISO 100), the minimal exposure time might still yield overexposed results. ND filters make it possible to compensate for the excess light, unlocking creative long-exposure techniques like smoothing water, softening cloud movement, or eliminating transient objects from bustling urban scenes.
For example:
- Without ND Filter: 1/1000 at f/11 (frozen water droplets)
- With 10-Stop ND Filter: 20-second shutter at f/11 (smooth, ethereal water)
2. Creating Motion Blur While Keeping Subjects Sharp
To intentionally blur part of your subject (such as a moving train in a static, sharp environment), a slower shutter speed is required. Yet, this is typically hard to achieve under natural light. An ND filter gives you the dynamic range needed to retain proper exposure while achieving that creative blur.
- Use cases: Portraiture amidst motion, such as a person standing in focus while blurred crowds hustle around in a busy square.
3. Capturing Light Trails
ND filters allow photographers to extend their exposure time during daylight, making it possible for light trails to be prominent even in brighter conditions. For nighttime scenarios, they also help ensure the balance between environmental light and trails of moving light sources.
For instance:
- In late evening or golden hour, add a 4-stop ND filter for light trails produced by vehicles while maintaining balanced ambient light.
4. Astrophotography with an ND Filter
ND filters can also be used creatively to extend day-to-night transitions, making them an excellent choice for time-lapse sequences where stars, city lights, and clouds are all moving in a single take. Reducing exposure levels during brighter periods complements other compositional tools and gives photographers control over starbursts or longer trails.
---
How to Choose the Right ND Filter for Shutter Speed Adjustments
Selecting the right ND filter depends on the lighting conditions and your desired outcome. Here's how to approach it:
1. Determine the Number of Stops Needed: First, identify the difference in stops between your current settings and your target shutter speed. Online ND filter calculators and smartphone apps can be particularly helpful for these calculations.
2. Consider Versatility with Variable ND Filters: If you're just starting out, a variable ND filter can help because it allows adjustment of light reduction by several stops with a single filter, eliminating the need to carry multiple filters.
3. Trial and Error: Photography often involves experimentation. Don’t hesitate to trial different ND filter strengths to master their applications in both bright and low-light conditions.
---
Common Challenges and How to Avoid Them
Although working with ND filters and long shutter speeds can yield stunning results, photographers often encounter challenges:
1. Focus Issues After Attaching ND Filters: Heavily darkened viewfinders make focusing tricky. A workaround involves composing and focusing without the filter first, then attaching the ND filter prior to shooting.
2. Vignetting or Color Casts: Lower-quality ND filters may cause vignetting or undesired color shifts. Investing in high-quality filters from trusted brands is essential.
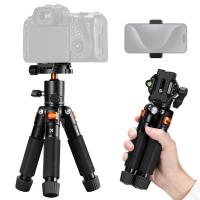
3. Excessive Light Leaks or Motion Blurs: When settings are pushed too far, even the smallest camera shake can ruin your image. Always use a sturdy tripod and remote shutter release to counteract camera motion.
---
Final Tips for Stunning Results
- Carry a Tripod: Long shutter speeds introduce motion blur, so having a stable setup is mandatory.
- Use Remote or Timer Release: To avoid introducing motion vibrations when pressing your camera’s shutter button, enable a 2-second timer or use a remote trigger.
- Experiment with Framing: Incorporate surroundings into the scene. Foreground elements like rocks, trees, or buildings add depth to long-exposure images.
- Post-Processing: Slight adjustments to contrast, sharpness, and color balance will enhance an already solid capture and mitigate minor issues introduced by filters.
---
Using ND filters to adjust shutter speeds is an invaluable skill for photographers looking to explore creative techniques and enhance their artistry. Mastering this combination equips you to manipulate light, motion, and exposure in a controlled and deliberate manner. Whether you’re capturing silky waterfalls, streaking clouds, or dynamic cityscapes, ND filters open the door to new realms of visual storytelling.
In the end, investing time into understanding the relationship between ND filters, shutter speed, and other exposure settings will enable you to craft extraordinary, unforgettable images. So, grab your ND filters, head out with your camera, and start experimenting—there’s a world of creativity waiting!

