What Camera Settings When Using External Flash?
When using an external flash for photography, controlling the camera settings effectively is crucial for achieving the desired results. External flashes introduce more creative flexibility and help illuminate subjects in various lighting environments. However, understanding how to properly configure your camera settings is a cornerstone of success. In this article, we’ll go through everything you need to know to optimize your camera settings when photographing with an external flash. Whether you’re a beginner or looking to refine your techniques, this guide will help you achieve well-lit, professional-looking images.
Understanding External Flash Basics
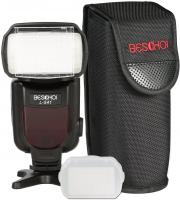
Before diving into camera settings, it’s important to understand how an external flash interacts with your camera. An external flash is a light source that can be mounted on your camera’s hot shoe or used off-camera as part of a wireless or tethered setup. Unlike the built-in flash, external flashes offer more power, flexibility, and control over light direction and quality.
There are two main modes for external flashes: TTL (Through-The-Lens metering) and Manual.
- TTL mode allows your camera to dynamically adjust the flash power based on the scene’s light metering. It’s particularly helpful for beginners or situations with variable lighting conditions.
- Manual mode, by contrast, allows you to set the flash power yourself. This mode gives you finer control and consistency across your shots, as you’re not relying on the camera’s metering system.
Both modes have their merits, and which one you use will depend on the demands of the scene and your level of experience.
---
Camera Settings for External Flash Photography
Now that we’ve established the functionality of an external flash, let’s cover the essential camera settings you should pay attention to. These parameters work together to control the exposure of your image and the way flash interacts with your scene. The key variables include shutter speed, aperture, ISO, flash output, and white balance.
1. Shutter Speed
Shutter speed controls how long the camera sensor is exposed to light. When using an external flash, you need to pay close attention to your camera’s flash sync speed.
The flash sync speed is the fastest shutter speed at which your camera can fire a flash while exposing the entire frame properly. Common sync speeds range between 1/160 and 1/250, depending on your camera model. If you exceed this sync speed without a high-speed sync (HSS) feature on your flash and camera, you’ll likely face issues such as half of the frame being in shadow.
- Best Practice: Keep your shutter speed at or below the sync speed unless your flash supports HSS. If shooting indoors or in low light, you can slow the shutter (e.g., 1/60) to allow more ambient light into the scene.
2. Aperture
Your aperture setting determines the size of the lens opening, which affects the amount of light hitting the sensor and controls depth of field. Aperture directly affects how your flash illuminates the subject.
- Wide Aperture (f/1.8 - f/3.5): Allows more ambient light to mix with the flash, giving the image a natural look.
- Narrow Aperture (f/8 - f/16): Useful for controlling flash exposure because it reduces the light entering the camera. This is ideal for situations where you want the flash entirely dominant.
- Best Practice: Choose a medium value (e.g., f/5.6–f/8) if you’re unsure. Modify your aperture based on how much natural light you want alongside the flash.
3. ISO
ISO controls the sensitivity of your camera sensor to light. In flash photography, you’ll often use a lower ISO value (e.g., ISO 100 or 200) to maintain noise-free images since the flash provides sufficient lighting.
- Best Practice: Start with ISO 100 to minimize noise and adjust upward only if you need more ambient light or your flash output is insufficient.
4. Flash Output (Flash Power)
In manual flash mode, you’ll need to control the flash output manually. Flash power is often adjustable in percentages or fractions of full power (e.g., 1/1 for full power, 1/2 for half power, and so forth).
- Best Practice: Start with 1/16 power for close-range subjects, and adjust based on the distance to the subject or the desired brightness. TTL mode adjusts the flash output automatically, so you can let the camera handle this if you’re unsure.
5. White Balance
White balance ensures that the colors in your photos appear natural. External flashes often emit light that’s close to daylight color temperature (around 5500K). Setting the correct white balance helps avoid unnatural color casts.
- Best Practice: Use the "Flash" white balance preset to complement your external flash. For mixed lighting (e.g., daylight and flash), consider using a custom white balance or correcting in post-production.
---
Advanced Concepts for Creative Control
Balancing Flash with Ambient Light
One of the most important aspects of external flash photography is achieving the right balance between flash exposure and ambient light. This technique prevents images from looking overly artificial or harsh. You can achieve balance by adjusting the flash exposure compensation (FEC) and your camera’s exposure triangle settings.
Take test shots and evaluate whether the flash is overpowering the natural light. Reduce flash output or increase exposure to the ambient light (by slowing shutter speed or increasing ISO) for a more balanced look.
Use of High-Speed Sync (HSS)
High-speed sync allows you to use shutter speeds faster than the sync speed while still using the flash. This feature is especially useful for outdoor portraits where you want to shoot with a wide aperture in bright conditions.
Modifiers for Creative Lighting
Using modifiers like softboxes, bounce cards, and diffusers can soften the harshness of direct flash. Bouncing the flash off walls or ceilings is another way to distribute the light more evenly for pleasing results.
Off-Camera Flash for Better Directionality
Using the flash off-camera gives you creative freedom to place light directionally. Set up your flash on a stand or handheld trigger and adjust its position to sculpt the light more dynamically.
---
Common Scenarios and Flash Techniques
Let’s explore how to use your settings effectively in several common scenarios:
Indoor Photography
- Shutter Speed: 1/60–1/200 (to allow ambient room light)
- Aperture: f/2.8–f/8 (adjust based on depth of field needs)
- ISO: 100–400
- Consider bouncing the flash off a neutral-colored wall or ceiling for softer light.
Outdoor Fill Flash
- Shutter Speed: Below the camera sync speed (or use HSS for faster speeds)
- Aperture: f/1.4–f/5.6 (for subject-background isolation)
- ISO: 100
- Reduce flash power to avoid harsh lighting; use fill flash to brighten shadows on the subject.
Portrait Photography
- Shutter Speed: 1/125–1/250
- Aperture: f/2.8–f/5.6 (to isolate the subject)
- ISO: 100–200
- Use a diffuser or softbox for flattering, even lighting.
Event Photography
- Shutter Speed: 1/60–1/200 (depending on room lighting)
- Aperture: f/4–f/8 (to capture groups)
- ISO: 400–800 (may need to go higher in low-light venues with distant subjects)
- Experiment with bounce techniques or on-camera modifiers.
---
Troubleshooting Flash Photography
If your flash photography doesn’t turn out as expected, consider these potential issues:
1. Overexposed Images:
- Lower the flash output.
- Use a narrower aperture (higher f-stop number).
2. Underexposed Images:
- Increase flash power or ISO.
- Open up the aperture or slow the shutter speed to let in more ambient light.
3. Harsh Shadows:
- Use a bounce surface or a diffuser.
- Consider placing the flash off-camera for better flexibility.
4. Mixed Lighting Issues:
- Adjust white balance.
- Use a gel filter over the flash to match ambient light temperature.
---

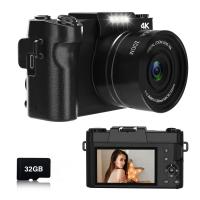
![4K Digital Camera for Photography & Video [Autofocus and Stabilisation] 48MP 16X Digital Zoom 3” 180° Flip Screen Vlog Camera with 32G SD Card, Flash 4K Digital Camera for Photography & Video [Autofocus and Stabilisation] 48MP 16X Digital Zoom 3” 180° Flip Screen Vlog Camera with 32G SD Card, Flash](https://img.kentfaith.com/cache/catalog/products/us/GW41.0065/GW41.0065-1-200x200.jpg)

