How To Use Ring Lights?
Mastering the Use of Ring Lights for Photography, Video, and Everyday Applications
The ring light, once a staple of professional photography studios, has taken the world by storm and is now a must-have accessory for virtually everyone from content creators to makeup enthusiasts. Its signature circular design provides soft, even lighting, eliminating harsh shadows and ensuring a pleasing glow for its subjects. In this article, we’ll delve into how to use ring lights effectively, explore their various applications, and address common questions surrounding their use. Whether you’re a beginner or a seasoned user, you’re sure to learn something valuable to enhance your craft or daily activities.
---
What Is a Ring Light and Why Is It Useful?
The ring light is a circular lighting device, typically lined with LEDs or fluorescent bulbs. Its primary design purpose is to emit uniform and shadow-free light, ideal for focusing attention on a single subject. Unlike harsh overhead lighting or uneven side lighting, the light emitted from a ring light surrounds the subject, creating an attractive "halo" effect that works wonders for close-up photography, videos, or makeup tutorials. The inherent softness of the light makes it a top choice for tasks requiring clarity and minimal distortion.
The applications for ring lights are vast: from professional-grade photography to casual smartphone selfies, video creation, makeup application, and even Zoom calls. Its versatility means users across various domains can adopt it for their unique needs.
---
Step-by-Step Guide to Using a Ring Light
If you’re new to ring lights, here’s a step-by-step roadmap to help you get started:
---
1. Choose the Right Size and Type of Ring Light
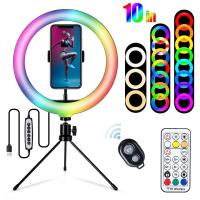
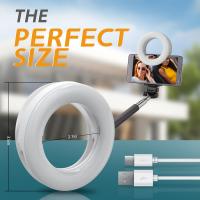
- Size: Ring lights are available in various sizes, usually ranging from 8 inches to 18 inches or more in diameter. Smaller ring lights (8–12 inches) are ideal for personal use, such as selfies, Zoom meetings, or makeup. Larger ring lights (14–18 inches) provide broader, more professional-grade illumination, ideal for YouTube creators, photographers, and beauty professionals.
- Type: Some ring lights come with adjustable brightness and color settings, while others may maintain a fixed temperature and intensity. Opt for an adjustable model if you require versatility for various lighting scenarios.
---
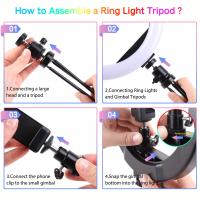
2. Secure the Ring Light on Its Stand
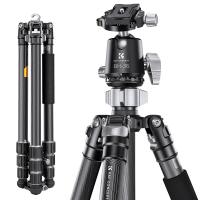
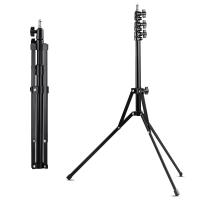
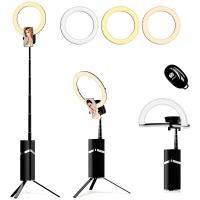
Most ring lights come with a tripod stand for easy setup. Begin by unfolding the tripod and adjusting its height to match your task:
- For makeup application, position the light at face level.
- For photography or video recording, carefully align the light with the focal point of your subject.
Some ring lights are attachable to desks or come with clips for securing them directly to devices like smartphones or laptops. Ensure stability to prevent movement or shaking that could disrupt your intended results.
---
3. Power and Set Up the Light
Ring lights are powered via USB, batteries, or direct AC adapters depending on the model:
- USB-Powered Models: These are versatile and portable, great for on-the-go creators.
- AC-Powered Models: These are sturdier and better suited for extended professional-grade use.
Plug the light into its power source and turn it on. If your ring light features adjustable settings, you’ll usually find controls for:
- Brightness levels
- Color temperatures (e.g., warm white, neutral, cool white)
Experiment with the controls to find the right settings for your purpose:
- Use warmer tones for makeup or lifestyle videos.
- Opt for cooler tones for sharp, professional headshots or tutorials.
---
4. Position Your Camera or Device
One of the most prominent features of ring lights is their hollow center. This design allows you to place your camera, smartphone, or even mirror directly in the middle, ensuring even lighting on your subject. Attach your camera (if your ring light kit includes a holder) or position your device manually to ensure that the lens peers through the empty circle.
This positioning is what creates that iconic "catchlight" reflection in the eyes—a subtle sparkle that brings depth to portraits when done correctly.
---
5. Adjust Angles and Distances
Ring lights perform best when positioned close to their subject, usually 1–2 feet, though this will vary depending on the strength of the light and the desired effect:
- For clear and radiant facial illumination, keep the light in front of the subject at head height.
- If you're capturing flat-lay photos of objects, tilt the light downward to create balanced illumination.
Experiment with the distance to avoid overexposure or under-lighting. Full-body shots may require additional light sources to complement the ring light.
---
6. Test and Tweak Settings
Once the basic setup is complete, take a moment to test your results:
- Take a photograph or video clip.
- Observe the shadows, brightness, and overall quality of the lighting.
- Continue tweaking the light's temperature, brightness, or angles until satisfied.
A common mistake is to rely solely on the automatic exposure of your camera—manual adjustments are often required to achieve the perfect balance of lighting and image settings.
---
Practical Applications for Ring Lights
Now that you know how to use your ring light let’s examine where it shines best (pun intended):
---
1. Content Creation
For video bloggers, live streamers, and TikTok creators, ring lights are virtually indispensable. Their even light ensures a professional, polished appearance.
- When streaming, position the light behind your device to keep your face evenly lit.
- Combine with a secondary source like a softbox for multidimensional lighting in more professional setups.
---
2. Photography
Photography enthusiasts often use ring lights for close-up shots, product photography, or studio portraits. Their ability to eliminate shadows ensures crisp, high-quality images. Use diffusers, if included, to soften the harshness for portrait sessions.
---
3. Makeup Application
Ring lights mimic natural light, making them ideal for applying makeup. The consistent brightness eliminates the guesswork involved in matching colors and ensures precision when blending products.
---
4. Virtual Meetings
With the increase in remote work and online communication, ring lights are a favorite for improving webcam image quality. Position a compact model near your workspace for a clean, professional look during virtual meetings.
---
5. Educational Tutorials
Teachers, trainers, and online instructors use ring lights to ensure clarity in recorded or live tutorials. When recording hands-on content such as art demos or technical how-tos, this light ensures every detail is easily seen.
---
Common Challenges and How to Solve Them
Like any equipment, ring lights have their learning curve. Here are common issues beginners face:
- Overexposed Images: Lower the brightness or increase the distance between the light and your subject to minimize overexposure.
- Reflections in Glasses: Adjust the positioning of the light (above or beside your camera) to reduce glare on eyeglasses.
- Unstable Setup: Ensure the tripod is on a flat surface and weighted down if necessary to avoid tipping over.
---
Conclusion
The beauty of the ring light lies in its versatility, accessibility, and ability to elevate virtually any creative or professional endeavor. Whether you’re a content creator looking to upgrade your production value, a makeup enthusiast striving for precision, or a professional wanting to improve virtual meeting visibility, ring lights are the perfect tool to meet your needs.
By investing time in understanding how to best utilize your ring light—choosing the right size, setting it up correctly, and fine-tuning its settings—you’ll effortlessly achieve high-quality results. No matter the application, the uniform lighting provided by this handy device ensures your work looks polished and professional. So, get started today with your ring light and master the art of impeccable lighting in every shot!

