How To Use A Tripod Mount Ring?
A tripod mount ring is an essential accessory for photographers and videographers who need to achieve balance, stability, and versatility while working with telephoto lenses or heavier camera-lens combinations. Proper use of the tripod mount ring can significantly enhance the quality of your photography or videography while protecting your equipment. In this article, we will discuss the steps to effectively use a tripod mount ring, clarify its importance, and share some practical tips for both beginners and professionals.
What Is a Tripod Mount Ring?

A tripod mount ring (sometimes referred to as a tripod collar) is a specially designed circular ring that attaches to certain types of longer or heavier camera lenses. It provides a dedicated mounting point for a tripod or monopod. This accessory is often found on telephoto and macro lenses because their size and weight, if mounted solely through the camera body, could create an unbalanced setup, potentially damaging the camera's lens mount or causing camera shake.
Rather than attaching your camera to the tripod via its baseplate, the tripod mount ring allows the weight of the camera and lens combo to be distributed more evenly by using the lens itself as the mounting point. This not only helps prevent potential damage to your equipment but also improves stability and allows for easier transitions between horizontal and vertical orientations while maintaining balance.
Why Use a Tripod Mount Ring?

Before diving into its usage, let's first discuss why you might need a tripod mount ring in your photography toolkit:
1. Improved Balance and Stability: Long and heavy lenses, such as 70-200mm zooms or 300mm fixed lenses, can cause an imbalance if mounted on a tripod through the camera body alone. The tripod mount ring centers the setup’s weight for optimal stability.
2. Minimized Risk of Camera or Lens Damage: Using a tripod mount ring reduces stress on the camera’s lens mount, which could otherwise bend or break under the sustained weight of a heavy lens.
3. Smooth Orientation Adjustments: Many tripod mount rings have a rotating mechanism that allows the lens and camera to rotate smoothly while mounted. This is particularly useful for switching between landscape and portrait orientations without having to readjust the tripod itself.
4. Better Handling of Long Exposure Shots: For long exposure photography styles like astrophotography or night photography, achieving perfect stability is crucial. A tripod mount ring helps reduce vibrations, enabling sharper images.
5. Essential for Macro and Wildlife Photography: In fields like macro and wildlife photography, where precision and stability are vital, a tripod mount ring is indispensable.
Steps to Use a Tripod Mount Ring

Here’s a step-by-step guide on how to correctly use a tripod mount ring to achieve the best results:
1. Attach the Mount Ring to the Lens
- Locate the tripod mount ring that corresponds to your lens model. Some lenses come with an integrated tripod collar, while for others, you may need to purchase one separately.
- Open the clamp on the mount ring (most have a screw or latch that loosens the ring).
- Slide the tripod mount ring onto the wider part of the lens barrel. Align the ring so it is nearest to the lens’s center of gravity, usually about midway down its length.
2. Secure the Mount Ring
- Adjust the tripod mount ring so that the mounting foot points directly downward when the camera is upright.
- Tighten the screw or latch on the tripod mount ring to lock it in place. It should be snug enough that there’s no play, but avoid overtightening to prevent damage to the lens or ring.
3. Mount the Lens and Camera to the Tripod
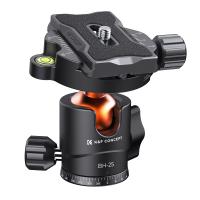
- With the tripod mount ring securely attached to the lens, attach the mounting foot of the ring to your tripod or monopod’s quick-release plate. For best results, use an Arca-Swiss-compatible quick-release plate, as it allows for precise adjustments and security.
- Tighten the quick-release plate firmly to prevent any shifting or wobble.
4. Balance the Setup on the Tripod
- Once mounted, check the setup’s balance. A properly balanced camera-lens combination should not tip forward or backward. If unbalanced, loosen the mount ring slightly and adjust its position on the lens until you find the ideal center of gravity.
- Tighten the tripod mount ring once the balance is correct.
5. Adjust the Camera’s Orientation
- To switch between portrait and landscape modes, loosen the rotating knob on the tripod mount ring if available. Rotate the lens and camera to the desired orientation, then tighten the knob to lock it in place.
- If you’re doing this adjustment during a shoot, always check that the quick-release plate and mount ring are securely tightened before continuing.
6. Make Use of Fine Adjustments
- For telephoto and macro photography, even the tiniest movements can disrupt framing. Consider using a tripod head that supports fine adjustment knobs for panning and tilting movements to make subtle changes in composition.
Practical Tips for Using a Tripod Mount Ring

Here are some additional tips to maximize the utility of your tripod mount ring:
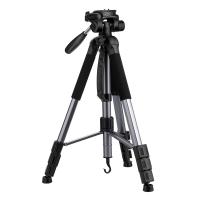
1. Test Stability Before Shooting: If you’re shooting outdoors on uneven surfaces, test the tripod for wobbling before committing to a shot. Adjust the tripod legs as needed to ensure solid footing.
2. Combine with a Gimbal Head for Wildlife Photography: A gimbal head offers smooth motion control, making it ideal for tracking birds or moving wildlife when paired with a tripod mount ring.
3. Keep the Ring Lubricated: If the rotating mechanism of your tripod mount ring becomes stiff over time, apply a small amount of camera-safe lubricant to keep it smooth and responsive.
4. Ensure Compatibility: Not all tripod mount rings are universal. When purchasing one for your lens, ensure it matches the exact model to avoid fitment issues.
5. Practice Lens Swaps Safely: If you need to switch between lenses during a shoot, always detach the lens from the tripod and camera before removing the mount ring – this prevents accidental drops.
Common Use Cases for a Tripod Mount Ring
Understanding its applications can highlight why a tripod mount ring is such a valuable tool:
- Nature and Wildlife Photography: Capturing distant subjects like birds or wildlife often involves telephoto lenses. A tripod mount ring makes these lenses easier to manage, especially for long shoots.
- Sports Photography: Sports photographers using long lenses can reposition their lens quickly between shots thanks to the rotating feature of the mount ring.
- Portrait Photography: The ring allows for seamless orientation changes between horizontal and vertical framing without disrupting the composition.
- Macro and Close-Up Photography: Precision is key in macro photography, and having the lens as the tripod’s balance point ensures maximum stability for tiny adjustments.
- Astrophotography: When pointing a camera skyward using a telephoto or zoom lens, a properly mounted setup minimizes shake and helps achieve pin-sharp results in long exposures.
A tripod mount ring is a must-have accessory for any photographer or videographer working with large, heavy lenses. By understanding how to properly use one, you can greatly improve the stability of your setup, protect your equipment from unnecessary strain, and simplify adjustments during a shoot.
Following the steps outlined in this article and implementing the practical tips shared will ensure that you maximize the performance and longevity of your photography gear. Whether you’re a seasoned professional or an enthusiastic hobbyist, mastering the use of this versatile tool will elevate your creative possibilities and help you capture sharper, more professional-quality images and footage.

