How To Use A Tripod For Camera?
Mastering the use of a tripod is an essential skill for any photographer or videographer aiming to improve the sharpness, precision, and overall quality of their work. Whether you're an amateur hobbyist capturing landscapes or a professional shooting a time-lapse sequence, your tripod can become one of your most reliable tools. A tripod is more than just a camera stand – it’s a fundamental piece of equipment that can expand the creative possibilities of your photography. In this article, you will learn not only how to use a tripod properly but also tips for maximizing its potential to elevate your photography and videography.
What is a Tripod and Why Use One?
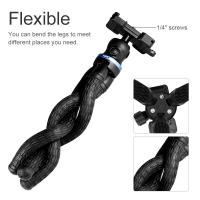
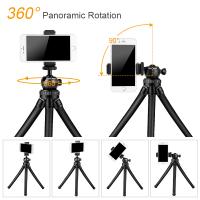
A tripod is a three-legged support system designed to stabilize your camera. The basic components include the legs, the head (which attaches to your camera), and often various adjusters to modify height and angle. There are numerous reasons why using a tripod can significantly benefit your craft:
1. Stability: A tripod provides stability and eliminates camera shake, especially in low-light conditions or long-exposure photography.
2. Composition: It allows you to precisely frame your subject, giving you ample time to focus on composition without the pressure of holding your equipment steady.
3. Versatility: Tripods are ideal for diverse applications, including landscapes, astrophotography, time-lapse videos, macro photography, and portraiture.
4. Professionalism: A tripod exudes a professional approach and ensures consistent quality in your shots.
However, if not used correctly, even the best tripod can lead to missed creative opportunities or subpar images. It’s crucial to understand its mechanics and techniques for optimal effectiveness.
---
Step-by-Step Guide: How to Use a Tripod
Below is a structured process to help you make the most out of your tripod.
1. Choose the Right Tripod
Before you set up your tripod, ensure you’ve selected the right one for your needs. Consider these key factors:
- Weight Capacity: Ensure that your tripod can support both your camera and any additional gear like lenses, flashes, or filters.
- Height Requirements: Look for one that reaches eye level when fully extended without needing excessive bending or strain.
- Portability: If you travel frequently, consider a lightweight model.
2. Extend and Adjust the Legs Correctly
Improper leg extension can reduce stability and compromise your camera’s safety. Follow these guidelines:
- Start with the Thickest Sections: Extend the thicker, sturdier leg sections first, as they provide more stability compared to the thinner bottom sections.
- Angle the Legs for Stability: Most tripods allow you to change the leg angles. Adjust them based on your shooting location. For uneven terrain, spread the legs wider to lower the center of gravity.
- Match the Surface: On soft terrain, push the tripod legs firmly into the ground or use spiked feet (available on some tripod models). For indoor or smooth surfaces, ensure the rubber feet are secure to prevent slipping.
3. Level Your Tripod
Many tripods have a built-in bubble level to ensure proper alignment. Keep an eye on this level as you adjust the leg lengths to ensure your camera is positioned evenly. An uneven tripod can lead to skewed horizons, especially in landscape or architectural photography.
4. Attach Your Camera Securely
Most tripods use a quick-release plate or a screw mount to attach the camera. Here's how to do it:
- Screw-In or Lock-In Tight: Attach the camera securely using the mounting plate or screw to ensure it doesn’t wobble or fall.
- Double-Check Stability: After attaching the camera, gently shake the setup to confirm it’s snugly fixed.
5. Adjust the Tripod Head
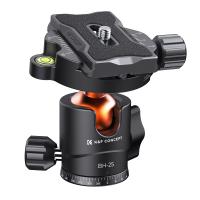
Tripod heads come in various types, such as ball heads, pan-tilt heads, and gimbal heads. Adjusting the head allows you to position the camera more precisely. For instance:
- Use a ball head for quick adjustments in multiple directions.
- A pan-tilt head is ideal for controlled horizontal or vertical movements.
Experiment with your tripod head’s movement and locking mechanisms to learn how they affect your shots.
6. Compose Your Shot
With the camera firmly mounted, pay attention to your composition. Since you’re not holding the camera, you have the freedom to experiment. Utilize tools like the live-view screen, focus peaking, or a grid overlay to refine your framing.
7. Use a Remote Shutter Release or Timer
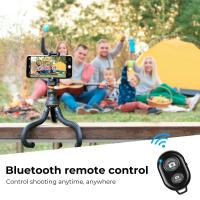
To eliminate camera shake when pressing the shutter button, use a remote shutter release, cable release, or your camera’s self-timer. This is particularly important for long exposure shots, macro photography, or when working with telephoto lenses.
8. Adjust for Wind or Vibrations
Outdoor conditions, such as wind, can cause noticeable vibrations. To counteract this:
- Use a Weighted Bag: Many tripods come with a central hook. Attach your camera bag or a weighted object for extra stability.
- Lower the Tripod Height: Reducing height minimizes the impact of wind.
- Shield the Tripod: Position your body or a portable windbreak to shield the tripod.
---
Tips for Maximum Efficiency with Your Tripod
1. Practice Setting Up Quickly
The ability to set up and break down your tripod efficiently comes with practice. Familiarize yourself with the locking mechanisms, adjustments, and mounting system so you don’t waste time on location.
2. Experiment with Angles and Heights
Using a tripod doesn’t mean sticking to static shots. Explore unique perspectives by:
- Shooting from very low angles, close to the ground.
- Experimenting with extreme tilt angles for dynamic compositions.
- Extending only two legs and using support from a wall or ledge for creative framing.
3. Clean and Maintain Your Tripod
Regular maintenance ensures your tripod remains functional and sturdy over time:
- Clean After Outdoor Use: Dust, sand, and water can compromise the locking mechanisms. Use a soft cloth and compressed air for cleaning.
- Check for Loose Parts: Tighten any screws or clamps before each shoot.
- Store Properly: Keep your tripod in a dedicated bag when not in use to protect it from damage.
4. Use Specialized Accessories
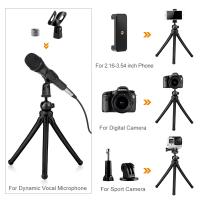
Many tripod brands offer accessories like center-column extenders, smartphone adapters, or levelers to expand functionality. Consider purchasing these to suit your shooting style.
---
Common Mistakes to Avoid
1. Overextending the Center Column
Extending the center column too far may destabilize the tripod. If you need more height, it’s better to extend the legs fully.
2. Not Using a Level Surface
Even a slight slope can cause uneven or tilted images. Always check the bubble level before hitting the shutter.
3. Ignoring the Environment
Set your tripod based on your surroundings. For example, on soft ground, push the legs deeper into the terrain for better grip. On delicate surfaces, consider using protective rubber soles.
4. Forgetting to Lock Adjustments
Always double-check that all legs, knobs, and locks are securely fastened. A loose setup can result in a damaged camera or blurry images.
---
Benefits of Mastering Tripod Use
The advantages of using a tripod extend beyond stability and precision. By incorporating it into your workflow, you’ll:
- Gain more control over your creative process.
- Produce sharper, clearer images, especially in challenging conditions.
- Elevate your work to a professional level, impressing clients or building your portfolio.
---
A tripod is a critical tool that every photographer should learn to use skillfully. From capturing tack-sharp images to enabling advanced techniques like HDR photography or panoramic stitching, its applications are vast. Although it may initially seem cumbersome to carry and set up, the benefits far outweigh the inconveniences. With practice and attention to detail, you can unlock the full potential of your tripod, enhancing your artistry and technical proficiency. Remember to treat it as an investment—not just in equipment, but in your growth as a visual storyteller. So grab your tripod, head outdoors, and start exploring new creative possibilities today!


