How To Use A Monopod For Bird Photography?
Mastering the Art of Using a Monopod for Bird Photography
Bird photography is a unique and rewarding niche in the world of photography, combining technical skill with genuine appreciation for the natural world. However, capturing the beauty of these elusive and often unpredictable creatures poses certain challenges. Chief among them is the need to balance mobility and stability. While traditional tripods offer unparalleled stability, they are cumbersome in the field, especially when tracking fast-moving subjects. Enter the monopod.
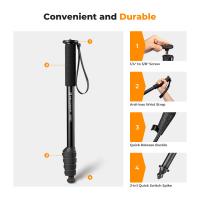
A monopod—a single-legged support for your camera—strikes the perfect balance between stability and portability, making it an indispensable tool for bird photographers. If you’re eager to elevate your bird photography skills and keen to understand how to make the most of your monopod, this guide will cover everything you need to know.
---
What Is a Monopod and Why Use One for Bird Photography?
A monopod is essentially a camera support with one leg, designed to reduce camera shake and make holding your camera setup easier over long periods. Unlike tripods, which offer full stabilization but are relatively stationary, monopods give you stability while maintaining flexibility. For bird photographers, who frequently move in pursuit of their subjects, this advantage is invaluable.
Here’s why a monopod is a great tool for bird photography:
1. Improved Stability: Telephoto lenses, frequently used in bird photography, are heavy, and even minor hand movements can cause blur. A monopod reduces this shake.
2. Portability and Speed: A monopod is light, easy to carry, and can be set up almost instantly, allowing for quick positioning to capture fleeting moments.
3. Longer Shooting Sessions: By shifting the weight of the camera and lens from your arms to the monopod, you can shoot for longer without fatigue.
4. Flexible Movement: Birds are unpredictable, and a monopod allows you to pivot, tilt, or track their movements easily, unlike the more rigid tripod.
---
Step-by-Step Guide to Using a Monopod for Bird Photography
The key to effective monopod use lies in understanding its mechanics and adapting its versatility to your shooting environment. Here’s a breakdown of how to use a monopod for bird photography:
1. Set Up the Monopod Correctly
- Choosing the Right Height: Extend the monopod to support your camera setup at eye level or slightly above. Remember, you’ll likely tilt the lens at angles, so make sure the height feels comfortable for long usage.
- Lock the Sections: Once you extend the monopod legs, securely lock the joints to avoid unintended collapse.
- Attach the Camera or Lens: Use a quick-release plate or a mounting system to ensure the camera is securely attached to the monopod head. Note that for larger telephoto lenses, attaching the monopod to the lens’s tripod collar ensures better balance.
2. Master the Monopod Techniques
- Three-Point Contact Method: To maximize stability, adopt a three-point stance. Place the foot of the monopod on solid ground, press the padded grip of the monopod against your body (e.g., waist or chest), and firmly plant your legs in a wide stance. This creates a stable positioning triangle.
- Lean Slightly Forward: By angling the monopod slightly forward rather than keeping it perfectly vertical, you reduce vibrations caused by your movements.
- Use Your Hand as Extra Support: Rest one hand over the monopod head or camera body for added stability while the other hand controls the shutter button.
3. Track Moving Subjects
- Bird photography often involves tracking birds in flight or motion. With a monopod, you can pivot smoothly by rotating the monopod on its axis.
- Practice “panning” techniques to follow the bird as it flies across the frame. To execute smoother pans, keep your movements fluid and practice finding and staying on your subject in real-time.
4. Pair with a Gimbal or Tilt Head
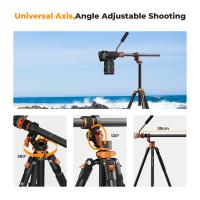
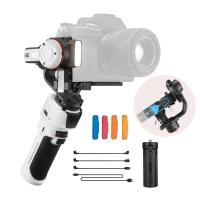
- A standard monopod head provides basic adjustment angles, but pairing your monopod with a gimbal or tilt head can drastically improve your ability to angle the camera upwards—perfect for birds perched in trees or flying overhead. Gimbals also offer better precision for panning and tracking movement.
5. Use the Right Base
- Consider using a monopod with a “tilt base” or mini tripod feet. These models provide additional support without sacrificing flexibility, giving you better stability on uneven terrain (a common occurrence in outdoor bird photography).
6. Adapt to the Environment
- Soft Ground: When using a monopod on soft terrain, such as grass or sand, keep an eye on stability. Some monopods have pointed feet attachments, which are useful for digging slightly into soft earth.
- Uneven Surfaces: In areas with rocks or inclines, adjust the angle of the monopod to maintain stability without compromising flexibility.
---
Pro Tips for Success Using a Monopod
Understanding the mechanics of a monopod is step one. Mastery comes with experience, deliberate adjustments, and keeping a few helpful tips in mind:
1. Practice Before Going Into the Field: If you’re new to monopod use, practice setting it up and shooting with it at different angles before heading out on a birding adventure. The more comfortable you are, the quicker you’ll react to fleeting moments.
2. Choose the Right Monopod for Your Gear: Lightweight monopods work well for smaller camera setups, but if you’re shooting with a heavy DSLR or mirrorless camera paired with a telephoto lens, invest in a heavy-duty carbon fiber monopod.
3. Keep the Monopod Ready at Travel Length: When you’re moving between areas, collapse the monopod to a comfortable length that’s portable but ready for quick deployment.
4. Experiment with Shutter Speeds and Camera Settings: While the monopod reduces shake, mastering technique ensures sharp results. Pair it with faster shutter speeds (especially for flying birds) and vibration reduction (if your lens or camera body supports it).
5. Blend Stabilization Techniques: If possible, use the monopod in conjunction with in-lens or in-body image stabilization (IS/IBIS) for even sharper images.
---
Common Mistakes to Avoid
Even experienced photographers occasionally make errors in the field. Avoid these common mistakes to ensure smooth use of your monopod:
- Relying Too Heavily on Stability: While a monopod provides stability, remember that it’s not a tripod. Adjust your body posture and use proper hand-holding techniques for sharp shots.
- Overextending the Monopod: Resist the urge to fully extend all sections, especially in high-wind conditions, as it makes the monopod less stable.
- Ignoring Maintenance: Over time, dirt and debris can accumulate in the monopod's sections or locking mechanisms. Regular cleaning ensures it performs optimally.
---
The Benefits You’ll Reap
Once you learn how to effectively use a monopod, you’ll notice a dramatic improvement in your bird photography. Whether you're capturing a brightly colored kingfisher perched by the water or an eagle soaring high above the treetops, the monopod will become a valuable companion, enabling you to freeze the beauty of nature with precision.
Most importantly, the lightweight design means you’ll never hesitate to take it along, ensuring you’re always ready for spontaneous photographic opportunities.
---
Conclusion
To excel in bird photography, technical skill and the right equipment must go hand in hand. A monopod simplifies the challenge of stabilizing heavy camera setups while providing the agility needed to track dynamic bird movements. By using it effectively—adjusting techniques based on the environment and subject—you can bridge the gap between vision and execution. Mastery takes time, but with practice and dedication, your monopod will become an extension of yourself as you document the beauty and wonder of the avian world.
So, the next time you head into the wild with your camera in hand, don’t forget to pack your monopod. It might just be the vital tool that transforms your bird photography from good to great. Happy shooting!


