How To Take Pictures Without Tripod?
Capturing stunning photographs often requires steady hands, a clear vision, and sometimes, the right tools. One such tool that photographers frequently rely on is the tripod, known for its ability to stabilize the camera and allow for sharper, noise-free images. However, not every situation allows for tripod usage. Whether you're traveling light, caught in spontaneous moments, or simply don't own a tripod, it's entirely possible to create gorgeous, professional-looking photos without one. In this article, we'll explore practical tips and techniques to help you revolutionize your handheld photography game. From leaning on creative stabilization methods to making the most of your camera's settings, these suggestions will keep you snapping exceptional images no matter the circumstances.
Why You Might Shoot Without a Tripod
There are numerous scenarios where you might need alternatives to a tripod. For instance:
1. Portability: A tripod can be bulky and inconvenient, especially while traveling.
2. Budget Constraints: Beginners or hobbyists may not want to invest in a tripod immediately.
3. Spontaneity: Some of the best shots occur unexpectedly, in places where setting up a tripod simply isn't practical.
4. Restricted Areas: Certain locations, such as museums or public spaces, may prohibit the use of tripods due to safety or logistical concerns.
Knowing how to mitigate camera shake and successfully stabilize your camera when a tripod isn't an option is an essential skill for photographers of all levels.
Techniques to Photograph Without a Tripod
1. Master Your Hand-holding Technique
It's crucial to hold your camera as steadily as possible to minimize shake:
- Use Both Hands: Hold the camera with your right hand gripping the body and shutter button, while supporting the lens with your left hand.
- Tighten Your Core: Keep your posture stable by standing with your feet shoulder-width apart and tucking your elbows close to your body.
- Breathe Slowly: Control your breathing to avoid movement; exhale gently when pressing the shutter button.
This foundation ensures you're providing maximum stability for your camera, even without a tripod.
2. Use Walls, Railings, or Other Surfaces
Look for the environment around you to double as a makeshift tripod:
- Leverage Stationary Objects: Rest your camera on flat, immovable surfaces such as tables, fences, or a stack of books.
- Walls or Poles for Support: Lean against walls, trees, or poles to steady yourself when taking the shot.
- Camera-Strap Technique: Wrap a camera strap tightly around your neck or arm for added tension, reducing motion.
These strategies work particularly well for dimly lit environments, providing the stabilization needed for longer exposures.
3. Shoot on Higher Shutter Speeds
One of the easiest ways to prevent blur while shooting handheld is to adjust your shutter speed:
- The Reciprocal Rule: Use a shutter speed that's the inverse of your focal length (e.g., for a 50mm lens, use at least 1/50 seconds).
- Fast-Moving Scenes: For sports or action photography, prioritize a shutter speed of 1/1000 seconds or higher.
- In-Lens Stabilization (if available): Cameras and lenses with built-in stabilization allow for reducing shutter speed without compromising sharpness.
When combined with proper hand-holding techniques, shorter shutter speeds help eliminate small shakes and vibrations.
4. Take Advantage of your Camera’s Built-In Features
Modern cameras include tools that can assist in low-light or dynamic scenarios:
- Image Stabilization (IS): Cameras and lenses featuring IS or vibration reduction (VR) are tailored to counteract small hand movements.
- Burst Mode: Shoot in continuous mode to take multiple photos in quick succession—odds are, at least one of these images will be sharp.
- Touch Shutter/Remote App: Use your camera's touch-to-shot function or a smartphone app to remotely capture the image, avoiding the need to press the shutter release yourself.
These features, often overlooked, are indispensable when stability is a concern.
5. Optimize Your Camera’s ISO and Aperture Settings
Adapting your settings to the environment ensures higher-quality images:
- Increase the ISO Sensitivity: While increasing ISO may introduce noise, modern cameras can produce cleaner results at higher ISO.
- Open the Aperture: A wider aperture (smaller f-number) allows more light into the lens, which compensates for the lack of stability when shooting handheld.
- Shoot in RAW: RAW files retain more detail, making post-processing corrections for noise or sharpness easier.
Striking the right balance between these settings ensures minimal compromise on image quality, even in tricky conditions.
6. Use a Monopod or Alternative Gear
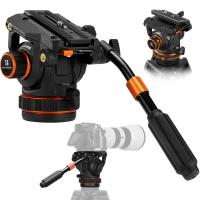
Although not exactly a tripod, a monopod can be a wonderful substitute. It's lighter, more compact, and easier to transport while still offering some stability. Similarly:
- Bean Bags: These small, portable bags filled with beans, rice, or foam can act as a stabilizing surface for your camera in a pinch.
- Clamps and Mounts: Small clamps attach your camera to unusual surfaces, like railings or bike handles, offering creative stabilization methods.
Keep one of these lightweight solutions in your camera bag for an easy alternative.
7. Rely on Natural Light
Lighting plays a critical role in photography, especially when stabilizing the camera is challenging:
- Shoot During Golden Hour: Soft light offers a more even exposure, reducing the need for detailed post-processing.
- Position Near Light Sources: Indoors, get closer to windows or other light sources to keep ISO settings manageable.
In well-lit setups, you can comfortably shoot crisp images without the help of a tripod.
8. Experiment with Creative Angles
When you don’t have a tripod, embrace different perspectives:
- Shoot from Ground Level: Place your camera directly on the ground or balance it on a backpack for unique low-angle shots.
- Use a Self Timer: Activate the self-timer or a remote shutter release to prevent the camera from shifting during button presses.
- Experiment with Handheld Long Exposures: Though challenging, a slightly slow shutter speed paired with stabilization techniques can produce creative motion blur effects.
This fosters a mindset of ingenuity, urging you to think outside the box and elevate your photography style.
9. Post-Processing for Rescue
Once you've taken the photo, minor imperfections can often be corrected in editing software:
- Crop for Stability: Slight cropping can eliminate blurry or distorted edges caused by unsteady shooting.
- Adjust Sharpness and Noise: Use tools like Lightroom, Photoshop, or their alternatives to increase sharpness and reduce noise in post-production.
- Stitch Panorama Shots: If individual handheld photos don’t cover enough of the scene, stitch images together digitally to create ultra-wide compositions.
Post-processing complements these techniques, helping you refine your captures and achieve the desired professional look.
Conclusion: Eye on the Commonsense Tools and Techniques
While tripods are invaluable for certain photographic challenges, they’re far from indispensable. Learning to work with what you have—your hands, your camera’s settings, your surroundings, and even some basic gear—can unlock a new dimension of creativity in your photography. Whether you’re capturing fleeting moments during a trip or experimenting with handheld long exposures, the absence of a tripod need not restrict the quality of your shots. Instead, treat it as an opportunity to grow your technical skills and develop a versatile photography toolkit. Eventually, you'll find that some of your most striking and memorable shots were captured precisely because you adapted to the dynamic spontaneity of shooting tripod-free.
In the end, photography isn’t fundamentally about the tools you use; it’s about the vision behind the camera. By refining your techniques and experimenting with your surroundings, you can achieve remarkable photo results that tell vivid stories—no tripod required.


