How To Stabilize Iphone Video Without Gimbal?
In the realm of videography, stabilizing footage has remained an essential aspect of capturing professional-grade content. While gimbals provide one of the most reliable solutions for stabilization, they aren’t always accessible or practical for everyday use. Fortunately, with advancements in technology and a bit of creativity, you can achieve smooth and steady video on your iPhone without resorting to a gimbal. Whether you’re a content creator, filmmaker, or simply someone who enjoys capturing life’s moments, this article will introduce you to practical methods and tools to stabilize your iPhone video without compromising on quality.
1. Utilize iPhone's Built-In Optical and Digital Stabilization Features
Modern iPhones come equipped with advanced stabilization technologies, such as Optical Image Stabilization (OIS) and Electronic Image Stabilization (EIS). OIS is hardware-based and works by adjusting for movement in real-time using the phone’s lenses, while EIS stabilizes video digitally by processing the footage post-capture. Both technologies make a significant difference in minimizing shakiness.
To maximize these features:
- Ensure your iPhone is updated to the latest iOS version: Software updates often include enhancements to video stabilization.
- Choose the right camera mode: In most cases, filming at a lower resolution or frame rate (e.g., 1080p at 30fps) ensures greater stability since these settings demand less processing power.
Keep in mind that these features are automatic, so you don’t have to manually enable them. Simply take advantage of the advanced optics available on your iPhone by holding your device as steady as possible during recording.
2. Adopt a Stable Shooting Posture
Your own body can serve as the best “stabilization equipment” when shooting video. Following proper techniques can significantly reduce shakiness and improve overall smoothness.
Here’s how:
- Use both hands: Always hold your iPhone with two hands instead of one. Grip it firmly but not too tightly.
- Keep your elbows close to your body: Tucking your elbows in creates a solid anchor, reducing arm movement.
- Engage your core: A stable core provides a strong foundation for holding your phone steady.
- Bend your knees slightly: If you’re shooting while standing, bending your knees acts as a natural shock absorber, allowing smoother movements.
If you’re walking while filming, try a slow, deliberate "heel-to-toe" stepping motion. This lessens the impact of each step on your footage.
3. Use Third-Party Stabilization Apps
Sometimes, built-in stabilization isn’t enough, particularly for dynamic or high-motion shots. Luckily, third-party apps can take your footage to the next level by applying stabilization algorithms post-capture.
Recommended apps:
- Adobe Premiere Rush: With its intuitive interface, this app offers powerful stabilization tools tailored for mobile devices.
- LumaFusion: Popular among professionals, LumaFusion allows in-depth control over stabilization and other editing features.
- Emulsio: Specifically designed for smartphone footage, Emulsio efficiently removes jitters and corrects shaky clips.
These apps allow you to stabilize footage after filming, offering a cost-effective alternative to using a gimbal.
4. Leverage Everyday Objects for Stability

If you don’t have professional equipment, everyday items can serve as makeshift stabilization tools. Here are a few innovative ways to stabilize your iPhone video using common objects:
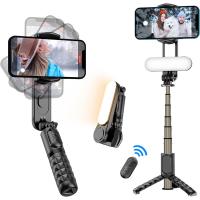
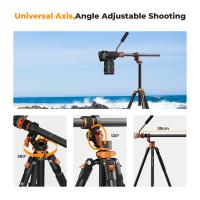
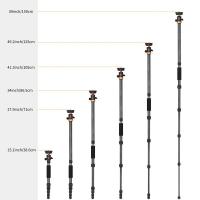
- Tripods and monopods: While a tripod might seem obvious, even the smallest tabletop tripod can make a huge difference. A monopod can act as a stabilizer as well, especially when walking.
- Books or cushions: If filming indoors, stack books or use soft objects to prop up your phone for a steady shot.
- Rubber bands: If you have an additional stick (like a broomstick), wrap rubber bands around your phone and the stick. This setup reduces vibrations while providing a makeshift stabilizing handle.
Getting creative with household items can save you time and money while still achieving remarkable results.
5. Master the Art of Smooth Hand Movements
Manual stabilization using your own hands requires patience and practice. Knowing how to move smoothly is a valuable skill for smartphone videography. Break the motion of your hands into deliberate, slow movements to avoid unwanted jerks or jolts. Here are a few tips:
- Practice panning and tilting slowly: Sudden or jerky camera movements are a primary cause of choppy footage. Improve your coordination by rehearsing slow pans and tilts.
- Use your surroundings for leverage: When available, lean against walls or place your hands on stable surfaces for support.
- Control your breathing: Unintended body movements caused by heavy breathing can introduce unnecessary shakiness. Take slow, deep breaths and exhale gently while filming.
Mastering steady hand movements alone can dramatically enhance the stability and cinematic quality of your footage.
6. Shoot in Slow Motion for Additional Stability
Slow-motion video has the unique advantage of making movements appear more fluid and stable. By filming in slow motion, you can disguise small shakes or inconsistencies, giving the footage a polished appearance. On your iPhone, simply access the "Slo-Mo" mode in the camera app and adjust the recording speed as needed.
This method works particularly well for capturing dynamic actions like sports, nature, or events where achieving perfect steadiness is difficult.
7. Crop and Stabilize in Post-Production
Another method to stabilize video is to rely on post-production software that allows cropping and stabilization. Most editing tools have stabilization features that work by slightly cropping the edges of your frame and applying algorithms to smooth movements.
Top editing software includes:
- iMovie (free for iPhone users): iMovie offers basic yet effective stabilization tools accessible to beginners.
- Final Cut Pro and Adobe Premiere Pro: Ideal for advanced users, these programs give you precise control over stabilization settings.
- DaVinci Resolve: Known for its professional-grade tools, this software also has powerful stabilization options.
While this method requires additional time, it can significantly elevate the quality of your video, especially for projects that demand perfection.
8. Balance Lighting and Frame Rate
It’s essential to capture videos under optimal lighting conditions to reduce motion blur and enhance stabilization. Shooting in well-lit environments ensures that your iPhone’s camera can maintain higher shutter speeds, which is crucial for smooth footage.
Additionally, consider the frame rate. A frame rate of 60 fps (frames per second) makes for sharper video when shooting handheld, as it captures more frames within the same period. This reduces the jittery effect caused by quick movements.
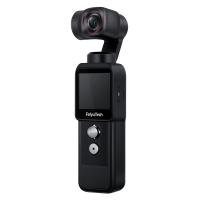
9. Use Phone Accessories Like Handheld Stabilizers
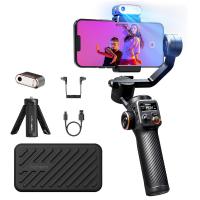
If you're looking to step up from DIY solutions without committing to a full gimbal system, lightweight handheld stabilizers for smartphones can be a great compromise. These accessories are affordable and significantly improve handheld footage by damping vibrations and offering ergonomic grips.
Popular options include:
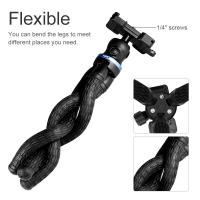
- Joby GorillaPod GripTight: Known for its flexible legs, this tripod doubles as a handheld stabilizer, providing versatility in shooting angles.
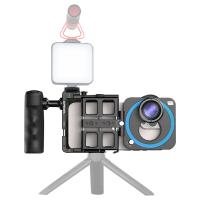
- Beastgrip Pro Stabilizer Rig: Perfect for iPhone users who want a hybrid solution offering stabilization and customization for additional lenses or microphones.
Such tools strike a balance between cost-effectiveness and functionality.
10. Experiment with Editing Techniques for Dynamic Stability
Sometimes, the challenge isn’t just stabilizing the video but making it visually engaging. Modern editing techniques, like reframing and speed ramps, can create the illusion of stability while turning ordinary footage into cinematic masterpieces. Don’t shy away from cropping or trimming clips to cut out shaky moments.
Stabilizing iPhone video without a gimbal is entirely achievable with the right combination of techniques, tools, and apps. From utilizing built-in stabilization features to leveraging creative solutions such as household objects, it’s possible to produce professional-looking footage without breaking the bank. By understanding the fundamentals of steady shooting and taking advantage of stabilization options in both shooting and post-production, you can elevate the quality of your videos to compete with those captured on specialized equipment.
The key to success is practice and experimentation. Embrace these methods, adapt them to your unique filming needs, and watch as your footage transforms into perfectly stabilized content that conveys your vision flawlessly.

