How To Set Up Wireless Lavalier Microphone?
Setting up a wireless lavalier microphone can seem daunting at first, especially if you're new to audio equipment. However, understanding the steps will make the process simple and allow you to achieve optimal audio clarity for your video productions, live events, or presentations. In this article, we'll walk you through the key steps involved in setting up and optimizing a wireless lavalier microphone system, ensuring you get the best performance out of your equipment.
---
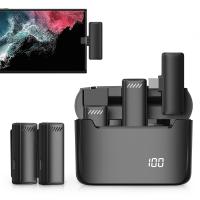
Understanding the Components of a Wireless Lavalier Microphone System
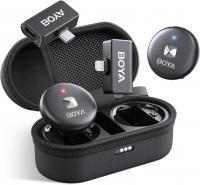
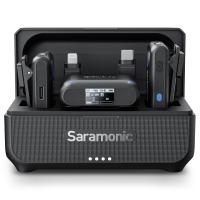
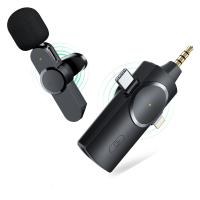
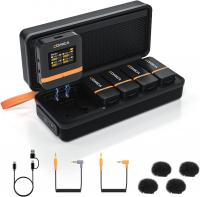
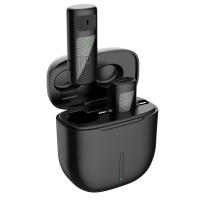
Before diving into the setup process, it's essential to familiarize yourself with the components involved. A typical wireless lavalier microphone system includes:
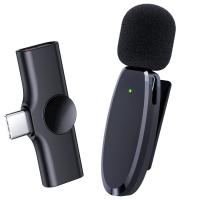
1. Lavalier Microphone (Clip-on Mic): This small, discreet microphone clips directly onto your clothing near your mouth, capturing audio clearly and effectively.
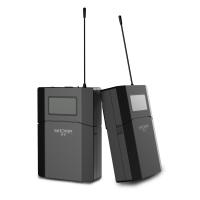
2. Bodypack Transmitter: This portable device transmits the audio signal from the lavalier microphone to the receiver. It is typically worn on the user's belt or in a pocket.
3. Wireless Receiver: This device receives the audio signal sent by the bodypack transmitter and sends it to the audio system or recording device.
4. Audio Output Cable: This cable connects the receiver to an audio system, camera, or recorder.
5. Power Source: Both the transmitter and receiver require power, often provided by batteries or a power adapter.
It’s crucial to ensure that all these components are included in your setup and are in good working order. Missing or malfunctioning components can lead to connectivity issues or poor sound quality.
---
Step 1: Check Compatibility and Frequency Settings
One of the most critical steps when setting up a wireless lavalier microphone system is ensuring compatibility between the equipment components and their frequency settings.
1. Equipment Compatibility: Before starting, confirm that the transmitter and receiver are from the same manufacturer and frequency range. Mixing devices from different brands or frequency bands can cause communication failures.
2. Frequency Coordination: Wireless microphones operate using specific frequency bands (UHF or VHF). Choose a frequency that avoids interference from other devices, Wi-Fi routers, or environmental signals. Many newer systems come with automatic frequency coordination features, which simplify this process.
3. Frequency Restrictions: Be aware of local regulations regarding wireless microphone frequencies, as some bands may be restricted in your region.
---
Step 2: Power Up and Test the Devices
Once you're ready to begin the setup, start by powering up your equipment.
1. Install Batteries: Insert fresh batteries into both the bodypack transmitter and receiver. Rechargeable batteries are a cost-effective and eco-friendly option, but ensure they’re fully charged.
2. Power On: Turn on the transmitter and receiver. Look for indicator lights or displays to confirm they are active.
3. Sync the Devices: If your system supports automatic syncing, press the designated sync button on both the transmitter and receiver. This ensures they operate on the same frequency. For manual systems, refer to the user manual and set both components to the same channel or frequency manually.
4. Check Signal Strength: Most receivers display a signal strength indicator. Verify that the transmitter's signal is reaching the receiver with sufficient strength and clarity.
---
Step 3: Position and Connect the Lavalier Microphone
The placement of the lavalier microphone and connections to the bodypack transmitter are crucial for proper sound capture.
1. Clip Placement: Attach the lavalier microphone to the subject’s clothing, typically near the chest area, about 6–8 inches below the chin. Ensure the microphone points toward the speaker's mouth for optimal sound clarity.
- Avoid Obstruction: Make sure the microphone isn’t covered by fabric or jewelry, as this can muffle the sound.
- Reduce Rustling: Secure the microphone cable to prevent rubbing or movement against clothing, which can create unwanted noise.
2. Connect to the Transmitter: Plug the lavalier microphone’s cable securely into the input jack of the bodypack transmitter. Ensure the connection is tight to prevent audio dropouts.
3. Optimize Cable Management: Tuck excess cable neatly, making sure it doesn’t interfere with movement or cause accidental disconnections.
---
Step 4: Connect the Receiver to Your Audio System
The receiver’s role is to deliver the captured audio to your output device, such as a camera, audio mixer, or speaker system.
1. Physical Connection: Use the appropriate audio output cable to connect the receiver to your desired device. Match the type of cable with the input port on your device (e.g., XLR, 3.5mm, or 1/4-inch).
2. Test Audio Levels: Set the output volume on the receiver to an appropriate level to avoid distorted or overly quiet recordings. When connecting to a mixer or camera, ensure their input levels are adjusted accordingly as well.
3. Monitor the Connection: If possible, use headphones or monitoring equipment to listen to test audio to confirm clarity, absence of interference, and the correct volume level.
---
Step 5: Conduct a Sound Check
Before moving forward with any recording or performance, conduct a thorough sound check.
1. Speak Normally: Have the user speak at a typical volume and tone to evaluate the microphone’s sensitivity and clarity.
2. Adjust Gain: Use the gain control on the transmitter and receiver to fine-tune the audio input signal. Avoid clipping or distortion caused by excessively high gain levels.
3. Check for Interference: Listen carefully for any hiss, crackling, or signal dropouts. If interference is detected, change to an alternate frequency channel.
4. Walk-Test the Range: Have the speaker move around the performance or recording area to test the microphone’s transmission range and signal reliability. Wireless systems typically have a limited range of up to 300 feet, depending on the model and environment.
---
Step 6: Secure and Optimize During Use
To ensure seamless operation during your recording or presentation, it’s important to manage the equipment and optimize continually.
1. Fasten the Transmitter: Clip the transmitter securely onto the user’s belt or clothing. Some systems provide a carrying pouch or strap for convenience.
2. Monitor Throughout the Event: If possible, have someone monitor the audio levels and quality periodically to catch and address issues in real time.
3. Spare Batteries: Always have spare batteries or a charger on hand in case the transmitter or receiver loses power during use.
---
Troubleshooting Common Issues
Even with proper setup, issues can arise during use. Here’s how to address some of the most common problems:
1. Audio Dropouts: Check the line of sight between the transmitter and receiver. Objects, walls, or large crowds can cause signal interference. Reposition the receiver or use an antenna accessory to improve signal stability.
2. Excess Noise: If there’s unwanted noise, check for loose connections, ensure the microphone isn't picking up rustling sounds, and confirm that environmental interference is minimal.
3. Low Sound Levels: Verify that the microphone is positioned correctly near the speaker’s mouth and that gain levels on both the transmitter and receiver are properly configured.
4. Battery Drain: Use fresh batteries or switch to a wired lavalier system if power issues persist.
---
Final Thoughts
Mastering the setup of a wireless lavalier microphone doesn’t just improve your audio quality—it ensures your events and recordings maintain a professional level of clarity and reliability. By following the above steps, you’ll be equipped to avoid the common pitfalls associated with wireless audio systems while producing clean and consistent sound. Over time, with experience, you’ll also gain faster troubleshooting skills and a deeper understanding of how to optimize your setup for different environments.
Whether you’re a vlogger, event organizer, or speaker, investing the time to learn how to properly set up a wireless lavalier microphone will enhance the quality of your audio and help you stand out in your field. The road to audio excellence begins with proper preparation, so take these lessons into practice and enjoy the results!

