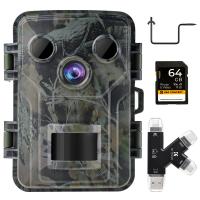
How To Set Up Trail Cameras?
Trail cameras, also known as game cameras, have become an indispensable tool for wildlife enthusiasts, hunters, landowners, and researchers. They offer the ability to monitor wildlife activity, observe animal behaviors, and manage lands effectively without disturbing the natural environment. However, setting up a trail camera properly is crucial for obtaining quality footage and achieving your specific goals, whether for hunting preparation or scientific study. In this article, we’ll break down the essential steps and considerations for setting up a trail camera, ensuring you maximize its performance and utility.
---
Step 1: Choose the Right Location
The first and most critical step in setting up a trail camera is selecting the appropriate location. This can make or break your efforts, as poor placement may result in hours of footage with little to no activity or missed opportunities to capture the intended subjects.
1. Understand the Purpose:
Decide what you want to achieve. If you're a hunter, you may want to place the camera near trails, food sources, or bedding areas where wild game is likely to pass. For wildlife observation, prioritize locations with signs of frequent activity, such as tracks, scat, or rubbing marks.
2. Identify Activity Hotspots:
Look for natural pathways animals use, such as game trails, water sources, or feeding spots. Pay attention to high-traffic areas where animals are more likely to appear consistently.
3. Consider the Angle and View:
The placement site should allow the camera to cover a wide field of view. Avoid obstructing the lens with vegetation, and point the camera at an open area to ensure animals are visible in the frame.
---
Step 2: Choose the Correct Camera Settings
The settings on your trail camera can make a significant difference in the quality of the footage and the likelihood of capturing activity. Spend time configuring the camera to match your specific needs.
1. Photo vs. Video Mode:
Decide whether you want to capture still photos or videos. Photos generally consume less memory and battery life, while videos can provide additional context, such as animal behavior or direction of movement.
2. Adjust Resolution and Sensitivity:
Higher resolution results in clearer images but reduces storage capacity and consumes more battery power. Similarly, setting the camera sensitivity too high may lead to capturing redundant or unintended triggers, such as moving branches.
3. Set the Intervals:
Configure the delay time between captures to minimize duplicates. Depending on your goal, the delay can range from a few seconds to several minutes.
4. Enable Night Mode:
Most trail cameras are equipped with infrared flash or no-glow LEDs for nighttime recording. Ensure these features are activated if you plan to capture nocturnal animals.
---
Step 3: Position the Trail Camera Properly
Proper placement of the trail camera is key to optimizing its effectiveness and capturing high-quality footage.
1. Determine the Height:
Mount your camera about 2–3 feet off the ground to capture medium- to large-sized animals. You can adjust the height based on your target species. For smaller animals, place the camera lower; for taller species like deer or elk, aim a little higher.
2. Use Angles to Your Advantage:
Instead of positioning the camera directly in the line of movement, angle it slightly across the anticipated path. This allows for a longer capture window as the animal enters and exits the frame.
3. Secure the Camera:
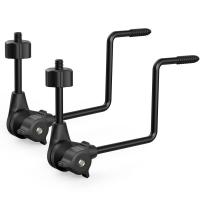
Use the mounting strap provided with the camera to secure it firmly to a tree, post, or other solid structure. For additional security, consider investing in a lockbox or cable lock to prevent theft or damage.
4. Minimize Detection:
Camouflage the camera by using natural surroundings, such as leaves, grass, or bark texture. However, ensure it does not obstruct the lens or sensor. Avoid placing the camera directly under direct sunlight, as it may lead to glare and overexposure.
---
Step 4: Maintain and Test the Camera
A few critical steps during and after installation can ensure your trail camera remains operational and delivers the desired results.
1. Insert High-Quality Batteries:
Trail cameras typically operate for extended periods in remote areas, so reliable batteries are essential. Use high-capacity alkaline or lithium batteries for optimal performance and longevity, especially in cold weather conditions.
2. Use Ample Memory:
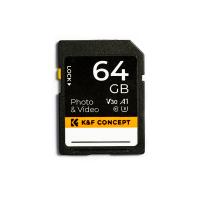
Depending on the device’s specifications, use an SD card with an adequate storage capacity, typically 16GB to 64GB. Check the card’s speed and compatibility with your camera.
3. Run a Test Shot:
After mounting and configuring the camera, test it by walking in front of the sensor to ensure it captures motion as expected. Review the test shots to check lighting, angles, and focus, making adjustments as necessary.
4. Monitor and Rotate:
Regularly check the camera to retrieve footage, replace batteries, or clear memory cards. Adjust locations periodically based on results or seasonal changes in animal movement patterns.
---
Step 5: Avoid Common Mistakes
Even with the best intentions, some mistakes in trail camera setup can yield disappointing results. Avoid these common pitfalls:
1. Obstructed Field of View:
Ensure vegetation, branches, or debris aren’t blocking the lens or motion sensor, as this can result in false triggers or obstructed frames.
2. Incorrect Placement Height:
Setting the camera too high or too low can lead to missing the intended targets. Position it thoughtfully based on the size of the animals you're tracking.
3. Overlooking Sunlight Direction:
Place the camera facing north or south to avoid backlighting or glare, which can cause overexposed or low-quality images.
4. Neglecting Weatherproofing:
Ensure the camera’s housing is properly sealed to protect it from rain, dust, or snow. Many cameras are designed to be weatherproof, but double-check during installation.
---
Extra Tips for Getting the Most Out of Your Trail Camera
- Use Multiple Cameras: Deploy multiple cameras in different locations to cover a broader area and increase your chances of tracking animal activity.
- Keep Scent-Free: Animals have strong senses of smell and may avoid the area if they detect human scent. Wear gloves while handling the camera and avoid leaving lingering odors at the site.
- Analyze Patterns: Review footage over time to identify patterns in animal movement, which can inform hunting strategies or deepen your understanding of wildlife behavior.
- Plan for Seasonal Changes: In different seasons, animals may migrate, shift feeding grounds, or change their activity timing. Adjust your camera locations accordingly.
---
Applications of Trail Cameras
Understanding the diverse applications of trail cameras can help you make the most of your investment:
1. Hunting and Scouting:
Hunters use trail cameras to track game movement, identify patterns, and scout potential blind spots. This ensures targeted preparation and improved success rates.
2. Wildlife Research:
Researchers and conservationists leverage trail cameras to monitor animal populations, track migration, and document rare or endangered species.
3. Land Management:
Farmers and landowners can use trail cameras to assess the presence of pests, predators, or trespassers on their property.
4. Recreational Use:
Enthusiasts can capture captivating images of local wildlife, offering a unique window into nature’s beauty.
---
Conclusion
Trail cameras are versatile tools that enhance our ability to monitor and observe wildlife with minimal intrusion into their natural habitats. Setting one up effectively requires careful attention to location, configuration, placement, and maintenance. By following the best practices outlined in this guide, you’ll not only capture high-quality images and videos but also gain a deeper understanding of the behaviors and patterns of the animals you’re observing. Whether you’re a hunter, researcher, land manager, or wildlife enthusiast, a properly installed trail camera is your gateway to a richer connection with the natural world.

