How To Plug In Outdoor Security Camera?
Installing an outdoor security camera is a straightforward process, but it requires proper planning and execution to ensure the camera operates effectively and securely. Whether you're enhancing your home security or setting up surveillance for a business, the right installation ensures the camera functions optimally and covers desired areas. In this guide, I’ll provide step-by-step instructions on how to plug in and install an outdoor security camera, tips for proper placement, and considerations to keep in mind during the process.
---
Step 1: Choose the Right Location
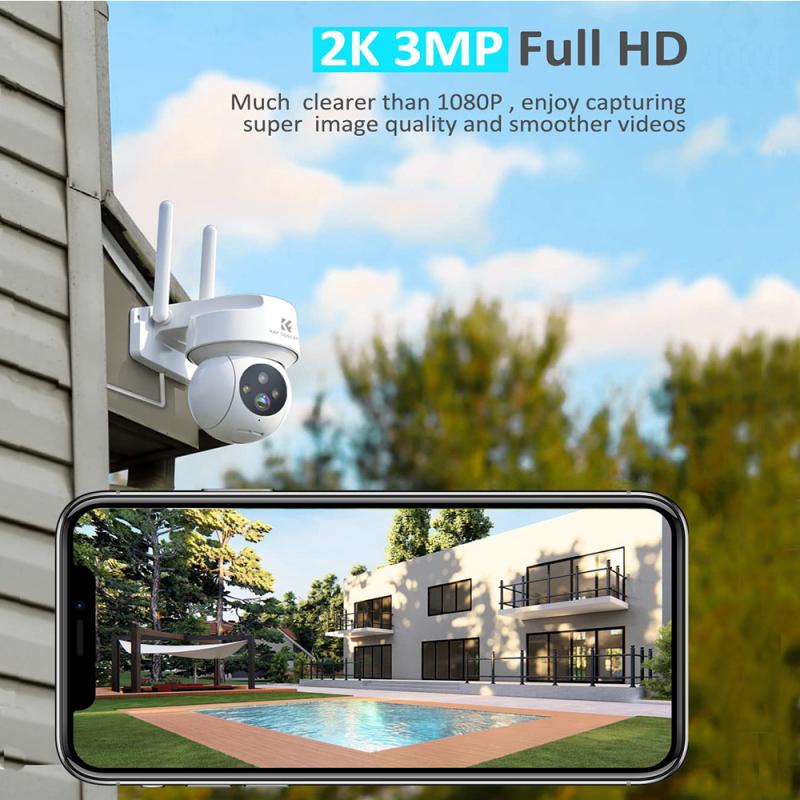
Before plugging in your camera, selecting the right location is crucial. The location determines the area's visibility, camera durability, and ease of installation. Here's how you can make the right choice:
1. Identify High-Traffic Areas: Choose a location that covers high-traffic areas such as doorways, driveways, backyards, or side entrances. Think like an intruder when picking areas—focus on entry points and spots where someone might try to stay hidden.
2. Height Considerations: Place the camera high enough to avoid tampering or accidental damage but low enough that it offers clear footage. Typically, 8-10 feet above ground is ideal.
3. Lighting Conditions: Consider the available lighting. Avoid placing the camera directly in front of light sources (like the sun or streetlights), as this can create glare and impact footage quality. Opt for shaded areas for better image clarity.
4. Power Source Proximity: Since you’re plugging in the camera, ensure it’s near an outdoor power outlet or extension cord to minimize complicated wiring.
5. Wi-Fi or Signal Strength: If your security camera connects to a Wi-Fi network, confirm the signal strength is adequate in the desired location. Routers may not adequately reach outdoor areas, so you may need extenders or a stronger network setup.
---
Step 2: Prepare for Installation
Once you’ve decided where to place the camera, gather all necessary tools and prepare for mounting and wiring. Here’s what you'll need:
- Your outdoor security camera
- Screws and brackets (generally included with the camera)
- Power adapter or extension cord, if required
- Drill, screwdriver, or mounting tools
- Weatherproof casing for the power cable or camera (if not pre-installed)
- Optional: Ladder, cable clips, or ties for organizing wires
---
Step 3: Mount the Camera
1. Mark the Spot: Once you’ve decided where to mount your camera, use a pencil or marker to indicate where the screws will go.
2. Drill Holes: Drill pilot holes for the screws in the desired location. Use a drill bit size that matches the screws provided with the camera.
3. Install the Mounting Bracket: Attach the camera’s mounting bracket or base to the wall using screws. If you’re attaching the camera to a surface like wood, screws may go directly in. For masonry or brick, you’ll often need wall anchors.
4. Attach Your Camera: Secure the camera onto the mounting bracket once the base is attached. Adjust the angle of the camera to ensure it covers the desired area.
---
Step 4: Connect Power to the Camera
Since you are plugging in an outdoor security camera, powering it properly is essential. Here’s how to do it:
1. Locate a Power Source: Outdoor cameras often require an external power source unless they are battery-operated. Ensure there is an accessible outdoor outlet or use a weatherproof extension cord to connect the camera to an indoor outlet.
2. Run the Cable: If your camera’s power cable is long enough to reach the outlet, carefully run the cable along the wall or through a conduit to protect it from environmental wear and tampering.
3. Protect the Connections:
- Use weatherproof covers for outdoor outlets.
- Seal any exposed connections with electrical tape or use weather-resistant connection kits that come with the camera.
4. Secure and Hide the Cable: To keep the installation neat and secure, use cable clips or ties to attach the power cord to walls, fences, or other surfaces. This reduces the risk of tripping or cable damage.
---
Step 5: Connect and Set Up the Camera
If your security camera is a smart device, it will likely require setup via your Wi-Fi network or company app. Follow these steps after plugging in the camera:
1. Download the Manufacturer’s App: Most modern cameras have dedicated apps for configuration and viewing live footage.
2. Connect to Power: Once the camera is plugged into the power source and turned on, it should display an indicator light signaling readiness.
3. Pair It with Your System:
- Follow the app’s instructions to connect the camera to your Wi-Fi network.
- Ensure the Wi-Fi signal in the location is strong enough to maintain stable connectivity.
4. Test the Feed: Access the live feed via the app or device interface to confirm everything works correctly. Adjust the viewing angle if necessary.
---
Step 6: Test, Adjust, and Secure
After the main setup is complete, don’t consider the job done just yet. Testing and tweaking are important for maximizing coverage.
1. Test Different Angles: Verify that the camera captures all the desired areas with minimal blind spots. Reposition if needed.
2. Set Motion Detection Zones: If your camera supports motion sensing, set specific zones for monitoring activity so it doesn’t pick up irrelevant triggers like moving branches or passing cars.
3. Enable Notifications: Fine-tune notification settings so you’re alerted to suspicious activity without being overwhelmed by unnecessary updates.
4. Secure All Components: Ensure screws, cables, and connections are tight and secure. A loose cable could cause the feed to disconnect, and loose mounting could lead to the camera falling over time.
---
Considerations for Outdoor Camera Installation
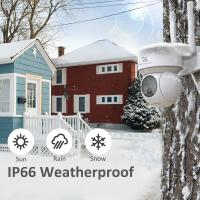
1. Weatherproofing: Outdoor cameras and cables should be resistant to rain, extreme heat, and cold. If your camera isn’t designed for outdoor use, you’ll need weatherproof enclosures.
2. Connection Stability: Cameras that use Wi-Fi can sometimes experience lag or interruptions. If this is an issue, consider a wired camera connected via Ethernet.
3. Privacy and Legal Compliance: Ensure your camera is positioned in a way that doesn’t invade others’ privacy. Avoid pointing cameras toward neighbors' homes or shared spaces like sidewalks (depending on your local regulations).
4. Power Backup Options: Power outages may interrupt recording. Consider adding a backup battery or investing in a camera with onboard storage.
5. Routine Maintenance: Check the camera regularly for dirt, debris, or damage that could obstruct the lens or reduce performance.
---
Plugging in and installing an outdoor security camera provides a significant boost to your security efforts, giving you peace of mind. While the installation can seem daunting at first, planning ahead and following the steps outlined above will help you complete the job efficiently. Remember, the key points to focus on are choosing the proper location, securing your hardware, protecting power connections, and ensuring the system is functional.
By properly setting up your outdoor camera, you not only deter potential threats but also have a reliable tool to monitor and document activity around your property. Additionally, routine maintenance and testing will keep the system running smoothly, ensuring your investment in home or business security pays off for years to come.
---
With these tips and instructions, you’re ready to set up your outdoor security camera like a pro. Whether for your home or office, proper setup ensures that you stay protected and informed without any unnecessary hassle.

