How To Pan Smoothly With A Tripod?
Mastering smooth panning with a tripod is a skill many videographers and photographers aspire to perfect, as it adds professionalism and fluidity to motion shots. A shaky or jerky pan can disrupt the viewer's experience and detract from the storytelling even in the most compelling content. Whether you're filming cinematic footage, capturing sports events, or shooting a landscape panorama, understanding the fundamentals and working with the right techniques and equipment can make all the difference. In this guide, we’ll explore the essential steps, tips, and common pitfalls for achieving a seamless pan with a tripod.
---
Understanding Panning and Why Smooth Technique Matters
Panning is a filmmaking and photography technique where the camera remains fixed on its mount while rotating horizontally to follow a subject or capture a wide scene. Smooth pans are crucial in video production, as they help maintain continuity and provide a polished appearance to the footage. In photography, panning is commonly used for dynamic motion shots where the background blurs to emphasize a moving subject.
Jerky movements, uneven speeds, and undesirable vibrations during a pan can result from improper setup or execution. With the proper tools, preparation, and practices, you can ensure your panning shots contribute positively to the story and aesthetic, rather than detract from it.
---
Step-by-Step Guide to Smooth Panning
Here’s a comprehensive breakdown of how to achieve that buttery smooth pan:
1. Invest in a Quality Tripod with a Fluid Head
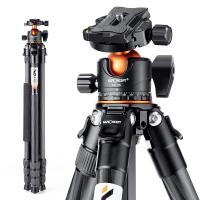
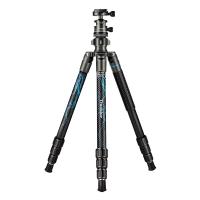
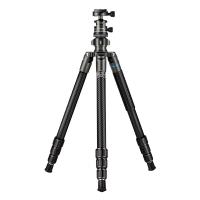
The foundation of any good panning technique is your equipment. Tripods come in various designs and functionalities, and not all are optimized for smooth panning. Look for the following features:
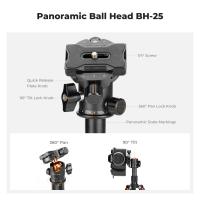
- Fluid Head Mechanism: A fluid head tripod uses hydraulic dampening to ensure motion is smooth and controlled. This is especially critical for video.
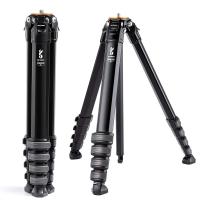
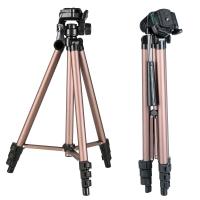
- Robust Construction for Stability: Ensure the tripod legs are sturdy and support your camera's weight without introducing wobble.
- Adjustable Resistance: Some fluid heads allow you to regulate the drag, giving better control over panning speed and resistance.
If your existing tripod doesn't include a fluid head, consider investing in one to mount onto your current tripod legs.
2. Balance Your Camera Properly
Improper camera balance is one of the leading causes of uneven panning. Start by securing your camera to the tripod’s quick-release plate or mounting system and ensure it’s centered and level. Some advanced tripods come with built-in bubble levels; use these to confirm alignment.
When using heavy lenses, ensure the weight distribution between the lens and camera body is equal. Many tripods offer counterbalance adjustments to help achieve a steady center of gravity for smoother operation.
3. Practice Smooth Movements and Adjust Posture
Even with great equipment, technique plays a crucial role. Stand in a relaxed but stable position, ensuring your feet are shoulder-width apart for balance. Place one hand on the tripod handle (or pan arm), and use your other hand to steady the camera or tripod.
Focus on movements that originate from your body’s core rather than your wrist. Many professionals use a left-to-right or right-to-left sweeping motion, pivoting their upper body slightly to maintain smoothness.
4. Set the Right Drag and Friction Levels
Fluid heads typically allow users to adjust the resistance—or "drag"—when panning. Experiment with these settings to find the right balance. If it’s too tight, your movements may become jerky as you struggle to overcome the resistance. Too loose, and you risk losing control of the speed.
Aim for a setting that allows the pan to feel fluid yet controlled, giving you the flexibility to track fast-moving or slow-moving subjects with ease.
5. Plan Your Shot
Proper planning is critical for smooth results. Before hitting the record button, take a moment to rehearse your pan. Identify your starting and ending points, and visualize the composition throughout the movement. Assess the subject's motion or the environmental elements you want to highlight.
Mark your stopping points on the ground if needed. Many professionals also use tape or chalk to create subtle visual markers to guide their pan trajectory.
6. Control Speed and Consistency
One of the primary challenges with panning is maintaining a consistent speed. Avoid sudden jerks or acceleration as you track your subject across the frame.
To aid consistency, mentally count or follow the rhythm of the subject’s movement. For example, if you’re panning to capture a car passing, try to match the pan's speed to the car’s velocity. Tools such as motorized panoramic heads can also assist in maintaining consistent motion, though learning to achieve this manually is a valuable skill.
7. Minimize External Vibrations
External factors like wind, uneven terrain, or vibrations from nearby machinery can ruin a smooth pan. Here are some tips to counteract these issues:
- Use weight bags or sandbags to stabilize tripod legs.
- Set up on solid ground or use tripod spikes when working on uncertain surfaces like dirt or gravel.
- Avoid extending tripod legs fully; the lower the tripod is to the ground, the more stable it will be.
8. Optimize Camera Settings for Capture
Technical camera settings can also affect the perception of smoothness. If you’re shooting video:
- Use a frame rate and shutter speed that minimizes motion blur while preserving the natural aesthetics of the scene.
- Adjust ISO and aperture to maintain proper exposure throughout the pan, particularly if lighting conditions vary across your view.
In still photography, using a slow shutter speed during a dynamic pan can yield stunning motion blur effects, especially in sports or wildlife photography.
9. Review and Refine
After completing your shot, review it on your camera’s screen or external monitor to assess its quality. Look for inconsistencies in speed, jerks, or uneven framing. With practice, you'll identify areas for improvement and refine your technique over time.
---
Common Challenges and How to Address Them
Panning isn’t without its hurdles. Here are some common obstacles and their solutions:
- Lag or Stickiness in the Pan: Ensure your fluid head and tripod components are clean and well-maintained. Occasionally lubricate or tighten screws to prevent malfunction.
- Subject Moving Too Fast: Anticipate the subject's motion and start your pan slightly ahead of them.
- Camera Shake at the End of the Pan: Apply gradual deceleration toward the end of your motion, and avoid letting go of the handle suddenly.
---
Advanced Tips for Professionals
Once you’ve mastered the basics, you can take your panning skills to the next level:
- Use Motorized Heads: For absolute precision, motorized tripod heads can help you achieve ultra-smooth results, especially for time-lapse or slow-motion video work.
- Incorporate Tilt Movements: For dynamic shots, combine horizontal panning with vertical tilting, using a fluid head tripod for multidirectional control.
- Post-Production Stabilization: If minor shakes remain, modern editing software tools like Adobe Premiere Pro or Final Cut Pro can stabilize footage.
---
Final Thoughts
Smooth panning is a combination of good equipment, careful technique, and thorough preparation. While it may require some practice and experimentation, the results are well worth the effort—elevating the quality of your projects and making your work stand out. Whether you're a budding photographer, an aspiring filmmaker, or a seasoned professional, the principles outlined here will set you on the path to capturing stunning, seamless pans that captivate audiences and communicate your creative vision. So grab your tripod, head outside, and start practicing!













There are no comments for this blog.