How To Make Metal Detector At Home?
In today’s world of creativity and innovation, learning how to make tools and devices at home can be an exciting and educational project. One such DIY activity is building a metal detector. A metal detector is a device primarily used to find metallic objects buried underground or hidden within other materials. These devices use electromagnetic fields to detect the presence of metal. Whether for treasure hunting, hobby crafting, or practical purposes like finding lost keys, building a metal detector can be both fun and functional. In this article, we'll explore the step-by-step process of constructing a basic metal detector at home and provide insights into the science behind its functioning.
---
Understanding the Basics of a Metal Detector

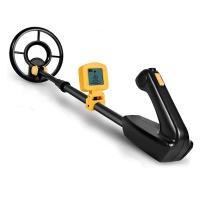
Before diving into the construction process, it is important to understand how a metal detector works. The fundamental principle behind it is electromagnetic induction. Metal detectors typically consist of the following key components:
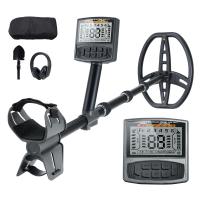
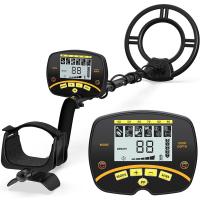
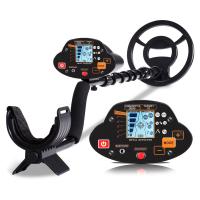
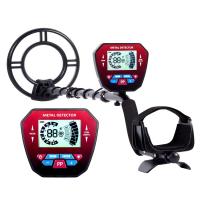
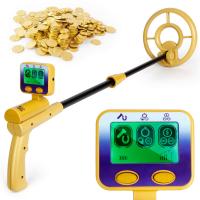
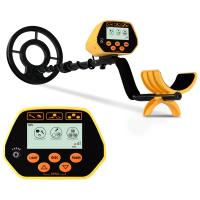
1. Search Coil: This is the primary part of a metal detector responsible for detecting metal objects. It produces an electromagnetic field when an electric current passes through it. If a metal object is close to the coil, it disrupts the field, which the circuit reads as a signal.
2. Control Unit: This part of the detector interprets the signals from the search coil. It usually consists of circuits, sensors, and often a battery to power the device.
3. Audio or Visual Indicator: Most metal detectors output a beep, buzz, or light signal when they detect metal.
By understanding how these components come together in a functional device, you can replicate the concept on a smaller, simpler scale to make a homemade metal detector.
---
Materials Required to Make a Metal Detector

Here is a list of items you will need to make a basic metal detector at home:
- A small AM/FM radio
- A simple calculator
- Adhesive tape (e.g., duct tape or masking tape)
- A sturdy stick or broom handle (to act as a support structure)
- A headphone jack and headphones (optional)
- Batteries for the radio
- Cardboard or plastic to construct a mount
These materials are easy to find and inexpensive, making this project accessible even for beginners.
---
Step-by-Step Guide to Building a Simple Metal Detector

Let's now walk through the process of constructing a basic metal detector using simple household items.
Step 1: Prepare the AM/FM Radio

Begin by tuning the AM radio to the highest frequency available in the AM spectrum. Make sure there's no broadcast or static playing, as the device needs to remain quiet for accurate detection. This creates a clean signal for metal detection operations.
Step 2: Pair the Radio with the Calculator
Turn on the calculator and bring it close to the AM radio. You should hear a steady, high-pitched sound or a tone coming from the radio. The sound occurs because the radio picks up the electromagnetic interference from the calculator. This is a critical part of the detection mechanism.
Step 3: Secure the Components
Using adhesive tape, secure the calculator and AM radio back-to-back with the screens or components facing outward. Keep them tightly bound so they stay connected during use.
Step 4: Set Up the Search Coil
Attach the calculator-radio assembly to the end of the stick or broom handle with tape. This extension will allow you to "sweep" the device over areas to search for metal. Make sure it is securely fastened so that the assembly doesn’t come loose.
Step 5: Test the Metal Detector
Turn on the radio and calculator. Sweep the device slowly over a small metal object like a coin, key, or piece of jewelry. You should notice a change in the tone from the radio when it passes over the metal object. This is the detector signaling the presence of metal.
Step 6: Adjust and Optimize
Test the metal detector in different environments, such as carpets, soil, or lawn. You may need to fine-tune the distance between the radio and the calculator or adjust the position of the components to improve sensitivity.
---
How DIY Metal Detectors Compare to Store-Bought Versions
Homemade metal detectors are a great way to explore the science of electromagnetic fields, but it's important to manage expectations when comparing them to commercial metal detectors. DIY models are often simple and lack the precision and depth range of commercial devices.
Advantages of a homemade metal detector:
- Cost-effective: You can build one using items you already own.
- Educational: It offers a hands-on demonstration of electromagnetic principles.
- Fun: It’s an engaging, creative activity for individuals or families.
Limitations to consider:
- Sensitivity: Store-bought detectors are more sensitive and can detect smaller objects at greater depths.
- Limited range: DIY versions may only detect objects within a few inches of the surface.
- No advanced features: Commercial metal detectors have adjustable settings and better alerts, while homemade versions are more basic.
Despite these limitations, homemade detectors are perfect for small-scale searches and understanding the basic functionality of the device.
---
Advanced DIY Metal Detector Projects
If the above project seems too basic, more advanced options exist for enthusiasts with some electronics knowledge and programming experience. Here are some ideas for building metal detectors with increased sensitivity and sophistication:
1. Induction Balance Metal Detector:
Build a metal detector using a more traditional induction balance method. This design uses a transmitter coil and receiver coil, which can be crafted easily using copper wire and basic circuit components. Induction balance detectors are more sensitive and can distinguish between different types of metals.
2. Arduino-Based Metal Detector:
For tech enthusiasts, Arduino provides the opportunity to create a customizable and programmable metal detector. Using an Arduino microcontroller, sensors, a custom-built coil, and programming input, you can build a highly efficient and versatile detector. These models are highly accurate and ideal for exploring circuit design and coding.
3. Pulse Induction Detector:
This method works by sending short electric pulses into the ground and detecting the returned signal. A pulse induction detector requires slightly more expertise but offers better depth detection. You can purchase kits or design your own circuit from scratch with the help of online tutorials.
---
Frequently Asked Questions About Homemade Metal Detectors
1. Can a homemade metal detector work on all types of metal?
Homemade devices generally detect all conductive metals but may not distinguish between types (such as ferrous vs. non-ferrous metals). Advanced detectors can provide such distinctions.
2. How do I improve sensitivity?
Fine-tune the distance between the radio and calculator, use higher-quality components, or integrate advanced circuitry to improve performance.
3. Are homemade detectors safe for electronic devices?
Yes, when made following the steps provided, there is no risk of interference or harm to nearby electronic devices.
4. What are practical uses for a homemade detector?
They are suitable for finding small items on the surface of soil, floors, or in shallow areas. They can also be used for educational purposes.
---
Final Thoughts
Making a metal detector at home is a rewarding experience that combines creativity with a fundamental understanding of physics and electronics. It’s a small but intriguing project that can spark curiosity, especially among young learners, while offering practical benefits like finding lost items. Whether you build one as an experiment or as a functional tool for small-scale use, the process teaches invaluable problem-solving and critical-thinking skills.
The simple method of using an AM radio and calculator is ideal for beginners, while more advanced builds—like induction balance or Arduino projects—offer options for those eager for a greater challenge. Regardless of which approach you take, the journey into the mechanics of metal detection is an engaging and informative endeavor.
By understanding how these concepts work and experimenting with their construction, you not only develop a useful device but also gain deeper insights into the fascinating interaction between electromagnetic fields and metallic objects. So grab your materials, tap into your DIY spirit, and start crafting your homemade metal detector today!

