How To Make A Powerful Astronomical Telescope?
How to Make a Powerful Astronomical Telescope
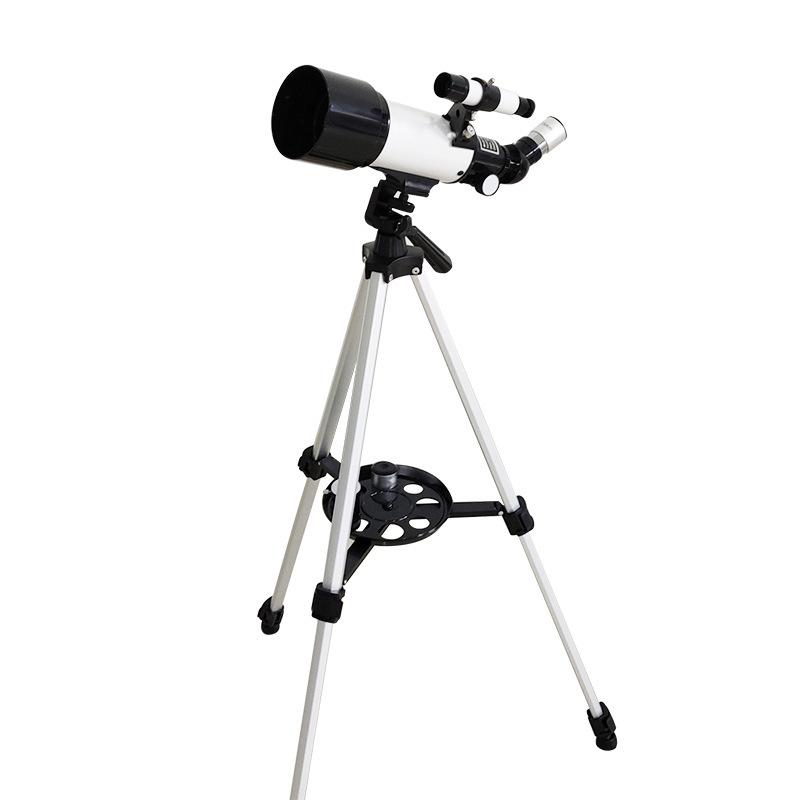
Astronomy is one of humanity’s most awe-inspiring endeavors, allowing us to explore the vastness of the universe and unlock its many secrets. A powerful astronomical telescope can help you spot distant objects like planets, nebulae, and galaxies, bringing the cosmos to your backyard. While there are plenty of commercial telescopes available, setting out to create one from scratch brings not only a sense of accomplishment but an intricate understanding of how telescopes work. In this article, we'll take a deep dive into how you can build a powerful telescope at home, considering the materials required, scientific principles behind its operation, and step-by-step instructions.
---
Understanding Telescope Basics: Optics and Design
Before jumping into the construction of a telescope, it’s essential to understand its basic components and functionality. Telescopes work by gathering and focusing light from distant objects to produce an image that can be magnified. Two critical components make this possible:
1. Objective Lens or Mirror: Captures light and creates an initial image.
- Refracting telescopes use lenses for this purpose.
- Reflecting telescopes use mirrors and tend to be more suitable for homemade designs due to their simpler construction and reduced optical distortion.
2. Eyepiece: Magnifies the image created by the objective lens or mirror, allowing you to see faraway celestial objects in greater detail.
Powerful telescopes typically rely on two factors:
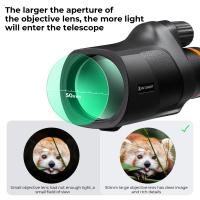
- The light-gathering ability of the objective (determined by its diameter or aperture).
- The magnifying power of the eyepiece.
For a homemade telescope, a Newtonian reflector—a type of reflecting telescope—is often the best choice. This design is simpler and allows for larger apertures compared to complex refracting systems. Additionally, mirrors are easier to construct and polish for beginner telescope builders than lenses.
---
Materials You'll Need
Building a telescope doesn't require advanced engineering skills, but precision and attention to detail are crucial. Here’s a list of materials you’ll need:
1. Primary Mirror:
- A parabolic mirror with a large aperture (6 to 12 inches is ideal for amateur astronomers).
- Mirrors can be purchased pre-made, or you can grind your own if you're up for the challenge.
2. Secondary Mirror:
- A smaller, flat diagonal mirror that reflects the light from the primary mirror to the eyepiece.
3. Telescope Tube:
- A cylindrical tube made of lightweight and durable material to house the optics (e.g., PVC pipe, cardboard tubing, or specialized telescope kits).
4. Eyepiece:
- Choose eyepieces with varying magnifications for flexibility (e.g., 10mm and 25mm focal lengths).
5. Focuser:
- A mechanism for holding the eyepiece and adjusting focus.
6. Mirror Mounts and Supports:
- Adjustable holders to secure the primary and secondary mirrors.
- Springs and screws for fine-tuning alignment.
7. Mount and Tripod:
- A stable mount for the telescope (Dobsonian mounts are popular for homemade reflecting telescopes because they’re easy to build and use).
- A tripod or base to stabilize the setup for viewing.
8. Tools:
- Sandpaper, screws, adhesive, paint, and a collimation tool (used for aligning the mirrors).
Optional but helpful tools might include a power drill, ruler, and protractor for precise measurements.
---
Step-by-Step Instructions to Build Your Telescope
Now that you understand the materials and concept, let’s dive into the assembly process:
1. Select Your Optics and Tube
- Primary Mirror: Start by acquiring or crafting your parabolic mirror. If polishing your own mirror, you'll need a glass blank, carborundum grit, pitch, and a lot of patience. Many first-time builders, however, prefer buying a tested mirror.
- Tube: Cut the telescope tube to the appropriate length based on the mirror’s focal length (length from the mirror to its focus point).
2. Install the Primary Mirror
- Position the primary mirror in a stable holder at one end of the telescope tube.
- Secure it with adjustable screws and springs so you can fine-tune its alignment, which is critical for capturing sharp images.
3. Position the Secondary Mirror
- The secondary mirror must be angled at 45 degrees inside the tube to redirect light from the primary mirror to the eyepiece.
- Use a sturdy mount and ensure the mirror is properly aligned with the telescope’s axis.
4. Attach the Focuser
- Install the focuser on the side of the tube at the eyepiece position, directly in line with the secondary mirror. Make sure it’s securely affixed and allows for smooth movement.
- You can build a simple focuser or purchase a pre-made one.
5. Build the Base
- Construct a Dobsonian mount or similar base to allow your telescope to rotate and tilt smoothly. Ensure the base is stable yet easy to maneuver.
6. Align the Optics
- Use a collimation tool or a laser collimator to adjust the position of the mirrors. Accurate alignment is crucial for the clearest view of celestial objects.
- Start by aligning the secondary mirror, then adjust the primary mirror until the image appears centered and sharp.
7. Add Finishing Touches
- Paint the interior of the telescope tube with matte black paint to reduce internal light reflections.
- Attach any additional features, such as a finder scope for easier object location or a cooling fan behind the primary mirror to reduce heat distortion.
---
Tips for Maximizing Performance
Even with a simple homemade telescope, there are ways to optimize its performance and enjoy the best stargazing experience:
1. Choose the Right Location:
- Set up your telescope in a dark-sky area, away from urban light pollution. High-altitude locations are particularly ideal.
2. Allow Time for Temperature Adjustment:
- Let your telescope sit outside for 30 minutes to an hour before observing to equalize temperatures and minimize thermal currents that can blur images.
3. Learn to Collimate Regularly:
- Proper mirror alignment ensures crystal-clear views. Misaligned mirrors will degrade the performance significantly.
4. Experiment with Eyepieces:
- Different celestial objects require different magnification levels. A wide-field eyepiece is excellent for galaxies and star clusters, while high-magnification eyepieces work well for planetary or lunar viewing.
5. Use Online Star Maps:
- Apps and star charts make finding celestial objects easier, especially for beginners.
---
Expected Results and Key Takeaways
With your homemade telescope, you should be able to view the Moon’s craters, Jupiter’s moons, Saturn’s rings, and some brighter nebulae and star clusters. Larger mirrors and precise adjustments will allow you to glimpse deeper into space.
Constructing your own astronomical telescope is a rewarding experience that combines craftsmanship, science, and a passion for the stars. Beyond the practical results, it provides invaluable insight into optics and astronomy. While it can be challenging at first, each step you take brings the vastness of the universe closer within your reach.
Collaboration with astronomy clubs or online communities can further enhance your learning and troubleshooting. If this is your first telescope project, start small, follow the steps patiently, and don’t hesitate to experiment with adjustments. Whether or not you perfect your build on the first attempt, the journey itself can be as enlightening as the celestial wonders your telescope will one day reveal.

