How To Install Your Own Wifi Cameras Outdoors?
WiFi cameras have quickly become a go-to choice for boosting home security due to their affordability, convenience, and ease of use. Installing your own outdoor WiFi cameras might seem daunting at first, but with the right guidance, you can get them up and running in no time. In this article, we’ll walk you through the steps of planning, choosing, and installing these cameras, as well as provide tips on maximizing their effectiveness. By following this guide, you’ll gain not only peace of mind but also a better understanding of how to bring smart security to your outdoor spaces.
---
Step 1: Determine Your Security Needs
Before you shop for a WiFi camera or start drilling holes, it’s important to assess your specific needs.
1. Coverage Goals: Identify the areas you want to monitor. Popular locations include entry points such as front doors, back doors, driveways, and backyard spaces. Make a list of priority areas where you feel security could be enhanced.
2. Environment Challenges: Consider environmental factors like lighting conditions (day and night), weather variability (rain, snow, heat), and potential obstructions (trees, walls, or parked vehicles).
3. Network Range: Check how far your Wi-Fi signal reaches outdoors. If your signal is weak in the areas where you need coverage, you may need to address this limitation (e.g., by adding a Wi-Fi extender).
By clearly understanding your needs, you’ll make better purchasing and installation choices down the line.
---
Step 2: Choose the Right WiFi Camera
The market offers an overwhelming array of outdoor WiFi cameras, so choosing the right one isn’t just about buying the most expensive option. Consider the following factors:
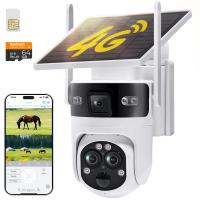
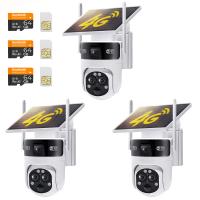
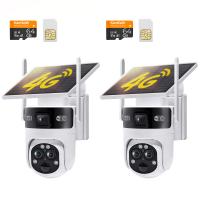
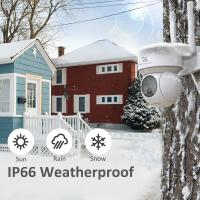
1. Weatherproof Design: Outdoor cameras should have a high weather resistance rating, such as IP65 or IP67, which ensures they are protected from dust, rain, and snow.
2. Power Supply: Decide whether you prefer battery-powered cameras or those that require a wired connection. Battery-powered models are easier to install but may require regular recharging. Wired cameras, on the other hand, don’t need maintenance for power but require more effort during installation.
3. Resolution: Look for cameras with at least 1080p resolution for clear video footage. For crisper images, especially at night, consider one that supports 2K or 4K resolution.
4. Night Vision: Ensure the camera has infrared or color night vision capabilities so monitoring can continue even in low-light conditions.
5. Two-Way Audio: This allows you not only to hear what’s happening but to communicate with anyone near the camera – a useful feature for front-door installations.
6. Smart Features: Some cameras include motion detection, person recognition, or even package detection. These features help minimize unnecessary notifications.
7. Storage Options: Check if the camera supports cloud storage, local storage via SD cards, or both. Cloud options often come with subscription fees, so consider this when planning your budget.
8. Wi-Fi Band Compatibility: Many cameras only work on 2.4 GHz Wi-Fi networks. Ensure your home router supports the required frequency.
---
Step 3: Prepare for Installation
Once you’ve purchased the cameras, you’ll need to prep before installation.
1. Charge or Test the Camera: If you chose a battery-powered model, fully charge it beforehand. For wired cameras, connect them briefly to a power source to ensure they’re functioning properly.
2. Download Necessary Apps: Most cameras require a smartphone app for setup and live monitoring. Download and set up the app before proceeding.
3. Survey the Locations: Confirm the exact spots where the cameras will be mounted. Check for adequate Wi-Fi signal strength using a smartphone. If needed, reposition your router or use a signal booster.
4. Gather Tools: Most installations will require basic tools, such as a drill, screwdriver, and mounting screws (typically provided with the camera). Be sure to have a ladder handy if mounting high on walls or eaves.
---
Step 4: Mount & Position the Cameras
With preparation complete, it’s time to install the cameras. Follow these detailed steps:
1. Mount the Bracket
- If your camera comes with a mounting bracket, hold it up to the wall or surface where you’ll place the camera. Most outdoor cameras are mounted at a height of 7–10 feet, which provides an optimal view while keeping them out of reach from tampering.
- Use the drill to pre-drill holes for screws (if required). Attach the bracket securely to the wall using the screws provided.
2. Attach the Camera
- Secure the camera to the mounting bracket as per the manufacturer’s instructions. This step might involve clipping, sliding, or screwing the camera into place.
3. Adjust the Angle
- Point the camera at your target monitoring area. For entry points, angle the camera slightly downward for better facial recognition and object detection.
4. Connect to Power (if applicable)
- For wired models, plug the camera into a nearby outdoor power outlet. If the power cable isn’t long enough, you may need to use waterproof outdoor extension cords or cable conduits for protection.
---
Step 5: Configure Camera Settings
Now that your camera is physically installed, it’s time to configure its software settings.
1. Connect to Wi-Fi: Open the camera’s app and follow the step-by-step instructions to connect the device to your home Wi-Fi network. This process usually involves scanning a QR code on the camera or app.
2. Set Notification Preferences: Configure motion detection sensitivity to avoid unnecessary alerts caused by pets or passing cars. You can also set activity zones to narrow the focus of the motion sensor.
3. Test the Camera: Once connected, test your camera by walking in front of it or simulating scenarios (e.g., package delivery) to ensure the alerts and recordings work as expected. Adjust the angle if the coverage isn’t ideal.
4. Integrate with Smart Home Systems: If you use devices like Amazon Alexa, Google Assistant, or Apple HomeKit, sync your camera so you can control it using voice commands or integrate it with other smart devices.
---
Step 6: Ensure Security & Maintenance
WiFi cameras are a critical part of your home’s security ecosystem, so it’s essential to keep them protected and in good working condition.
1. Encrypt Your Data: Update the camera’s firmware regularly to protect against potential vulnerabilities. Additionally, use strong, unique passwords for the camera app and your Wi-Fi network.
2. Monitor Cloud Storage Usage: If you use a cloud subscription, be aware of storage limits and set automatic deletion rules for older footage to ensure sufficient space for new recordings.
3. Regular Cleaning: Dust, rain, and debris can obscure the lens and affect the quality of footage. Periodically wipe down the camera with a soft cloth and inspect for any damage.
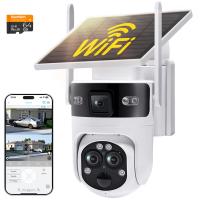
4. Battery Maintenance: For battery-powered cameras, establish a regular charging routine or invest in solar panels if your model supports them to ensure uninterrupted coverage.
---
Common Challenges & Solutions
1. Weak Wi-Fi Signal
- Solution: Install a Wi-Fi extender or mesh router system to improve coverage in your outdoor area.
2. False Alerts
- Solution: Adjust motion sensitivity, limit detection zones, or enable smart detection to reduce unwanted notifications.
3. Limited Power Options
- Solution: For remote or hard-to-reach locations, opt for a battery-powered camera or invest in solar-powered accessories.
4. Hard-to-Mount Surfaces
- Solution: Use adhesive mounting plates or specialized mounting kits for unconventional surfaces like brick or stucco.
---
Final Thoughts
Installing your own WiFi cameras outdoors can provide an affordable, robust security solution with the benefit of remote monitoring. While the process may require some upfront effort, the sense of security and control it offers over your home is well worth it. Through careful preparation, smart camera selection, and proper maintenance, you can create a reliable surveillance system tailored to your specific needs.
With this guide, even a beginner can tackle the installation process confidently and start enjoying the many benefits of outdoor WiFi cameras. Take the time to optimize placement and settings, and you’ll reap the rewards of an effective and accessible security system for years to come.

