How To Install Rgb Lights Led Pc?
Building a visually stunning PC setup is a fulfilling experience for gamers, tech enthusiasts, and professionals who appreciate a good aesthetic. One of the most popular ways to enhance the visual appeal of your rig is by adding RGB LED lighting. These lights can genuinely transform your PC into a work of art, with customizable colors and effects that suit your mood, theme, or branding.
In this article, we’ll walk you through the process of how to install RGB LED lights in your PC. We’ll talk about the types of RGB lighting, how to ensure compatibility with your existing setup, what tools you’ll need, and step-by-step instructions to illuminate your computer like a pro. By the end of this guide, you’ll be well-equipped to install RGB lights and create a personalized ambiance for your PC.
---
Choosing the Right RGB Lights for Your PC

Before diving into the installation, it's essential to understand the types of RGB setups available and what works best for your needs.
Types of RGB Lights

1. RGB Strips:
These flexible strips are embedded with LED lights and can be adhered to different parts of your case. They come in adhesive-backed variants that are perfect for mounting.
2. RGB Fans:
Many cooling fans now come with built-in RGB functionality. They are ideal for creating a seamless aesthetic that blends functionality with design.
3. ARGB Lights (Addressable RGB):
ARGB lighting allows for individual control of each LED. These setups offer more customization options than standard RGB but require a compatible motherboard or controller.
4. RGB Components:
Some PC components, like RAM, graphics cards, and CPU coolers, feature built-in RGB lighting. These are especially useful for a minimalist build that relies on the core components for illumination.
---
Steps Before Installation

Proper planning leads to a smoother installation process and helps avoid incompatible parts or errors. Follow these preparatory steps to get started.
1. Check Compatibility
The first thing to consider is whether your motherboard supports RGB lighting. Some motherboards come with dedicated RGB headers labeled as "RGB" or "ARGB." If your motherboard doesn’t have these headers, you’ll need an external RGB controller.
- For RGB headers: These are typically 4-pin connectors capable of supporting standard RGB lights.
- For ARGB headers: These use 3-pin connectors and are designed for addressable lighting.
Make sure to cross-check these with the connectors on your RGB lights.
2. Select a Power Source
Determine how your RGB lights will be powered. Most RGB strips and fans connect to the PSU (Power Supply Unit) via SATA connectors or to the motherboard through an RGB header. Decide which source works best for your specific setup.
3. Plan the Layout
Take some time to design where the lighting strips, fans, or other RGB components will be installed. Map out the routes for cables to ensure proper management and avoid clutter. A well-thought-out layout also helps prevent unwanted light bleed.
---
Tools and Materials You’ll Need:
- RGB LED strips, fans, or components
- Screwdrivers
- Zip ties or cable clips for cable management
- Alcohol wipes for surface cleaning (optional for better adhesion)
- RGB controller (if the motherboard doesn’t support RGB lighting)
- Instruction manual for your RGB kit
- Compatible RGB software for customization
---
Step-by-Step Guide to Installing RGB LED Lights
Here’s a detailed breakdown of the process:
Step 1: Turn Off and Unplug Your PC
Before working inside your PC, shut it down and unplug it. This ensures your safety and prevents electrical damage.
Step 2: Open the Case and Clean the Surfaces
Remove the side panels of your case for better access to the interior. If you’re using adhesive-backed RGB strips, clean the surfaces where the strips will be mounted. Wipe them down with alcohol wipes to remove dust and grease, which will improve adhesion.
Step 3: Mount the RGB Strips
Carefully measure and cut the RGB strips to the desired length (most RGB kits allow this). Peel off the adhesive backing and press the strips onto the cleaned surfaces. Popular spots for mounting include:
- Edges of the case
- Behind the motherboard tray
- Around cooling radiators
- Beneath the case floor (if it’s elevated)
If your strips don’t have adhesive, you might need to use mounting clips or zip ties.
Step 4: Install RGB Fans (if applicable)
If you’re upgrading your cooling system with RGB fans:
1. Unscrew and remove the old fans from your case.
2. Mount the RGB fans in the desired locations, ensuring correct airflow direction (usually indicated by arrows on the fan frame).
3. Connect the fan’s power cable to the appropriate motherboard headers, then attach the fan’s RGB cable to the RGB header.
Step 5: Connect the RGB Lights
Once everything is placed, it’s time to connect the cables:
- For motherboard RGB headers: Connect the cables to the “RGB” or “ARGB” header, ensuring the connectors align properly. Plugging them in backward can damage your components.
- For an RGB controller: If your setup lacks motherboard headers, plug the RGB cables into the controller, then connect the controller to your PC’s power supply.
Step 6: Install RGB Software
After connecting the hardware, install the RGB control software that corresponds to your hardware manufacturer. Popular RGB management software programs include:
- ASUS Aura Sync
- MSI Mystic Light
- Gigabyte RGB Fusion
- Corsair iCUE
- Razer Synapse (for compatible peripherals)
These programs enable you to customize the colors, lighting effects, and synchronization with other components.
---
Tips for Efficient Cable Management
Good cable management does more than make your build look neat—it improves airflow, reduces clutter, and minimizes the risk of loose connections. Use these tips:
- Route the cables through the case’s pre-designated grommets or channels.
- Use zip ties or Velcro straps to bundle cables neatly together.
- Keep RGB cables out of the airflow path to maintain optimal cooling performance.
---
Troubleshooting Common Issues
Sometimes, even with careful planning, you may encounter hiccups. Here’s how to address a few common problems:
1. RGB Lights Not Turning On:
- Ensure all connections for power and data are secure.
- Verify that the voltage matches the requirements of the RGB lights.
2. Colors Aren’t Syncing:
- Check that all RGB components are compatible with your software or controller.
- Double-check whether you’ve connected RGB or ARGB cables to the correct headers.
3. Adhesive on Strips Not Sticking:
- Clean the surface thoroughly before reapplying.
- Consider using aftermarket adhesive solutions like 3M tape.
---
Enhancing the Setup
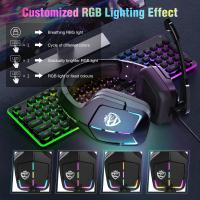
Once your RGB lights are installed, take the time to experiment with the customization settings in your software. You can program the lights to:
- Cycle through a rainbow of colors.
- Match colors to in-game settings using software like Corsair iCUE.
- Sync with music or system performance for added interactivity.
---
Final Thoughts
Installing RGB LED lights in your PC is an enjoyable and satisfying project that blends creativity with technical skills. Whether you’re going for a sleek, minimalist aesthetic or a vibrant and colorful gamer vibe, RGB lighting can make your build stand out. By using the right tools, ensuring compatibility, and following proper installation procedures, you’ll create a visually stunning setup that reflects your personality and creativity.
Remember, the key to success is planning ahead and taking things step by step. With some patience and attention to detail, you’ll have your RGB lights installed and your PC glowing in no time. Now go ahead and light up your rig!

