How To Install Memory Card In Galaxy S7?
Expanding your smartphone's storage is often necessary as more photos, videos, applications, and other files accumulate over time. Luckily, the Samsung Galaxy S7 allows users to install a microSD memory card to increase storage capacity. If you're unfamiliar with the process or are handling a smartphone for the first time, don’t worry—installing a memory card in the Galaxy S7 is a safe and straightforward task when done correctly. This article will guide you through the process of installing a memory card into your Galaxy S7, ensuring that you can take full advantage of the additional storage and functionality.
Why Install a Memory Card in the Galaxy S7?
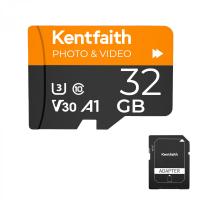
The Samsung Galaxy S7 comes with built-in storage options—32GB or 64GB. While this suits the needs of many users, heavy reliance on multimedia, high-resolution photos, 4K video recording, or an extensive app library can quickly drain your available storage. By using a microSD card, you can significantly expand your device's storage capacity without compromising performance. The Galaxy S7 supports microSD cards up to 256GB, providing ample room for additional apps, files, and media.
Tools You'll Need
Before starting, ensure you have the following items on hand:
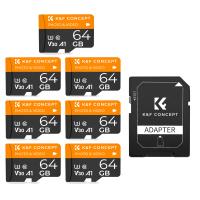
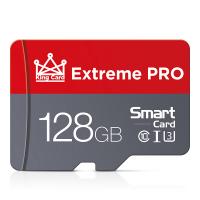
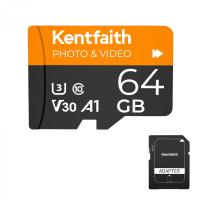
1. A compatible microSD card (Class 10 or UHS-1 recommended for optimal performance).
2. The SIM ejector tool, provided in the Galaxy S7 box. A small paperclip can serve as a substitute.
Now, let’s break down the steps for correctly installing a memory card into your Galaxy S7.
---
Step 1: Power Off Your Device
While it is technically possible to insert a memory card while your device is powered on, it’s not recommended. Doing so could inadvertently lead to software glitches or data corruption. To safely install your microSD card, press and hold the Power button on the right side of your device, then tap “Power Off” and wait until the phone completely shuts down.
---
Step 2: Locate the SIM and MicroSD Card Tray
The Galaxy S7’s SIM card and microSD card share a single tray, which is located on the top edge of the smartphone. Examine the top of your phone carefully, and you’ll notice a small pinhole adjacent to the tray opening.
---
Step 3: Use the SIM Ejector Tool
Insert the thin, pointed end of the SIM ejector tool into the tiny pinhole. Firmly but gently press the tool straight in until the tray pops out slightly. Remove the ejector tool and use your fingers to pull the tray completely out of the phone. Be careful not to drop or mishandle the tray, as it’s relatively small and delicate.
---
Step 4: Position the MicroSD Card Correctly
The SIM card and microSD card slots are placed on the tray. Identify the slot designed for the microSD card—it’s slightly larger than the SIM card slot.
Now align your microSD card with the designated slot. The gold connectors on the card should face downward, and the cut corner should match the slot’s design. Slide the card into place gently but firmly until it sits flush. It’s crucial to ensure proper alignment to prevent damage to the card or the tray.
---
Step 5: Reinsert the Tray Into the Device
Once both the SIM card and memory card are securely positioned, carefully slide the tray back into the phone. Make sure that the tray is aligned with its slot to avoid forcing it, which could damage the tray or the internal mechanisms of the phone. Push it gently until it fits snugly into the device.
---
Step 6: Turn Your Device Back On
Now that you’ve inserted the microSD card, press and hold the Power button on the right side of your Galaxy S7 to switch it back on. The phone will take a few moments to boot up.
---
Step 7: Confirm That the MicroSD Card Was Successfully Installed
Once your Galaxy S7 powers on, verify that the microSD card has been detected. To do this:
1. Open the Settings app on your phone.
2. Scroll down and tap “Device Maintenance” or “Storage” (depending on your version of the software).
3. Look for the microSD card under the “External Storage” section. If the card is visible, it means your device has successfully recognized it.
In some cases, you may see a prompt asking whether you’d like to use the microSD card as Portable Storage or Internal Storage. Typically, the Galaxy S7 treats the microSD card as Portable Storage by default, which allows you to store media files but keeps apps and system data confined to the internal storage. Choose the option that best suits your needs.
---
Troubleshooting Common Issues
If your device fails to recognize the microSD card, don’t panic. Several minor issues can cause this:
1. Card Compatibility: Ensure your microSD card meets the Galaxy S7’s specifications. The phone supports cards with capacities up to 256GB.
2. Corrupted Card: Test the card on another device or a computer to check if it’s functioning correctly. If it’s corrupted, you may need to reformat it.
3. Tray Placement: Remove and reinsert the tray to confirm that the card is seated securely.
You can reformat the card using your Galaxy S7 if necessary. Go to “Settings” > “Device Maintenance” > “Storage” > “SD Card” > “Format” to prepare the card for use. Keep in mind that formatting will erase all data on the card, so back up any important files in advance.
---
Benefits of Installing a Memory Card
Once successfully installed, your microSD card provides various benefits:
1. Increased Storage Capacity: By shifting photos, videos, music, and documents to the microSD card, you free up internal storage for essential apps and system files.
2. Portable Media Library: MicroSD cards offer flexibility, allowing you to transfer your files between devices easily.
3. Backup Option: A microSD card can serve as a backup for important files, especially in situations where a factory reset may be necessary.
---
Maintaining Your MicroSD Card
To ensure longevity and optimal performance, follow these maintenance tips:
1. Safely Remove the Card: Always unmount the microSD card via the “Settings” > “Storage” menu before removing it physically from the phone.
2. Avoid Physical Damage: Handle the card with care and store it properly when not in use.
3. Regularly Back Up Files: Keep important data backed up elsewhere to protect against accidental loss or card failure.
---
In Conclusion
Installing a memory card in your Galaxy S7 is an effective way to expand your phone’s storage and accommodate your growing collection of apps, photos, and media files. The process is straightforward, requiring minimal effort while providing significant benefits. By following the steps outlined in this guide, you’ll be able to confidently and securely install a microSD card, ensuring your Galaxy S7 is equipped to handle all your storage needs.
Whether you’re a tech-savvy individual or a first-time smartphone user, this tutorial simplifies the procedure, allowing you to make the most out of your Galaxy S7’s expandable storage capability. Incorporating a microSD card is a small upgrade that delivers significant returns in terms of convenience, functionality, and peace of mind.

