How To Install A Filter On Lens?
Installing a filter on your camera lens might seem like a simple task, but it is a crucial step that photographers, both beginners and professionals, must handle properly to ensure they avoid damaging their equipment while enhancing their photographic results. A properly installed lens filter can protect your lens, improve image quality, and even enable versatile shooting approaches. Whether you’re using a UV filter for protection or a polarizing filter to cut through glare, understanding the correct process and considerations can make a significant difference. In this article, we’ll dive deep into how to install a lens filter, troubleshoot common challenges, and discuss tips for maintaining your filters for long-term usability. Let’s explore the steps and strategies to get the best out of your photographic equipment.
Understanding Lens Filters: Types and Uses

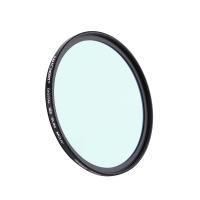
There are numerous types of lens filters, each designed with a specific purpose in mind. Here are some of the most commonly used filters and their applications:
- UV Filters: These are often used to protect the front element of your lens from dust, dirt, and scratches. While their original purpose was to block ultraviolet light, modern camera sensors no longer require UV filtration, so this type of filter is mainly used as a protective layer.
- Polarizing Filters: These are used to reduce reflections and glare, enhance color saturation, and increase contrast in outdoor photography. Landscapes, in particular, benefit significantly from circular polarizers.
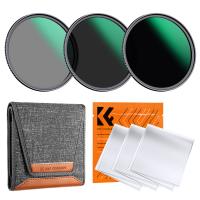
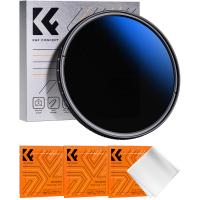
- ND Filters (Neutral Density): These reduce the amount of light entering your lens, allowing you to use slower shutter speeds or wider apertures even in bright lighting conditions. Perfect for long exposure photography or creating motion blur effects.
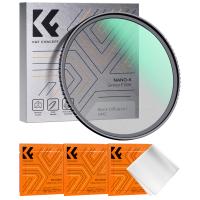
- Special Effects Filters: These include starburst filters, soft-focus filters, and color filters. They are used to create artistic effects and stylistic touches in your images.
Understanding the type of filter you need before installation is important because each serves a different functional or aesthetic purpose. Once you’ve selected the right filter, it’s time to proceed with the installation.
Step-By-Step Guide to Installing a Lens Filter
1. Check Compatibility
Before purchasing or installing a lens filter, ensure that the filter matches your lens’s thread size. The thread size is marked on the front or side of most lenses, usually indicated by a diameter symbol (⌀) followed by a number, such as 58mm or 77mm. Purchase a filter that matches this size, or use a step-up or step-down ring adapter to ensure compatibility with your existing filter.
2. Clean the Lens and Filter
Dust, smudges, or fingerprints on either your lens or the filter can degrade image quality. Make sure to thoroughly clean both surfaces before installation. Use a lens cleaning solution, a microfiber cloth, or a lens blower to remove any contaminants without leaving scratches.
- Hold your lens at an angle to verify that the surface is clean and streak-free.
- Carefully inspect the filter for any residue. Never wipe filters with abrasive materials or household tissues.
3. Hold the Filter by Its Edges
When handling your lens filter, make sure you only touch the edges. Avoid placing your fingers on the glass itself, as this can leave smudges or fingerprints that later affect your images. Keeping your filter clean begins at the installation stage.
4. Align the Filter Threads with the Lens Threads
Turn off your camera and make sure the lens is in a stable, upward-facing position. Gently align the metal threads of the filter with the threads on the front of your lens. The threading should fit securely without forcing or over-tightening it.
- Pro Tip: If you’re having trouble screwing the filter onto the lens, try turning it counterclockwise first until you feel a slight click. This ensures the threads align perfectly and prevents cross-threading damage.
5. Twist Gently Until Tightened
Slowly and carefully twist the filter clockwise onto your lens. Once it feels snug and secure, stop turning. Avoid over-tightening, as this can make the filter difficult to remove in the future and may even damage the filter or lens.
6. Inspect the Filter
After installation, look through the rear of your lens to ensure the filter is seated evenly and does not show any looseness. Double-check that the filter is not tilted, as this could create optical distortions in your images.
7. Adjust as Needed (for Variable or Polarizing Filters)
If you are using an adjustable filter, like a circular polarizer or variable neutral density (VND) filter, rotate the outer ring to adjust its effect. For example, turn a polarizer until glare or reflections are minimized when shooting reflective surfaces like water or glass.
Troubleshooting Common Issues

Even after following proper installation steps, you might encounter issues when using filters. Below are some common problems and tips on how to resolve them:
- Filter Won’t Screw On: Check that both the lens thread and filter thread are clean and free of dust or grit. Ensure that both components are of matching sizes.
- Over-Tightened Filter: To remove a stuck filter, try using a rubber jar opener to improve grip. Alternatively, invest in a filter wrench designed specifically for this purpose.
- Vignetting or Dark Corners: This often occurs when using a thick filter on a wide-angle lens. Consider using a slim-profile filter or stacking fewer filters at once.
- Reduced Image Quality: Poor-quality filters can degrade sharpness and color reproduction. Invest in high-quality, multi-coated filters to avoid sacrificing your lens’s optical performance.
Caring for Your Filters

Once you’ve installed your lens filter, proper maintenance is key to ensuring consistent performance over time:
- Regular Cleaning: Clean your filters after every shoot to avoid the buildup of dust, dirt, or oils.
- Protective Storage: Always store your filters in their original case or a dedicated filter pouch when they’re not in use. This prevents scratches and prolongs their lifespan.
- Avoid Overexposure to Harsh Environments: Dust and moisture can seep into filters, particularly low-cost ones, and potentially damage their coatings. Use a lens hood or camera bag to shield your gear during extreme shooting conditions.
Choosing the Right Filter for Your Needs
Filters vary in quality and price, so finding the right one involves balancing functionality and budget. Look for high-quality brands that offer multi-coating and sturdy frames, such as B+W, Hoya, or Tiffen. Remember that the performance of your lens filter can directly influence the clarity and detail in your images; a poorly made filter can undercut an otherwise outstanding lens.
If you’re just getting started with filters, a UV filter and a circular polarizer are great options to have in your camera bag. They’re versatile for most shooting conditions and can make visible improvements to your images. As you advance in your photography journey, consider adding an ND filter or experimenting with specialized filters for creative results.
Installing a filter on a lens may seem straightforward, but it’s a foundational skill that every photographer should master. A step-by-step approach ensures your equipment remains safe and your photographic results uncompromised. From choosing the right thread size and properly aligning the filter to maintaining cleanliness, attention to detail will ensure a smooth and problem-free installation process.
Filters are indispensable tools in the photographer’s arsenal, offering both protection and creative possibilities. Whether you’re aiming to shield your lens from elements, accentuating colors, or creating eye-catching effects, the right filter expands what’s possible with your camera. With the knowledge and techniques outlined here, you are now equipped to handle lens filters like a pro and take your photography to the next level. Happy shooting!










There are no comments for this blog.