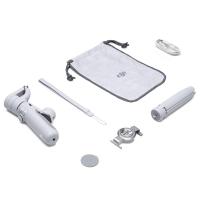
How To Connect Go Pro Tripod Grip?
Action cameras like GoPro are a popular choice for capturing high-quality photos and videos during adventures, sports, and other activities. A tripod or grip can be especially useful for stabilizing your footage, creating smoother video, or enabling hands-free operation. Whether you're new to using GoPros or just unfamiliar with tripod grips, properly connecting them can make filming more productive and enjoyable. In this article, we’ll walk you through the essentials of connecting your GoPro to a tripod grip, troubleshooting potential issues, and maximizing your setup to suit a variety of use cases.
---
Why Use a GoPro Tripod Grip?
Before diving into the steps, let’s first understand why a GoPro tripod grip is a valuable accessory. A tripod grip serves two functions: it offers a stable grip for handheld shooting and transforms into a tripod for steady, stationary shots. This dual-purpose design makes it perfect for capturing dynamic videos, time-lapses, group photos, and other creative content without compromising stability or portability.
Some popular GoPro tripod grips, such as the GoPro Shorty or 3-Way Grip, are designed specifically to complement the camera’s lightweight and compact form factor. Meanwhile, third-party tripod grips can expand your options with additional customization or compatibility features.
---
Step-by-Step Guide to Connecting Your GoPro Tripod Grip
Connecting your GoPro to a tripod grip is a straightforward process. However, it’s important to ensure a secure fit to avoid accidents or shaky footage. Here’s how you can achieve this:
1. Check Your Equipment
Make sure you have the following:
- Your GoPro camera: Ensure it’s charged and in good working condition.
- Tripod grip: Ensure it is clean, functional, and designed to support the GoPro’s weight.
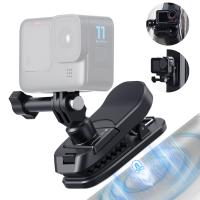
- Mounting accessories: Most GoPros use a standard mounting system that includes a clip, thumbscrew, or adapter. These typically come with your GoPro or tripod grip. If you’re using a third-party solution, double-check whether its mounting system is compatible with GoPro’s shoe mount.
If your tripod grip requires a special adapter, such as a 1/4-inch to GoPro mount adapter, have it on hand.
2. Attach the Mount to the Tripod Grip
For most GoPro tripod grips, the mount will already be built-in or detachable. Here’s what to do:
- If the mount is separate, connect it to the tripod grip by following the manufacturer’s instructions. This usually involves screwing or snapping the mount to the top of the grip.
- Double-check that the mount is tightly secured to prevent it from becoming loose during use.
3. Insert the GoPro Camera into the Mount
Next, align the camera’s mounting fingers (foldable legs) with the slots on the mount. Slide the GoPro into the mount until it aligns properly.
- If the camera model uses a frame housing, place the camera inside the housing before attaching it to the mount.
- For GoPros with built-in mounting fingers (like the HERO8 Black and later models), you can skip the frame housing entirely.
4. Secure the Connection with a Thumbscrew
Using a thumbscrew, connect the GoPro to the mount securely. Insert the screw and tighten it clockwise until the camera is firmly attached. Avoid over-tightening as it can damage the screw thread or mount.
5. Adjust the Angle
Adjust the camera angle based on your filming requirements. Most GoPro mounts allow for 90 to 180 degrees of tilting or rotation. Check to ensure the camera is stable and holds the desired position.
6. Test the Setup
Before filming, test the setup by lightly shaking the tripod grip. Ensure the camera is stable and firmly connected. Take a few test shots or videos to confirm the angle and stabilization.
---
Troubleshooting Common Connection Issues

Sometimes, even a simple setup like connecting a tripod grip might not go as smoothly as anticipated. Here are some common issues and solutions:
- Problem: The camera doesn’t fit snugly into the mount.
- Solution: Ensure you’re using the correct mount or adapter. Verify that you’re aligning the mounting fingers properly. If using a third-party mount, check its compatibility with your GoPro model.
- Problem: The thumbscrew becomes stuck or is difficult to tighten.
- Solution: Try using a rubber grip tool for better leverage. Avoid forcing the screw if it’s misaligned as this can damage the thread.
- Problem: The camera moves or shakes despite being mounted.
- Solution: Check that the thumbscrew is fully tightened. Confirm that the mount or tripod grip is not damaged or worn out. If the grip is handheld, ensure you’re holding it steadily.
- Problem: Difficulty attaching GoPro HERO models with built-in mounting fingers.
- Solution: Fold out the mounting fingers completely and clear any obstructions. Double-check alignment before sliding the camera into place.
---
Maximizing Your GoPro Tripod Grip Setup

Once your GoPro is securely attached to the tripod grip, you can enhance your filming experience by optimizing settings and using the grip creatively.
1. Experiment with Shooting Modes
Use your tripod grip to explore GoPro’s versatile shooting modes:
- For dynamic, handheld shots, try Linear or SuperView mode.
- For stationary shots like time-lapses or long exposures, switch to TimeWarp or Night Photo mode.
- For vlogging or selfies, use the tripod grip’s extended position if the grip offers an adjustable arm.
2. Adjust Stabilization Settings
GoPro’s HyperSmooth stabilization is excellent, but pairing it with a grip or tripod enhances results significantly in situations like hiking, biking, or panning shots. Enable stabilization from your camera settings for smoother video.
3. Leverage the Tripod Option
Take advantage of the grip’s built-in tripod by unfolding the legs and setting it on a flat surface. This is ideal for:
- Filming yourself hands-free
- Shooting group photos or wide-view landscapes
- Recording videos that require extended steadiness, such as interviews or tutorials
4. Use External Accessories
Combine the tripod grip with accessories like external microphones, lights, or smartphone apps that connect to your GoPro. This makes it easier to control the camera or improve the quality of your footage, particularly in low-light or noisy environments.
---
Use Cases for GoPro Tripod Grips
Depending on your content goals, a tripod grip can be useful in various scenarios:
- Travel Vlogging: Lightweight and portable tripod grips make them great for documenting travel adventures without carrying bulky equipment.
- Action Sports: Handheld grips ensure steady footage when skiing, biking, or engaging in other high-motion activities.
- Photography Time-Lapses: Place the tripod on a stable surface to capture stunning sunset/sunrise time lapses or cityscape transitions.
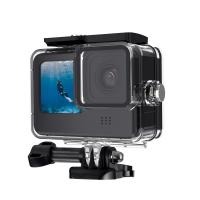
- Waterproof Filming: Many grips are water-resistant, allowing seamless filming underwater or in wet conditions (always confirm the grip’s waterproof rating).
---
Attaching your GoPro to a tripod grip is a simple yet impactful way to stabilize your camera, enhance versatility, and improve the quality of your footage. With the right grip and proper technique, you can capture smooth and professional-looking content for any activity. Remember to carefully follow the setup steps, troubleshoot any connection issues, and maximize your grip’s features for diverse shooting scenarios.
Whether you’re trekking up a mountain or filming a family event, the combination of a GoPro camera and tripod grip ensures you’re prepared to shoot with confidence and creativity. So, grab your gear, follow the setup instructions, and let your adventures unfold!


