How To Clean The Inside Of Binoculars?
Binoculars are essential tools for many activities, ranging from birdwatching and stargazing to sports and hunting. Over time, however, these optical instruments can accumulate dirt, dust, or even internal fogging, which may impair their performance. Cleaning the exterior lenses is a common task, but the prospect of cleaning the inside of binoculars can seem daunting for most users. Yet, learning how to approach this challenge properly can extend the lifespan of your binoculars and preserve image clarity.
In this article, we'll walk you through the steps for safely cleaning the inside of binoculars and discuss the best practices to avoid damage during the process. Keep in mind that cleaning the inside requires some technical knowledge and precision tools, as mishandling the task can lead to permanent damage.
---
Why Clean the Inside of Binoculars?
Cleaning the inside of binoculars isn’t always necessary unless there is visible obstruction or degradation in image quality. Internal cleaning may be required for several reasons, such as:
1. Presence of Dust or Debris: Tiny particles can sometimes make their way inside through poorly sealed components.
2. Fogging: Moisture trapped inside the optical system may condense, leading to fogging or mildew growth.
3. Mold or Fungus: A poorly stored pair of binoculars can develop mold or fungus over time, which may cause permanent damage to the lenses.
4. Manufacturing Residues: Occasionally, lubricants or internal materials deteriorate, leaving smudges inside the optics.
Attempting to clean the inside of binoculars should only happen if absolutely necessary; otherwise, the risk of further damage outweighs the benefits.
---
Important Considerations Before You Start

Before you dive into cleaning the inside of your binoculars, here are some critical points to take into account:
- Check the Warranty: Many binoculars come with manufacturer warranties that could be voided if you attempt self-repairs. If your binoculars are under warranty, consult the manufacturer first.
- Understand the Risks: Disassembling binoculars is a delicate operation, and incorrect handling may misalign the optics or damage the coatings on the lenses.
- Seek Professional Help: If you’re not confident about disassembling the binoculars yourself, it might be best to engage a professional optics repair service.
With these cautions in mind, proceed only if you are comfortable undertaking this meticulous process.
---
Tools You’ll Need

To clean the inside of your binoculars safely, you’ll need a few specialized tools. These include:
- Lens Cleaning Tools:
- Microfiber cloth
- Lens cleaning solution (formulated for optics)
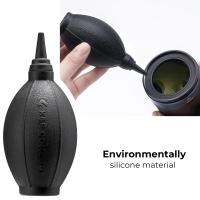
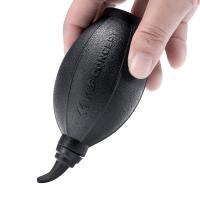
- Lens brush or blower
- Basic Repair Tools:
- Precision screwdriver set
- Rubber gloves
- Dust Removal Tools:
- Compressed air canister
- Lens cleaning wipes
- Magnification Tools:
- Magnifying glass or loupe for inspecting internal components
Having the correct tools will ensure you can access, clean, and reassemble your binoculars without inflicting damage to their delicate inner mechanisms.
---
Step-by-Step Guide to Cleaning the Inside of Binoculars

Step 1: Assess the Issue
Before you begin, thoroughly inspect your binoculars to understand the cause of the problem. Use a magnifying glass to verify whether the issue is indeed internal. If the obstruction is external, regular cleaning methods involving lens tissue and a blower brush should suffice.
Step 2: Create a Clean Environment
Optics are highly sensitive to dust and contaminants. Work in a clean, dust-free environment to avoid introducing additional particles into the lenses. A microfiber cleaning mat is also helpful for keeping components safe during disassembly.
Step 3: Disassemble the Binoculars
Carefully disassemble your binoculars using a precision screwdriver. Most binoculars require you to remove the outer casing and a few screws to access the internal lenses and prisms. Take note of the arrangement of the components, or better yet, document the process with photos to ensure proper reassembly.
Step 4: Inspect Internal Components
Once you have access to the inside of the binoculars, use a magnifying glass or loupe to inspect the lenses and prisms. Identify where the dust, debris, or fungus is located.
Step 5: Remove Dust and Debris
Use a blower or compressed air to gently remove loose dust particles. Avoid using excessive force, as some components may be delicate and prone to damage.
Step 6: Clean the Lenses
For smudges or more stubborn debris, lightly apply a small amount of optics-grade cleaning solution to a microfiber cloth or cleaning pad. Carefully wipe the lens surfaces without applying too much pressure, ensuring you don’t scratch the glass or coating.
Step 7: Address Mold or Fungus
Fungal growth on lenses can be difficult to remove and may require a specialized anti-fungal solution. Apply it sparingly to the affected areas using a microfiber cloth, and avoid contact with other parts of the binoculars.
Step 8: Reassemble and Test
Once all internal components are clean, carefully reassemble the binoculars in the exact order you disassembled them. Tighten screws securely but gently to avoid damaging the threads. Test the binoculars by looking through them to ensure everything is aligned correctly and the image quality meets your expectations.
---
Preventive Measures for Maintaining Binoculars
Cleaning the inside of binoculars can be a time-consuming and intricate process, so it’s better to prevent internal dirt, fog, and fungus in the first place. Here are some tips to keep your binoculars in optimal condition:
1. Store Them Properly:
- Use the protective case provided by the manufacturer.
- Keep your binoculars in a cool, dry environment to prevent moisture build-up.
- Consider using silica gel packets to absorb excess humidity.
2. Handle Them With Care:
- Always use a neck or wrist strap to prevent accidental drops.
- Avoid direct exposure to harsh environments, such as sandy areas or high humidity.
3. Regular Cleaning of External Lenses:
- Clean the external lenses frequently to prevent dirt and debris from migrating inside.
4. Check the Seals:
- Ensure that the rubber seals around the binoculars are intact, particularly for waterproof models.
5. Avoid DIY Repairs Without Proper Knowledge:
- If you lack confidence or the necessary tools, seek professional assistance for internal cleaning or repairs.
---
When to Contact a Professional
There are some cases where trying to clean the inside of binoculars yourself may not be advisable. Seek professional help if:
- There is severe fungal growth, which may require expert removal techniques.
- The lenses appear scratched or damaged after cleaning attempts.
- The internal components seem misaligned after reassembly.
Professional optics repair services have access to advanced tools and expertise, making them your best option for preserving the longevity of expensive binoculars.
---
Final Thoughts
Cleaning the inside of binoculars is a task that requires patience, precision, and an understanding of optical equipment. While it’s entirely possible to do this at home with the proper tools and techniques, the risk of causing irreparable damage is significant if the cleaning is not done correctly. If you’re unsure, the safest route is always to seek guidance from professionals in the optics field.
To keep your binoculars functioning at their best, practice preventive maintenance and store them in a clean, dry environment. With proper care, your binoculars will provide clear and sharp images for years to come. Remember, tackling the inside cleaning process should be your last resort when external cleaning and preventive measures are no longer sufficient.

