How To Charge Camera Batteries From A Vehicle?
In a world where digital cameras have become indispensable tools for capturing memories and creating content, ensuring that your camera remains charged is one of the most critical aspects of any adventure. While outlet charging at home is the most common and reliable way to keep camera batteries running, sometimes you find yourself in remote locations without access to traditional power sources. Whether you’re on a road trip, off-the-grid camping, or simply stuck in transit, charging camera batteries from a vehicle can be a lifesaver. In this article, we will break down everything you need to know about effectively and safely charging camera batteries from your car, truck, or camper.
Understanding the Basics of Vehicle Charging

Before diving into practical solutions, it’s important to understand how vehicle power systems work. Most vehicles are equipped with a 12-volt DC electrical system (sometimes referred to as the "cigarette lighter" outlet or accessory outlet). This power outlet is capable of supplying enough energy to charge a variety of devices, including camera batteries. However, the charging process requires specialized equipment to convert the vehicle's DC output into the format and voltage your camera batteries require.
Camera batteries typically fall within voltage ranges of 3.6–8.4V, depending on the specific make and model. Thus, charging a camera battery directly from the car’s 12-volt system is not possible without an intermediary device. This is where external chargers, inverters, or USB adapters designed for camera batteries come into play.
Essentials for Charging Camera Batteries in a Vehicle
To charge your camera battery safely in a car, you’ll need a few basic tools and devices tailored to your camera’s charging requirements. The exact setup varies depending on your preferences and the equipment available. Below are the most common methods and the corresponding tools you may require:
1. 12V Car Battery Charger for Cameras
Many third-party manufacturers offer chargers specifically designed to work with a vehicle's 12-volt socket. These chargers typically come with input connectors for the cigarette lighter socket and output terminals that fit your camera battery.
- Advantages: Compact, convenient, and directly tailored for charging specific camera batteries.
- Disadvantages: Limited compatibility — you’ll need a model that matches your camera’s battery size and type.
2. Car Power Inverter and Standard Battery Charger
If you already own an AC wall adapter that came with your camera's battery charger, using a car power inverter is a flexible option. Power inverters convert the vehicle’s 12V DC output to a standard 110V/220V AC power source (like a household socket). You can then plug your camera battery’s wall adapter into the inverter.
- Advantages: Universal compatibility, works with virtually all camera chargers.
- Disadvantages: Bulkier than a standalone 12V charger and may drain the car battery faster.
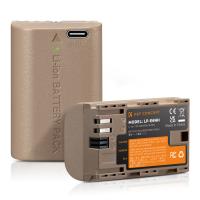
3. USB Charging Adapters
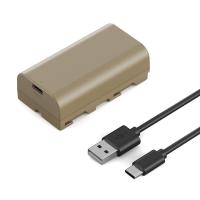
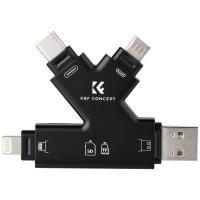
Modern cameras increasingly rely on USB charging, making it possible to charge batteries directly via USB cables. Most vehicles come with built-in USB ports, or you can use a USB adapter plugged into the cigarette lighter socket. Ensure that your camera’s batteries are USB-compatible.
- Advantages: Convenient, lightweight, and inexpensive.
- Disadvantages: Slower charging speeds compared to direct DC chargers or inverters.
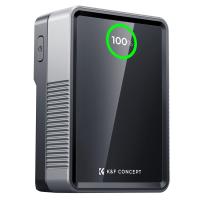
4. Portable Power Banks or Battery Packs
For situations where your vehicle’s 12V outlet is in use or unavailable, a high-capacity portable power bank with vehicle charging compatibility can be used to achieve the same effect. These power banks often come with adapters designed for charging camera batteries, making them versatile tools for photographers on the move.
- Advantages: Freedom to charge your camera without needing to run your car engine.
- Disadvantages: Limited by the capacity of the power bank itself.
Step-By-Step Guide to Charging Camera Batteries in a Vehicle
To maximize the efficiency and safety of your charging process, follow these steps:
Step 1: Prepare Essential Equipment
First, confirm the type of battery your camera uses and whether it’s compatible with the charging tools you have. Most batteries list their voltage and amperage on the label or in the user manual. Gather your 12V charger, power inverter, USB cable, or any other necessary accessories.
Step 2: Safely Connect Your Charging Device
Plug your charging device into the vehicle’s cigarette lighter socket or USB port. If you’re using a power inverter, securely connect the inverter before plugging in your camera’s original battery charger. Check for a tight, stable connection to ensure uninterrupted charging.
Step 3: Insert Your Camera Battery
Carefully place your camera battery into the charger or connect your USB charging cable to the camera body if you’re charging the battery in-camera. Ensure that the battery is properly seated to prevent damage or overheating during the charging process.
Step 4: Monitor Power Levels
Although charging should be straightforward, it’s important to monitor battery temperatures. Charging in extreme heat or direct sunlight, which are common conditions inside vehicles, can cause batteries to overheat. If possible, position the camera or charger in a shaded area to minimize the risk of damage.
Step 5: Restart Your Vehicle if Necessary
Charging devices draw power from the vehicle battery, and prolonged use with the engine turned off may deplete the car battery. If you’re charging for an extended period, it’s advisable to start the engine periodically to recharge the vehicle’s battery.
Step 6: Safely Disconnect Once Charged
When the camera battery is fully charged, unplug your charger and remove the battery. Leaving the charger connected to your vehicle after charging is complete may continue to draw power unnecessarily and create wear and tear on your charging devices.
Safety Considerations
While charging camera batteries in a vehicle is generally safe with the appropriate equipment, there are some best practices to keep in mind:
1. Avoid Overcharging: Use chargers with automatic shut-off features to avoid overcharging, which can degrade battery life or lead to overheating.
2. Be Mindful of Power Drain: Prolonged charging can drain your car battery. Use charging devices sparingly if the engine isn’t running.
3. Don’t Leave Batteries in Extreme Conditions: Exposure to high temperatures inside vehicles during summer or extreme cold in winter can damage camera batteries.
4. Use Genuine Products: Always use chargers and adapters that are either made by or certified for your camera brand. Avoid low-quality, generic chargers that may lack essential safety features.
5. Car Engine Off for USB Charging Only: Charging through USB ports generally draws minimal power, but it’s still wise to monitor the vehicle battery if the process requires extended time.
Troubleshooting Common Issues
Even with the right tools, charging from a car doesn’t always go perfectly. Here are solutions to common problems:
- Device Overheating: Switch to a shaded area or stop charging temporarily to let the devices cool down.
- Incompatible Equipment: Double-check that your charger or adapter matches your camera battery’s specifications. Manufacturer’s user manuals can provide precise recommendations.
- Vehicle Battery Drained: Keep jumper cables on hand if charging drains your car battery unexpectedly.
Charging camera batteries from a vehicle opens up new possibilities for photographers and travelers exploring off-the-grid destinations or embarking on extensive road trips. By understanding your camera battery’s unique requirements and equipping yourself with the right tools — whether it's a 12V charger, car power inverter, USB adapter, or portable battery pack — you can keep your camera ready for action no matter where your journey takes you.
As with all technology, preparation is key. Take time to familiarize yourself with your equipment, test chargers before you’re in a remote setting, and always prioritize safety by monitoring battery temperatures and power draw. With these steps in mind, you’ll never have to worry about running out of power just when the perfect shot presents itself. Happy shooting!

