How To Carry Tripod On Backpack?
Carrying a tripod on your backpack is a common concern for photographers, hikers, and outdoor enthusiasts who want to ensure their gear is both accessible and comfortable to carry. However, improper attachment or placement can lead to inconvenience, discomfort, or even damage to your tripod and other equipment. In this article, we’ll explore practical, effective, and ergonomic ways to carry a tripod on your backpack. These methods are rooted in addressing challenges such as secure attachment, ease of access, weight distribution, and protection of your gear and body.
---
Why Carrying a Tripod Matters
A tripod is an essential tool for many photographers, but its size and shape can make it awkward to carry long distances or fit neatly into a backpack. Whether you’re heading into the wilderness for landscape photography, traveling, or simply tackling an urban photoshoot, how you carry your tripod can significantly impact your overall experience.
Improperly carrying a tripod can create an imbalance in your backpack, strain your back and shoulders, and even risk damaging your tripod or bag. Thus, understanding optimal carrying methods is an important skill for anyone who spends time in the field with camera gear.
---
The Best Ways to Carry a Tripod on a Backpack
Here’s a look at some of the best methods for carrying a tripod, along with tips to improve comfort and accessibility.
1. Use the Built-In Straps and Loops on Your Backpack
Modern backpacks, especially those designed for photographers or outdoor enthusiasts, often come with built-in straps, loops, or webbing intended for carrying tripod-like objects. Typically, these straps are located on the sides, back, or bottom of the pack.
- Side Mounting: Many backpacks allow you to secure your tripod to one of the side panels using compression straps. This is a common option because it allows for balance (if one side holds a tripod while the other holds a water bottle or other gear) and keeps the tripod easy to reach.
- Advantages: Accessible, keeps the load distributed vertically.
- Disadvantages: Can be awkward if the tripod is heavy or larger.
- Bottom Mounting: If your pack has loops or straps on the bottom, you can use these to secure your tripod. Be sure to tighten the tripod securely to prevent it from rocking or hitting your legs as you walk.
- Advantages: Keeps bulk out of your way while allowing full access to the main compartments of the pack.
- Disadvantages: May make your pack bottom-heavy and increase strain.
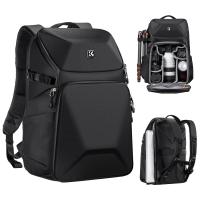
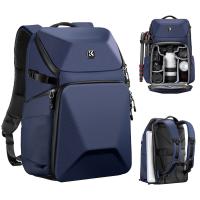
- Back Mounting: Some photography backpacks have dedicated tripod compartments or straps on the rear panel. By mounting your tripod on the back, you prevent side weight imbalance.
- Advantages: Keeps the load centered, frees up side pockets for water or accessories.
- Disadvantages: Makes your pack bulkier and harder to set down flat.
2. Use a Tripod Carrying Pouch or Sleeve
Some backpacks include a tripod-specific carrying pouch or sleeve, which cradles the base of the tripod while straps hold it in place. These are especially popular with photographer-specific backpacks.
- Steps:
1. Insert the tripod’s legs into the pouch.
2. Secure the top with adjustable straps.
- Advantages: Enhanced stability, minimizes wear and tear on your tripod.
- Disadvantages: Only works with compatible backpacks.
3. Attach Using Buckles, Straps, or Bungee Cords
If your backpack doesn’t include dedicated features for tripod attachment, you can improvise with adjustable straps, bungee cords, or carabiner clips. With this method, the tripod can typically be attached horizontally or vertically, depending on the available space.
- Tips for Success: Use rubberized straps or padding to prevent the tripod from rubbing against the backpack fabric or slipping. Be mindful of where the tripod’s weight is distributed to avoid extra strain.
4. Carry Inside the Backpack (When Necessary)
For smaller or ultra-lightweight tripods, carrying the tripod inside your pack might be an option. To protect both your tripod and your other gear, use a padded cover or wrap the tripod in clothing items to avoid scratches.
- Advantages: Offers the highest level of protection.
- Disadvantages: Consumes internal space and may be less accessible.
5. Custom Configurations for Hiking or Travel
When carrying a tripod during extended hiking trips, it’s particularly important to keep weight distribution in mind. Tripods are typically heavier than they look, and improper positioning can throw off your overall balance. For hiking or off-road travel:
- Place the tripod in the most stable position possible, such as centered along the length of your back or balanced on a symmetrical side.
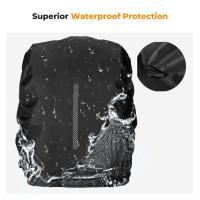
- Use waterproof straps or covers if you anticipate exposure to rain or water.
---
Tips for Keeping Comfortable and Safe
Carrying a tripod doesn’t need to be a burden if you follow some best practices for comfort and safety:
1. Distribute Weight Uniformly
Avoid creating an off-balance load on your shoulders or back. If you’ve strapped the tripod to one side of your pack, make a conscious effort to balance it by carrying gear of similar weight on the opposite side. Ideally, aim for centered weight distribution.
2. Secure the Tripod Tightly
A loosely strapped tripod can shift as you walk, causing discomfort and potentially damaging your tripod or other gear. Tighten all straps securely and periodically check them during long treks to ensure the tripod remains stable.
3. Protect Your Gear
Cover your tripod in harsh weather conditions or when traveling in rugged terrain. Use neoprene sleeves, custom tripod bags, or even a rain cover to minimize wear and tear.
4. Consider Quick Access
If you need to use your tripod frequently, prioritize accessibility when choosing where to mount it on your bag. Side mounting provides the easiest access, while rear or bottom-mounted configurations may require removing your bag entirely to access the tripod.
---
Choosing the Right Backpack for Carrying a Tripod
If you’re in the market for a good backpack to use with a tripod, here are a few features to prioritize:
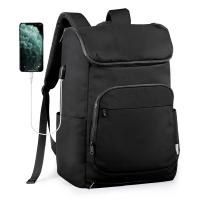
- Dedicated Straps or Compartments: Look for a bag specifically designed to carry camera gear with built-in tripod holders.
- Sturdy Frame and Padding: Adequate back and shoulder support is critical for carrying heavy loads, particularly with the added bulk of a tripod.
- Weather Resistance: Look for waterproof or weather-resistant materials to protect your gear in challenging environments.
---
Common Mistakes to Avoid
1. Overloading Your Backpack
Avoid overpacking your bag when adding a tripod, especially on long trips. A heavy load can quickly tire you out or lead to lower back pain.
2. Improper Strap Adjustment
Loose or uneven straps can cause the tripod to swing or bounce as you move, which is not only annoying but can also cause damage to your equipment over time.
3. Neglecting Tripod Care
If you’re carrying your tripod externally, it’s more likely to be exposed to dirt, rain, and impact. Taking the time to clean and maintain it regularly will extend its lifespan.
---
Carrying a tripod on your backpack doesn’t have to be a hassle if you use the right techniques and tools. By considering your specific needs—whether that’s comfort during hikes, accessibility during a photoshoot, or protection for your gear—you can tailor your tripod-carrying system to ensure a seamless experience.
The key is to focus on balance and practicality. The way you attach and carry a tripod can make a world of difference in how you move through your environment and how quickly you’re able to set up for the perfect shot.
With a well-planned approach, your tripod can be a trusted companion on any adventure, enhancing your ability to capture striking images without impeding your mobility or comfort. Keep these tips in mind, and you’ll be prepared to bring your tripod anywhere your journey takes you.

