How To Attach A Digital Microscope For Android?
Using a digital microscope with your Android device opens up a world of convenience for hobbyists, educators, professionals, and curious learners alike. These microscopes allow you to take high-resolution magnified images or videos directly through your phone, allowing for seamless sharing, analysis, and documentation. However, the attachment and setup process is not always intuitive for everyone, which is why many users experience challenges when integrating their digital microscopes with Android devices.
In this article, we’ll explore the detailed steps to correctly attach a digital microscope to an Android device, common troubleshooting issues, as well as ways to maximize the functionality of your digital microscope for your projects. Whether you're using this microscope for biological studies, electronics work, or other purposes, following these instructions will ensure a smoother and more effective setup.
---
Understanding Digital Microscopes for Android Devices
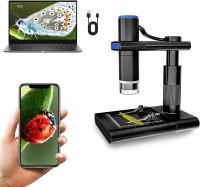
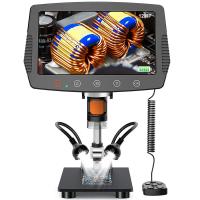
Digital microscopes operate differently from traditional optics-only microscopes. Equipped with USB or wireless interfaces, they connect to external devices like smartphones, tablets, or PCs and display live magnified images on those devices. These microscopes typically have built-in cameras, adjustable magnification levels, and features for capturing video or snapshots.
Most digital microscopes are compatible with Android devices via USB (micro-USB, USB-C) or wireless (Wi-Fi/Bluetooth) connections. However, compatibility depends on having the right adapter, application, and debugging mode enabled.
---
Step-by-Step Instructions to Attach a Digital Microscope to Android
1. Check the Compatibility of Your Microscope
Not all digital microscopes are universally compatible with Android devices. Most models list their supported platforms, such as Windows, Mac, iOS, and Android. Before attaching your microscope, confirm that it specifically states Android compatibility. USB-based microscopes will usually require an "OTG-enabled" phone or tablet, which is explained further below.
2. Gather the Required Accessories
For a smooth connection, ensure that you have all the necessary accessories, such as:
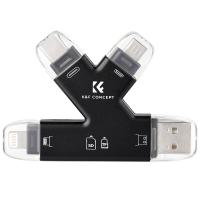
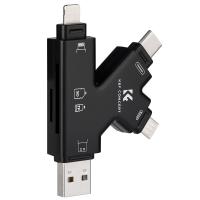
- OTG (On-The-Go) Adapter: If the digital microscope connects via USB, you’ll need a USB OTG adapter to connect the microscope’s USB plug to your phone’s micro-USB or USB-C port. OTG adapters allow peripherals (e.g., flash drives, mice, cameras, and microscopes) to communicate with Android devices.
- Wi-Fi Adapter (for wireless microscopes): If the microscope connects via Wi-Fi, ensure it has a transmitter or pairing mode to send data to your Android phone.
3. Install Microscope-Compatible Apps
Most digital microscopes require you to use third-party apps to display and control the microscope feed on your Android screen. Recommended apps for interfacing with a digital microscope include:
- OTG View or OTG Camera (for USB): These are simple apps that recognize USB-enabled devices to display and capture images.
- Amcap: A multi-purpose app often used with USB microscopes.
- Manufacturer's App: Many microscope manufacturers offer their proprietary apps. For example, some might provide QR codes or links for app downloads specifically designed for their microscopes.
- Wi-Fi Viewer Apps (for wireless models): These apps connect to wireless microscopes via the same network signal.
Install and verify that the app works on your Android device before attaching the microscope.
---
4. Enable OTG on your Android Device
If your microscope requires a direct USB connection, ensure your Android device has OTG functionality, as not all models support it. Here’s how:
- Go to your Settings menu.
- Search for options like "OTG" or "USB Preferences."
- Enable OTG functionality if it isn’t already turned on.
Some older or budget Android devices may lack OTG support entirely. If your phone/tablet doesn’t have OTG functionality, you may need to use another device or consider getting a Wi-Fi-enabled microscope.
---
5. Connect and Test the Microscope
Once you’ve prepared your phone and installed the designated application:
- For USB Microscopes: Plug the microscope’s USB cable into the OTG adapter, then connect the OTG adapter to your Android device. Open the corresponding app, which should automatically detect the microscope and display its feed.
- For Wireless Microscopes: Turn on the microscope’s wireless transmitter. Switch your phone's Wi-Fi connection to the microscope’s network (listed in the manual or microscope branding). Open the compatible app to view the live image feed.
If the microscope doesn’t work immediately, try the following:
- Ensure all connections are secure.
- Check the app permissions and grant access to storage and the camera.
- Restart your phone and reconnect the microscope.
---
Common Troubleshooting Issues and Solutions
1. Problem: The microscope isn't detected by the Android device/app.
- Solutions:
- Verify that your Android supports OTG. Not every phone recognizes USB peripherals.
- Make sure the microscope has been properly powered (some might require external power).
- Restart the device and reconnect.
2. Problem: The image feed is blurry or the magnification doesn’t work properly.
- Solutions:
- Adjust the microscope's focus manually using its adjustment knob or dial.
- Ensure the lighting on the microscope is sufficient for clear visibility. Check whether its LED lights are turned on.
3. Problem: Wireless microscope won’t connect to the phone.
- Solutions:
- Ensure your phone is connected to its dedicated Wi-Fi network. Most Wi-Fi microscopes don’t use your internet router but instead create their own local Wi-Fi connection.
- Check whether the microscope transmitter is powered and on.
4. Problem: App crashes or fails to display live feed.
- Solutions:
- Update the app to the latest version.
- Check whether the app developer recommends specific Android version requirements.
- Use an alternative app to connect.
---
Tips to Get the Most Out of Your Digital Microscope
Now that you’ve set up your device, here are some tips to utilize it effectively:
1. Experiment with Magnification:
- Understand your microscope's magnification range and adjust accordingly for different subjects. For example, examining biological samples may require finer adjustments than inspecting coins or electronics.
2. Capture and Save Images:
- Use the app’s capture function to take clear snapshots of your findings. Many apps allow you to save these as high-quality images or videos which can be shared online or used for documentation.
3. Lighting Adjustments:
- Always work in well-lit environments or use the built-in LED of the microscope to get clearer images. Dim or uneven lighting can distort the image quality.
4. Use Tripods or Stands:
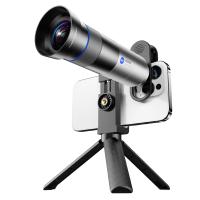
- If your microscope doesn’t come with a stand, consider purchasing one separately for a more stable viewing experience. This is especially useful for capturing videos or precise measurements.
5. Explore Advanced Features:
- Some apps include options to measure distances, annotate images, and adjust color settings. Explore these additional features to fully leverage the microscope.
---
Applications of Digital Microscopes with Android Devices
Digital microscopes are versatile and useful for a variety of activities, including:
- Education: Teachers and students can visualize magnified structures of plant life, insects, or metal surfaces during demonstrations or experiments.
- Hobbies: Coin collectors, stamp enthusiasts, and jewelry makers can analyze intricate details of their collectibles.
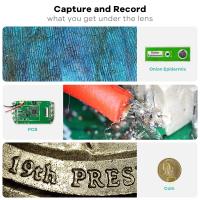
- Professional Use: Engineers can inspect the soldering on printed circuit boards (PCBs), while biologists can document microscopic samples.
- DIY Projects: Digital microscopes often help in assessing fine components or structures when working on intricate handmade crafts or electronics repairs.
---
Conclusion
Attaching a digital microscope to an Android device may require a little setup effort initially but is relatively straightforward with the right tools and techniques. By ensuring compatibility, using the appropriate app, and making basic adjustments, you can quickly turn your Android device into a portable screen for microscopic observations. This combination of convenience, portability, and precision makes it an excellent tool for students, professionals, and hobbyists alike.
If you’re having trouble connecting or optimizing your microscope, reference this guide for troubleshooting steps and tips to enhance your experience. Let your curiosity guide you, and take advantage of your digital microscope to explore the unseen details of

