How Do You Use A Rangefinder?
How to Use a Rangefinder: A Practical Guide for Beginners
Rangefinders are versatile devices designed to measure distances, and they’ve become essential tools for many activities, including golfing, hunting, hiking, surveying, and even photography. If you’ve recently purchased a rangefinder or are considering using one, you may be wondering how to make the most of this tool. In this guide, we’ll break down the basics of using a rangefinder, address typical challenges, and offer tips for ensuring accurate results. Whether you’re a beginner or just want to refine your skills, this article provides practical insights for leveraging your rangefinder effectively.
---
What Is a Rangefinder and Why Is It Useful?
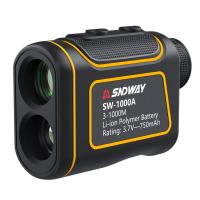
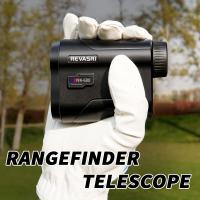
A rangefinder is a device, either optical or laser-based, that helps you determine the distance to an object. There are two main types of rangefinders on the market:
1. Laser Rangefinders: These emit laser beams to calculate the time it takes for the beam to return, giving highly precise distance measurements. They are commonly used in golf and hunting.
2. Optical Rangefinders: These rely on lenses and manual adjustment to measure distance. These devices are popular in photography and surveying.
Rangefinders are valuable for numerous purposes:
- Golfers use them to gauge the distance to the hole or hazards.
- Hunters rely on them for accurate shots.
- Hikers use them to plan safe paths and measure distances.
- Photographers use optical rangefinders in traditional cameras to focus on subjects.
Understanding the fundamental steps to operate a rangefinder is essential to achieving your goals in these activities.
---
Step-by-Step Guide to Using a Rangefinder
Let’s explore how to use a rangefinder effectively in various scenarios.
---
Step 1: Understand Your Device
Begin by familiarizing yourself with your rangefinder’s features:
- Power Button: Most rangefinders have a straightforward operation initiated by pressing the power button.
- Mode Settings: Some rangefinders offer multiple modes (e.g., golf mode, hunting mode, first-target priority, or continuous scanning). Choose the right mode for your use case.
- Range Display: Check where the distance reading appears (e.g., in the viewfinder or on a digital screen).
- Battery Check: Ensure the device has sufficient power. Laser rangefinders often require batteries, so always carry spares.
Before heading out, spend some time reading the product manual to understand specific features such as magnification, zoom, or slope measurements.
---
Step 2: Turn On the Device and Aim
Once you’re ready to use the rangefinder:
1. Turn the device on.
2. Look through the eyepiece or screen and locate the reticle (the crosshair or dot used for aiming).
3. Aim the reticle at your target. For golfers, this might be the flagstick. For hunters, it’s the intended game.
To hold the rangefinder steady, grip it firmly with both hands or stabilize it using a solid surface like a tree or tripod. This reduces errors caused by shaking.
---
Step 3: Activate the Measurement
After aiming:
1. Press and hold the rangefinder’s measurement button. Normally, this is the same as the power button or a separate designated control.
2. For laser rangefinders, the device will quickly emit a laser beam and calculate the time it takes to reflect back.
3. For optical models, you may need to manually adjust the device until the target is clear and aligned in the viewfinder.
Within seconds, the device will display the distance. Some advanced rangefinders also display additional data like angle, slope, or elevation differences.
---
Step 4: Verify the Results
The displayed distance should be an accurate measurement of your target’s location. However, there may be factors that affect the result:
- In golf or hunting, ensure you’re measuring the intended target rather than a background object (e.g., trees behind the flag or animal).
- For uneven terrain, a rangefinder equipped with slope correction functionality will provide a more accurate reading.
- Check measurements from multiple spots if the first reading seems off.
Continuous scanning mode can be useful in some situations. By activating this mode, the rangefinder provides real-time updates as you move it across different distances.
---
Common Challenges and How to Overcome Them
Rangefinders are precise but not without their challenges. Below are the most common issues users face and how to address them:
1. Unsteady Hands:
One of the most frequent problems is keeping the device steady while aiming, especially when focusing on a small target. To fix this:
- Rest your elbows on a sturdy surface or brace yourself.
- Use a tripod or other stabilizing accessories for longer-distance measurements.
2. Target Obstruction:
Background objects, trees, or tall grass can interfere with the laser’s path. If this happens:
- Use settings like “first-target priority” mode to prioritize the closest object.
- Move slightly to improve your line of sight and get a clear shot at the intended target.
3. Lack of Battery Power:
Rangefinders’ batteries may run out unexpectedly. Always check the battery level before heading out and carry spare batteries if needed.
4. Weather Conditions:
Rain, fog, or excessive sunlight can interfere with laser rangefinders’ performance. For better accuracy:
- Use the device during clear weather if possible.
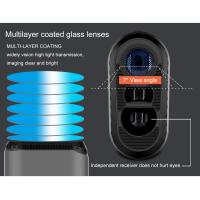
- For unavoidable conditions, rely on advanced rangefinders with anti-fog lenses or high-quality optics.
---
Tips for Optimizing Rangefinder Accuracy
To get the most accurate measurements, follow these tips:
- Calibrate Your Device: Some rangefinders allow calibration. Perform calibration periodically to maintain accuracy.
- Practice on Stationary Targets: Before advanced applications, practice using the rangefinder on stationary, easily visible objects. This builds your confidence and familiarity.
- Be Mindful of Distance Limits: Rangefinders have a maximum range (e.g., 800 yards, 1,500 yards). Attempting to measure beyond that range will likely result in unreliable readings.
For golfers, select a rangefinder with slope correction for courses with elevation changes. Hunters should consider ones with modes specifically for moving targets.
---
Understanding Rangefinder Use Cases
To fully appreciate a rangefinder’s utility, consider how it applies to different users:
- Golfers: To determine distances to hazards or the pin and ensure proper club selection. The slope-adjusted distance helps account for elevation changes in uphill or downhill shots.
- Hunters: To take more ethical and precise shots by gauging distance to prey accurately. The real-time updates in scan mode can be helpful for moving targets.
- Hikers/Campers: To measure distances to critical landmarks when planning a route.
- Photographers: To achieve better focus and subject alignment with optical viewfinders.
In each of these activities, accurate distance measurement enhances performance, safety, or convenience.
---
Maintaining Your Rangefinder
To prolong the life of your rangefinder:
- Store It Properly: Use a protective case when not in use.
- Keep It Clean: Wipe the lenses with a microfiber cloth to remove dirt or smudges. Avoid harsh chemicals.
- Check for Firmware Updates: For high-tech models, keep the device updated with the latest firmware.
---
Final Thoughts
Using a rangefinder is straightforward once you understand its basic functions and practice with it in real-world scenarios. Whether you’re looking to improve your golf game, refine your hunting skills, or explore the outdoors with confidence, this tool can help elevate your experience. By mastering the steps outlined above and addressing common challenges, you’ll quickly become proficient in rangefinder use, making your chosen activities more efficient and effective.
With time and practice, the rangefinder will become an extension of your skills, helping you make smarter decisions, take more accurate measurements, and ultimately achieve your goals.


